40 Spinal Block
Placement
Anatomy
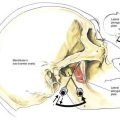
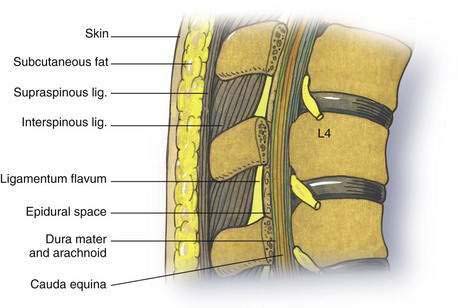
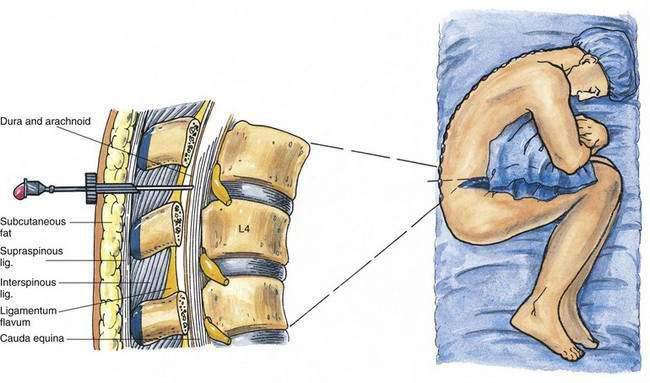
As outlined in Chapter 39, Neuraxial Block Anatomy, the spinous processes of the lumbar vertebrae have an almost horizontal orientation in relation to the long axis of their respective vertebral bodies (Fig. 40-1). When a midline needle is inserted between the lumbar vertebral spinous processes, it is most effective if it is placed almost perpendicularly in relation to the long axis of the back. To facilitate spinal anesthesia, the anesthesiologist must constantly keep in mind the midline of the patient’s body and the neuraxis in relation to the needle. As illustrated in Figure 40-1, as a midline needle is inserted into the cerebrospinal fluid (CSF), it logically must puncture the skin, subcutaneous tissue, supraspinous ligament, interspinous ligament, ligamentum flavum, epidural space, and finally the dura mater and arachnoid mater to reach the CSF.
Position
Spinal anesthesia is carried out in three principal positions: lateral decubitus (Fig. 40-2), sitting (Fig. 40-3), and prone jackknife (Fig. 40-4). In both the lateral decubitus and sitting positions, a well-trained assistant is essential if the block is to be easily and efficiently administered by the anesthesiologist. As illustrated in Figure 40-2, the assistant can help the patient assume the position of legs flexed on the abdomen and chin flexed on the chest. This is most easily accomplished by having the assistant pull the head toward the chest, place an arm behind the patient’s knees, and push the head and knees together. The position can also be facilitated by using an appropriate amount of sedation that allows the patient to be relaxed yet cooperative.
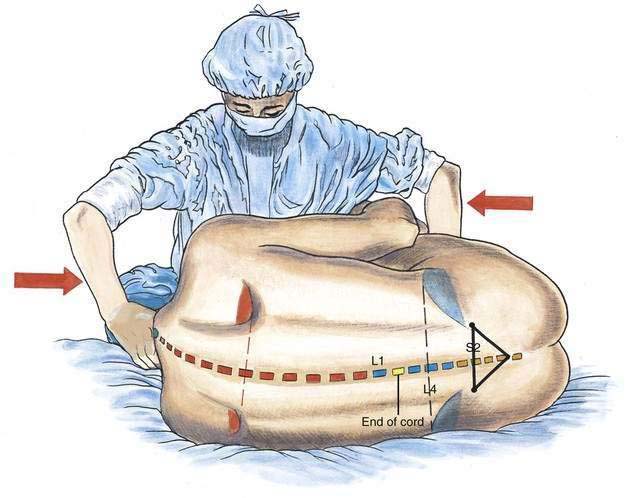
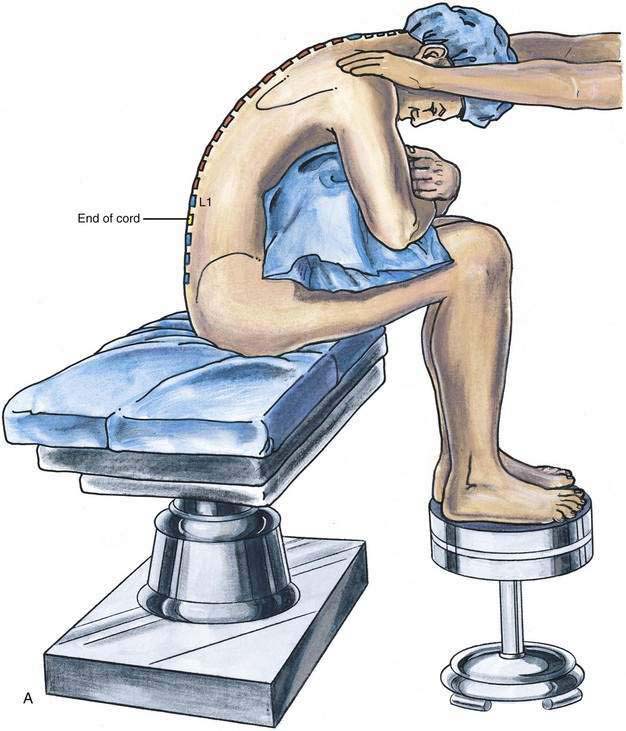

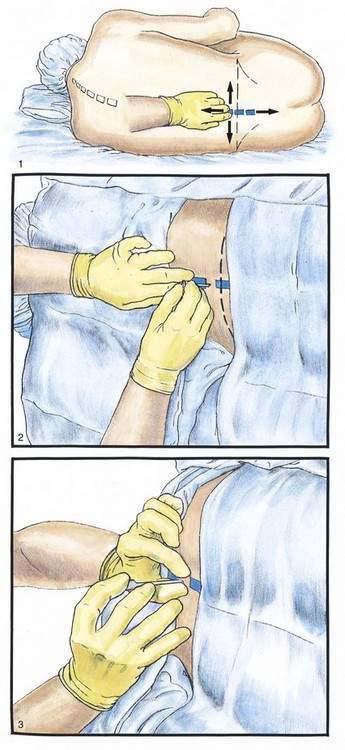
In some patients, the sitting position can facilitate location of the midline, especially in obese patients or in those with some scoliosis that makes midline identification more difficult. As illustrated in Figure 40-3A, the patient should assume a comfortable sitting position, with the legs placed over the edge of the operating table and the feet supported by a stool. A pillow should be placed in the patient’s lap and the patient’s arms allowed to drape over the pillow, resting on the flexed lower extremities. The assistant should be positioned immediately in front of the patient, supporting the shoulders and allowing the patient to minimize lumbar lordosis while ensuring that the vertebral midline remains in a vertical position (see Fig. 40-3B).
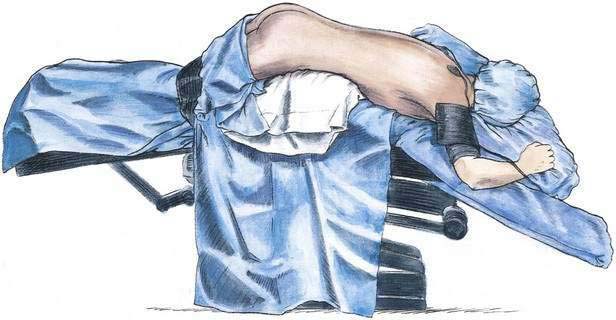
Sometimes it is more efficient to place the patient in a prone jackknife position before administering the spinal anesthetic (see Fig. 40-4). An assistant is not as essential for this technique as for the lateral decubitus and sitting positions, although to make the most efficient use of operating room block time, it is often helpful for the assistant to position the patient in the prone jackknife position while the anesthesiologist readies the spinal anesthesia tray and drugs.
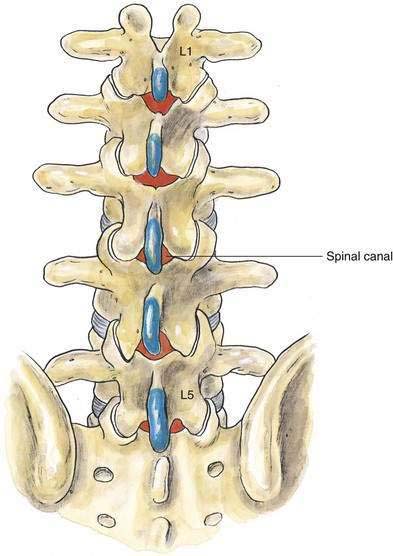
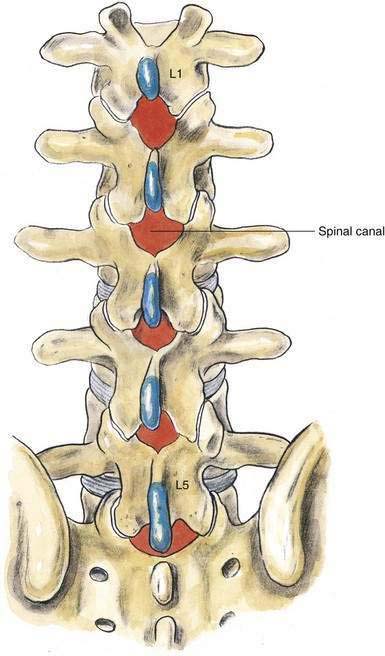
In all three positions, the goal is to place the patient so that the midline is readily identifiable and lumbar lordosis is reduced. Figure 40-5 shows what the lumbar anatomy looks like when the patient’s lumbar lordosis has been ineffectively reduced by poor positioning. As illustrated, the intralaminar space is small and difficult to enter with a needle in the midline. In contrast, Figure 40-6 illustrates how effective positioning can open the intralaminar space to allow easy access for subarachnoid puncture.
Needle Puncture
With the patient in the proper position, the anesthesiologist uses the palpating hand to clearly identify the patient’s intervertebral space and midline. As illustrated in Figure 40-7, Step 1, the anesthesiologist can effectively carry out this important maneuver by moving the fingers of the palpating hand alternately cephalocaudad and rolling them from side to side. When the appropriate intervertebral space has been clearly identified, a skin wheal is raised over the space. Next, an introducer is inserted into the substance of the interspinous ligament, taking care to firmly seat it in the midline (Fig. 40-7, Step 2). The introducer is grasped with the palpating fingers and steadied while the other hand holds the spinal needle, somewhat like a dart, as illustrated in Figure 40-7, Step 3. With the fifth finger of the needle hand used as a tripod against the patient’s back, the needle, with bevel (if present) parallel to the long axis of the spine, is advanced slowly to heighten the sense of tissue planes traversed as well as to avoid skewing the nerve roots, until a characteristic change in resistance is noted as the needle passes through the ligamentum flavum and dura. The stylet is then removed, and CSF should appear at the needle hub. If it does not, the needle is rotated in 90-degree increments until CSF appears. If CSF does not appear in any quadrant, the needle should be advanced a few millimeters and rechecked in all four quadrants. If CSF still has not appeared and the needle is at a depth appropriate for the patient, the needle and introducer should be withdrawn and the insertion steps repeated, because the most common reason for lack of CSF return is that the needle was inserted off the midline. Another common error preventing subarachnoid placement is insertion of the needle with too great a cephalad angle on the initial insertion (Fig. 40-8).
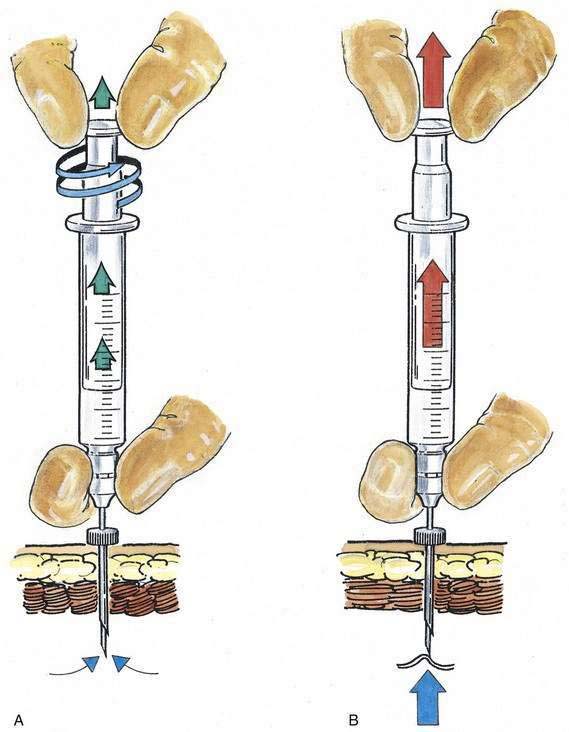
Once CSF is freely obtained, the dorsum of the anesthesiologist’s nondominant hand steadies the spinal needle against the patient’s back while the syringe containing the therapeutic dose is attached to the needle. CSF is again freely aspirated into the syringe, and the dose is injected. Sometimes, when the syringe has been attached to a needle from which CSF was clearly previously dripping, aspiration of additional CSF becomes impossible. As illustrated in Figure 40-9, one technique that can be used to facilitate CSF aspiration is to “unscrew” the syringe plunger (see Fig. 40-9A) rather than providing constant steady pressure (see Fig. 40-9B).
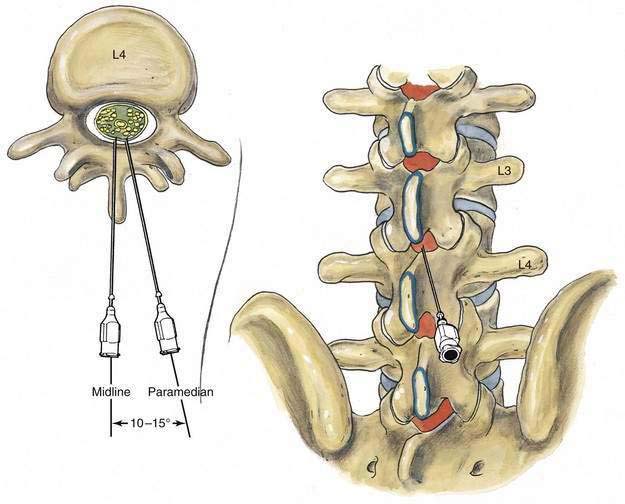
After the local anesthetic has been injected, the patient and the operating table should be placed in the position appropriate for the surgical procedure and the drugs being used. The midline approach to subarachnoid block is the technique of first choice because it requires anatomic projection in only two planes, and the needle insertion plane is a relatively avascular one. When difficulties with needle insertion are encountered with the midline approach, an option is to use the paramedian route, which does not require the same level of patient cooperation or reversal of lumbar lordosis to be successful. As illustrated in Figure 40-10, the paramedian approach exploits the larger “subarachnoid target” that exists if a needle is inserted slightly lateral to the midline. In the paramedian approach, the palpating fingers should identify the caudal edge of the cephalad spinous process of the intervertebral space chosen, and a skin wheal should be raised 1 cm lateral and 1 cm caudal to this point. A longer needle, such as a 4-cm, 22-gauge, short-beveled needle, is then used to infiltrate the deeper tissues in a cephalomedial plane. The spinal introducer and needle are then inserted 10 to 15 degrees off the sagittal plane in a cephalomedial plane, as noted in Figure 40-10. As with the midline approach, the most common error made with this technique is to angle the needle too far cephalad in its initial insertion. Once the needle contacts bone with this approach, it is redirected in slightly cephalad. If bone is again contacted after the needle has been redirected, but at a deeper level, this needle redirection is continued because it is likely that the needle is being “walked up” the lamina toward the intervertebral space. After CSF is obtained, the block continues in the same way as that described for the midline approach.
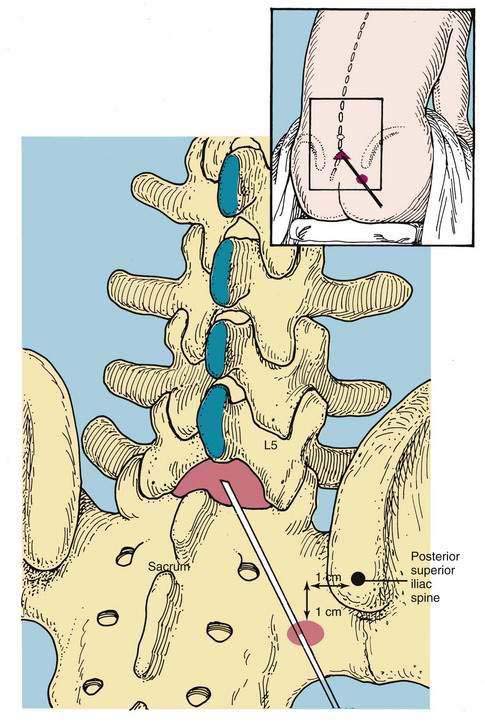
A variation of the paramedian approach is the lumbosacral approach of Taylor. The technique is carried out at the L5-S1 interspace, the largest interlaminar interspace of the vertebral column. As illustrated in Figure 40-11, the skin insertion site is 1 cm medial and 1 cm caudal to the ipsilateral posterior superior iliac spine. Through this point, a 12- to 15-cm spinal needle is inserted in a cephalomedial direction toward the midline. If bone is encountered on the first needle insertion, the needle is “walked off” the sacrum into the subarachnoid space, as in the method used for a lumbar paramedian approach. Once CSF is obtained, the steps are similar to those previously outlined.