Chapter 13 Upper Extremity Splints and Casts
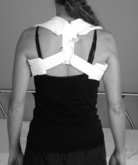
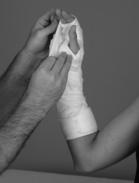
Figure-of-8 splint
Overview
Pearls

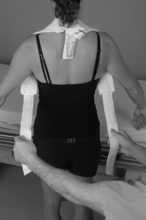

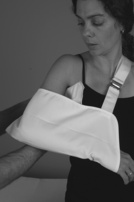
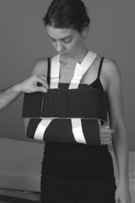
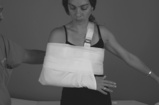
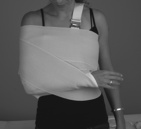
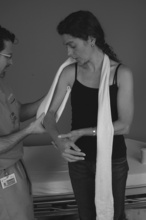
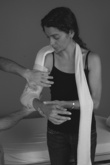
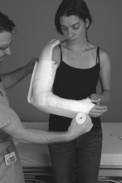
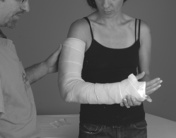
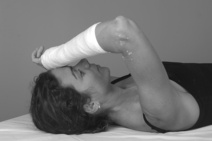
Arm sling/arm sling and swath
Precautions
Pearls
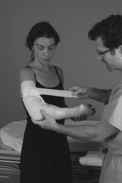
Detailed Technique
1. Sling:
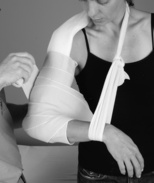
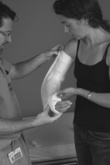
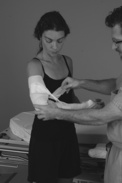
2. Sling and swath:
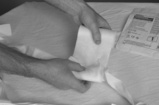
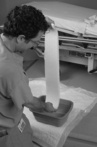
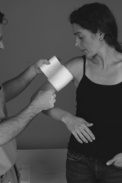
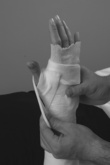
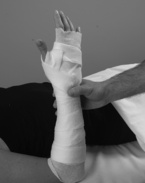
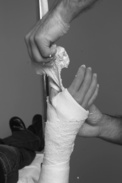
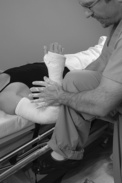
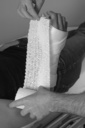
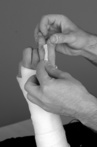
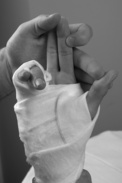
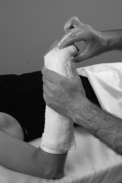
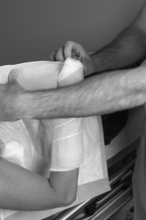
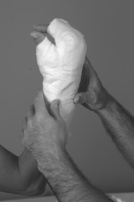
c. Place talcum powder on the ABD pad and fold the pad in half, with the talcum side facing out (Figure 13-8).
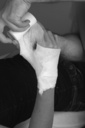
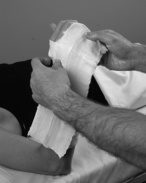
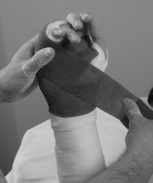
e. Apply the sling and adjust the straps so it is loose while providing some support for the weight of the arm.
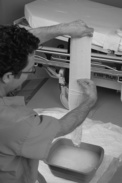
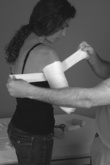
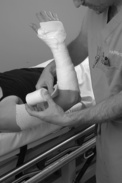
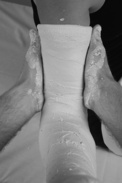
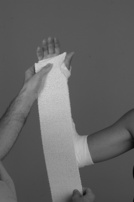
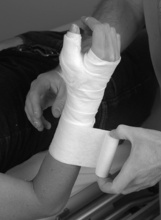
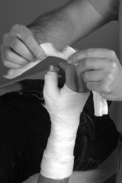
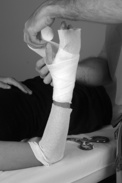
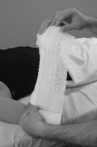
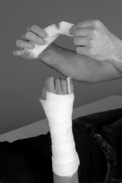
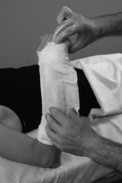
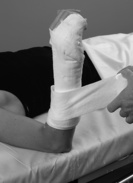
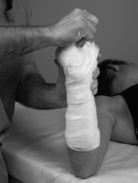
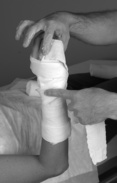
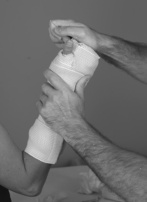
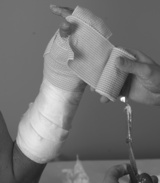
g. If using a sling only, swath the arm to the body using cast padding (Figure 13-10) followed by application of a large elastic bandage (Figure 13-11).


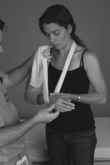
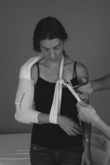
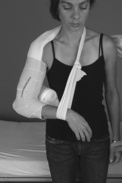
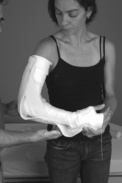
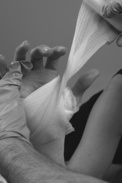
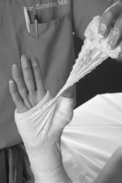
Coaptation splint
Overview
Precautions
1. Do not allow one end of the coaptation splint to end at the fracture site; otherwise, the splint terminus will become a fulcrum and cause more displacement.
Pearls
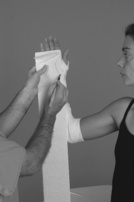
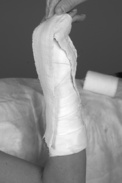
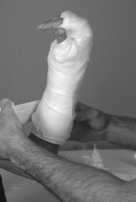
2. The key to applying a coaptation splint properly is to ensure that the splint always comes above the arm onto the shoulder (Figure 13-12).
3. Use a technique that allows the coaptation splint to be secured around the body to prevent distal displacement. An extra-long elastic or self-adherent bandage is a useful adjunct for a coaptation splint.
4. When applying the splint, have the patient turn his or her head to the contralateral side, which prevents the neck from pushing down the splint during application.
Detailed Technique
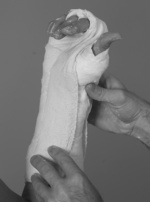
1. Measure the length of the splint.
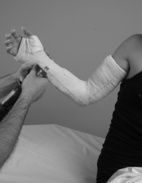
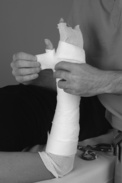
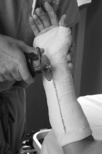
6. Prepare the plaster in the usual fashion (Figures 13-16 and 13-17). Use the usual technique of wetting and laminating, followed by placement in cast padding (see Chapter 12).
8. Apply the splint (see Figure 13-12).
a. Start in the axilla or at an appropriate starting point given the fracture site. Provisionally secure it with cast padding at the middle arm.
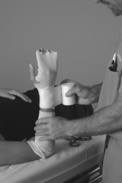
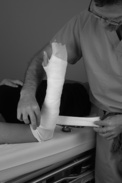
10. Apply the mold. Most fractures require a two-point mold, with one hand anterolateral at the fracture site and the other posteromedial at the elbow (Figure 13-20).
12. Place a cast padding wedge under the arm to counteract varus displacement of the fracture (optional) (Figures 13-23 and 13-24).


Posterior elbow splint
Overview
Precautions
1. The wrist is usually immobilized to control for pronation and supination about the elbow. Elbow dislocations should be splinted in at least 90 degrees of flexion with the wrist in pronation.
2. Ensure that the splint remains proximal to the palmar flexion crease to preserve complete finger range of motion.
3. At the antecubital fossa, do not allow edges of cast padding to lay immediately within the fossa borders.
a. Allowing edges of cast padding to lay immediately within the fossa borders will create wrinkling and can lead to skin breakdown in this very fragile area.
Pearls
Detailed Technique
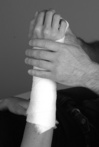
4. Wrap the extremity in cast padding.
b. Circumferentially wrap with cast padding, using a standard 50% overlap technique (see Chapter 12). Two layers of wrapping are sufficient.
5. Create three cast padding cuffs (see Chapter 12):
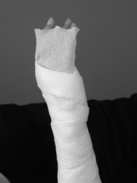
a. Palmar flexion crease/metacarpal heads (Figure 13-29): This cuff should form a “V” at the ulnar aspect of the hand to allow for the cascade of the digits.
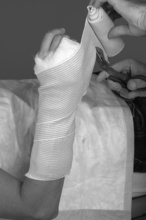
7. Apply the plaster.
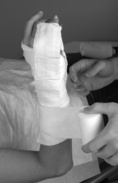
a. Apply the posterior slab first (Figure 13-32).
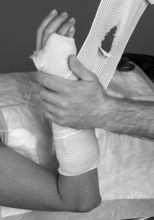
8. Cover the plaster. Wrap cast padding over the top of the plaster to prevent adhesion of the plaster to the elastic or self-adherent bandage (Figure 13-34).


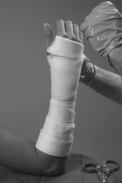
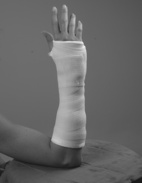
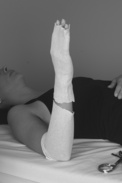
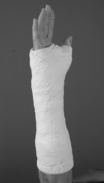
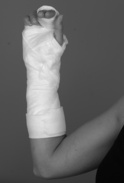
Long arm cast
Precautions
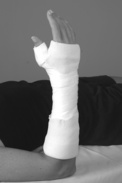
2. Do not extend the plaster beyond the palmar crease. The patient must be able to flex his or her metacarpophalangeal (MCP) joints to at least 70 degrees (Figure 13-42).
3. At the antecubital fossa, do not allow edges of cast padding to lay immediately within the fossa borders.
a. Allowing edges of cast padding to lay immediately within the fossa borders will create wrinkling and can lead to skin breakdown in this very fragile area.
4. Because the olecranon and ulnar styloid are at risk in this splint, care should be taken to apply additional padding over these areas.
Pearls
4. It is difficult to control elbow flexion and forearm pronation when placing a long arm cast, especially in a child.
Basic Technique
1. Patient positioning:
Detailed Technique
2. Position the stockinette:
3. Wrap the extremity in cast padding.
b. Carefully tear the cast padding so as to conform around the thumb interspace (Figure 13-46). Do not go past the palmar flexion crease.
c. Once the hand has been adequately padded, continue wrapping proximally to the proximal forearm (Figure 13-47).
d. Span the fossa with cast padding at the antebrachial fossa (Figure 13-48) (see aforementioned precautions).
4. Create three cast padding cuffs (see Chapter 12).
a. Palmar flexion crease/metacarpal heads (see Figure 13-29): This cuff should form a “V” at the ulnar aspect of the hand to allow for the cascade of the digits.
5. Fold the stockinette over proximally and distally. Ensure that MCP motion is completely preserved.
7. Apply the plaster roll for a short arm cast.
b. Use a twisting (Figure 13-51) or pinching (Figure 13-52) motion to get through the thumb interspace. Twist the plaster roll 360 degrees in the interspace.
d. Continue the plaster proximally (Figure 13-53). Use the standard technique of laminating while rolling (see Chapter 12).
9. Apply a plaster roll to the elbow and arm. Be vigilant about avoiding patient movement when applying this portion of the cast.
10. Apply a mold, if desired. For a fracture of both bones of the forearm:
a. An interosseous mold should be made over the forearm by compressing the anterior and posterior surfaces to make the cast more oval and less cylindrical (Figure 13-54).

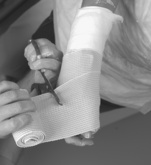
Sugar-tong splint
Precautions
1. It is crucial that the splint be neither too long nor too short.
Pearls
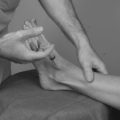
2. Before measuring the splint, it may be useful to perform a hematoma block, thus allowing the block to become effective while the splint is being measured.
3. It is better to measure the splint long rather than short. The splint can always be trimmed or folded over during application if it is too long, but a new splint will need to be made if it is too short.
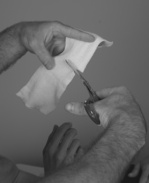
4. The cast padding may be measured 1 to 2 inches long on the volar aspect so that it may be folded over the end of the plaster splint, thus providing a comfortable and safe edge to the splint.

Basic Technique
1. Patient positioning:
Detailed Technique
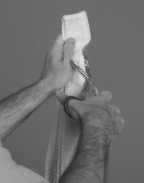
3. Roll out the cast padding. Use the usual technique that will allow the padding to be folded over (see Chapter 12).
6. Obtain traction views, if necessary (this step may be performed following the reduction maneuver, as desired).
8. Prepare plaster in the usual fashion, with wetting and laminating, followed by placement in cast padding (see Chapter 12).
9. Apply a splint.
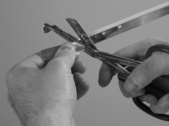
e. Cut a slit in the splint at the elbow to prevent bulk (see Figure 13-61). Fold the edges over one another (see Figure 13-62).


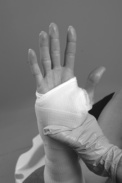
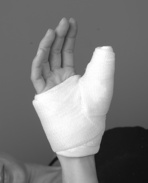
Thumb spica splint
Basic Technique
1. Patient positioning:
Detailed Technique
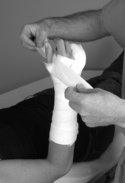
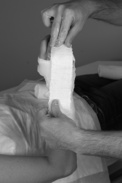
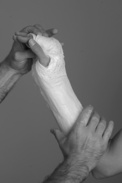
1. Measure the length of the splint using plaster (Figure 13-67). Start at the thumb and go to the mid to proximal forearm.
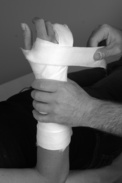
3. Wrap the extremity in cast padding
b. Carefully tear the cast padding so as to conform around the thumb interspace (Figure 13-69). Do not go past the palmar flexion crease.
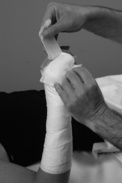
4. Create three cast padding cuffs (see Chapter 12):
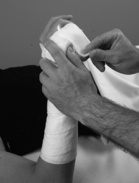
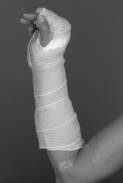
7. Cover the plaster. Place strips of cast padding over the top of the plaster to protect the elastic bandage.


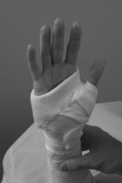
Short arm cast
Precautions
Pearls
The easiest place to begin is at the wrist. The natural contour of the arm will prevent sliding.
Basic Technique
4. Where to mold (three-point mold):
Detailed Technique
2. Position the stockinette:
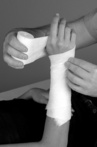
3. Wrap the extremity in cast padding.
4. Create three cast padding cuffs (see Chapter 12):
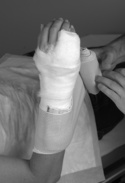
a. Palmar flexion crease/metacarpal heads (see Figure 13-29): This cuff should form a “V” at the ulnar aspect of the hand to allow for the cascade of the digits (Figure 13-82).
5. Fold the stockinette over both proximally and distally. Ensure that MCP motion is completely preserved (Figure 13-84).
7. Apply the plaster roll.
c. Roll two more times around the hand and through the thumb interspace. Do not go past the palmar flexion crease (Figure 13-88).
d. Continue the plaster proximally (Figure 13-89). Use the standard technique of laminating while rolling (see Chapter 12).

Thumb spica cast
Precautions
Pearls
Basic Technique
2. Where to start:
Detailed Technique
2. Position the stockinette (Figure 13-91).
3. Wrap the extremity in cast padding.
b. Carefully tear the cast padding so as to conform around the thumb interspace (Figure 13-94). Do not go past the palmar flexion crease.
4. Create three cast padding cuffs (see Chapter 12):
5. Fold the stockinette over both proximally and distally (Figure 13-98). Ensure that MP joint motion is completely preserved.
7. Apply the plaster roll.
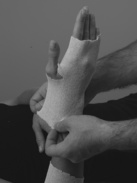
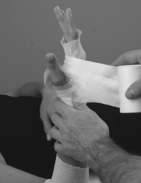
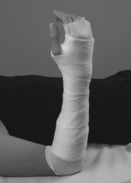
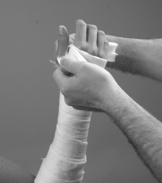
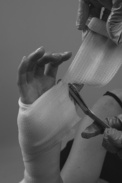
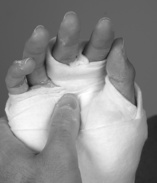
Ulnar gutter splint
Precautions
Pearls
Technique 1: One Plaster
Detailed Technique
2. Wrap the extremity in cast padding.
b. Carefully tear the cast padding so as to conform around the thumb interspace (Figure 13-106). Do not go past the palmar flexion crease.
c. Wrap the ring and little fingers in cast padding.
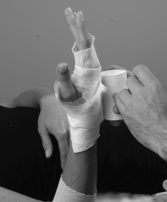
(1) Begin by placing a small piece of folded cast padding between the ring and little fingers (Figure 13-107) to prevent maceration between the digits.
(2) Create a cast padding cuff (Figure 13-108). Wrap around the proximal portion of ring and little fingers (Figure 13-109).
(3) Using 2-inch cast padding, apply two layers over the dorsum of the ring and little fingers that extends to the PIP joint or fingertip (Figure 13-110).
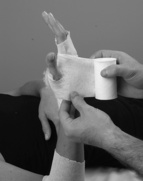
(4) Create a cast padding cuff (Figure 13-111):
(a) Palmar flexion crease/metacarpal heads (Figure 13-112): This cuff should form a “V” at the ulnar aspect of the hand to allow for the cascade of the digits.
(5) Create a cast padding cuff (Figure 13-113). Wrap around the distal portion of the ring and little fingers (Figure 13-114).
(6) The digits should be well-padded at this point, with the index and long fingers completely free (Figure 13-115). (If desired, an additional cuff can be placed around the thumb, as illustrated.)
5. Apply the splint.
a. Start by applying the splint to the dorsal side of the forearm (Figure 13-116). Ensure appropriate placement distally.
Technique 2: Two-Plaster, Dorsal-Ulnar Placement Modification
Detailed Technique
5. Apply the plaster.
a. Start by applying one slab to the dorsal side of the fingers and extend proximally down the ulnar border of the forearm (Figure 13-122). Provisionally secure it with cast padding at the fingers and wrist.
b. Place a second slab along the dorsum of the fingers and forearm (Figure 13-123). Provisionally secure it with cast padding at the wrist and fingers.
6. Cover the plaster: Place cast padding over the top of the plaster to prevent the covering bandage from sticking to the plaster (Figure 13-125).
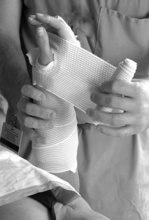
9. Definitively secure the splint with an elastic or self-adherent bandage (Figure 13-126).
a. The bandage can be cut (Figure 13-127) to minimize bulk between the long and ring digits (Figure 13-128).
Radial gutter splint
Overview
Precautions
Pearls
Technique 1: One Plaster
Basic Technique
1. Patient positioning:
Detailed Technique
2. Wrap the extremity in cast padding.
b. Carefully tear the cast padding so as to conform around the thumb interspace. Do not go past the palmar flexion crease.
c. Wrap the index and long fingers in cast padding (Figure 13-131).
(1) Begin by placing a small piece of folded cast padding between the long and index fingers (Figure 13-132) to prevent maceration between the digits.
(6) The digits should be well-padded at this point, with the ring and small fingers completely free (Figure 13-133). (If desired, an additional cuff can be placed around the thumb, as illustrated.)
5. Apply the plaster.
a. Start by applying the plaster to the radial side of the forearm (Figure 13-135). Ensure appropriate placement distally.
Technique 2: Two-Plaster, Dorsal-Ulnar Placement Modification
Detailed Technique
5. Apply the plaster.
6. Cover the plaster. Place cast padding over the top of the plaster to prevent the covering bandage from sticking to the plaster (Figure 13-141).
Finger splints
Pearls
1. Always place a finger splint on the dorsum of the finger unless a compelling reason exists not to.
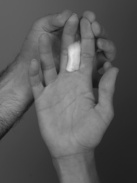
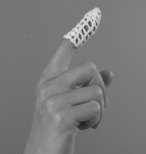
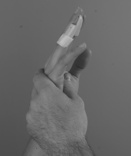
2. For distal phalangeal injuries, a wraparound splint can help protect the distal phalanx from impact during daily activities (Figure 13-144).
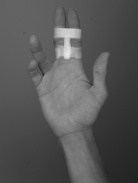
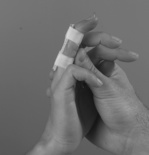
3. For extensor tendon injuries at the PIP joint (central slip injury), splint only the PIP joint in extension, leaving the DIP free (Figure 13-145).
Basic Technique


Finger tape/straps
Precautions
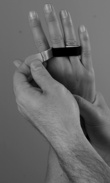
Make sure that the tape or straps are not too tight to limit the vascularity of the digit.
Pearls
2. Place a piece of felt or gauze between two fingers if they are to be taped together for longer than a couple of days (Figure 13-153).