Unification of Bicornuate Uterus
Incomplete fusion of the müllerian ducts leads to a variety of disorders, ranging from subseptate uterus to complete failure of fusion with uterus didelphys (Fig. 16–1). The subseptate uterus is treated hysteroscopically by sectioning the septum with a scissors, laser, or electrosurgical device. The uterus didelphys requires no treatment other than section of the vaginal septum to prevent traumatic tears (Fig. 16–2).
The bicornuate uterus may require a unification procedure to enhance the size of the uterine cavity if reproductive outcome problems are demonstrated (e.g., abortion, preterm labor) (see Figs. 16–1 and 16–3).
Diagnostic differentiation between a septate and a bicornuate uterus cannot be accomplished by hysteroscopy or by hysterosalpingography (Fig. 16–4). The diagnosis is made laparoscopically by observing the broad and indented fundus, the typical heart-shaped configuration. A hysterogram is performed to gain some insight into the size and configuration of the divided cavities (Fig. 16–5A–C).
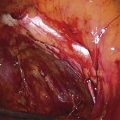
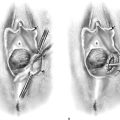
At laparotomy traction, sutures are placed at each fundal extreme away from the site of transection. A 1 : 200 vasopressin solution is injected into the uterus along and within the lines of resection (Fig. 16–6). A wedge-shaped incision is made through the body and fundus of the uterus in the vertical plane (Figs. 16–7A, B). The resultant tissue removed includes the heart-shaped defect (Fig. 16–7C). The two separate cavities are now ready to be joined to form a single uterine cavity (Figs. 16–7D, E). Closure is made beginning on the posterior wall with simple or figure-of-8 stitches placed submucosally and carried intramuscularly (Figs. 16–8A, B). The closure is carried over the fundus and is completed on the anterior surface (Fig. 16–8C). The author typically uses 0 Vicryl for the intramuscular layer (Fig. 16–8D). Next, with 2-0 or 3-0 Vicryl, the superficial muscle and serosa are closed with a running or running lock suture (Fig. 16–9).
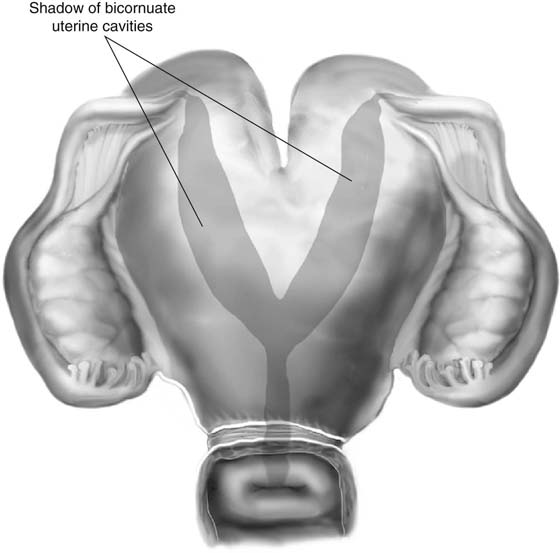
FIGURE 16–1 External view of heart-shaped bicornuate uterus. Note the schema of a hysterogram superimposed on the uterus.
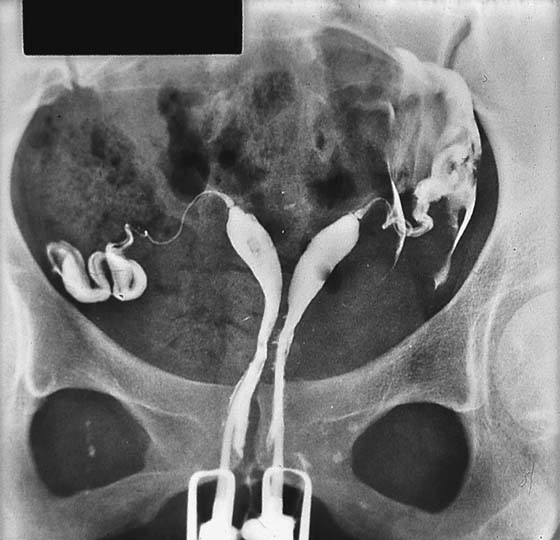
FIGURE 16–2 Hysterosalpingogram of a complete fusion defect illustrating duplication of the uterus and cervix. The vagina was septate.
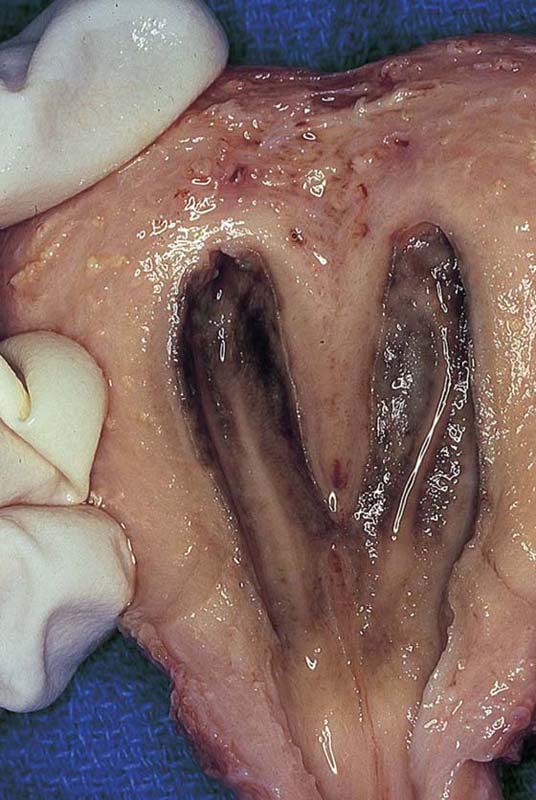
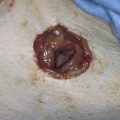
FIGURE 16–3 Specimen of an extirpated uterus showing a septated cavity and a single cervix.
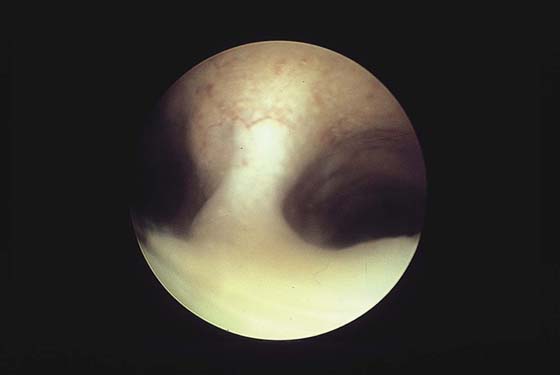
FIGURE 16–4 Hysteroscopic view of bicornuate uterus.
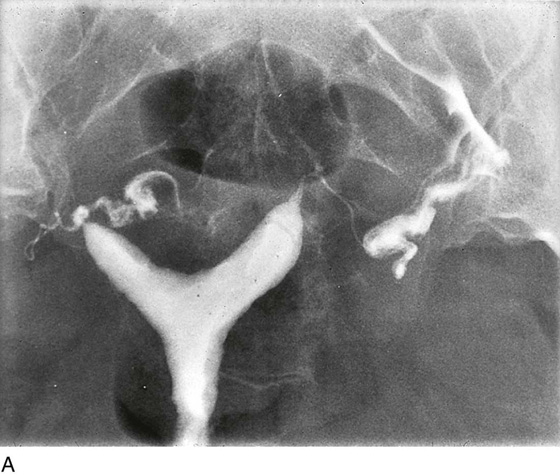
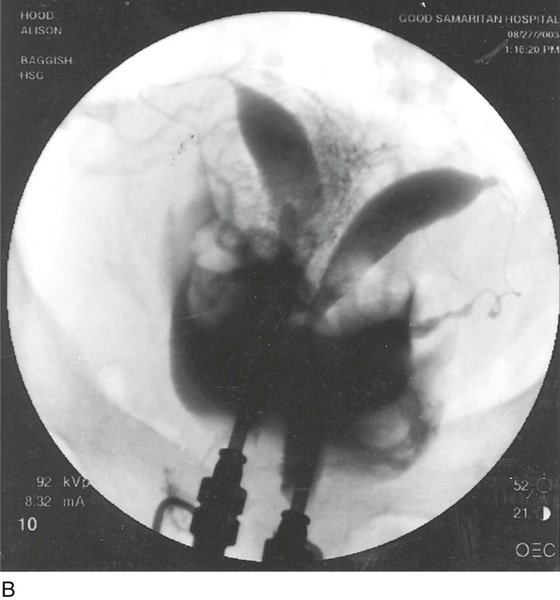
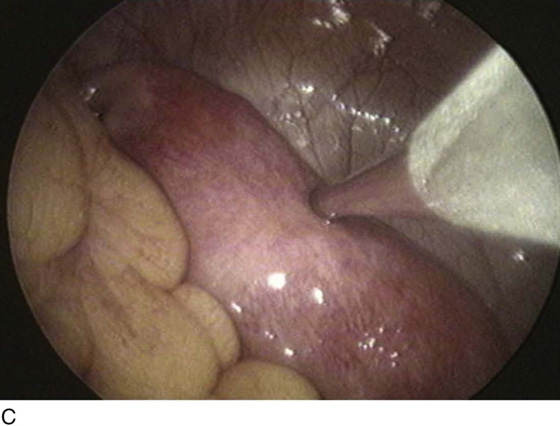
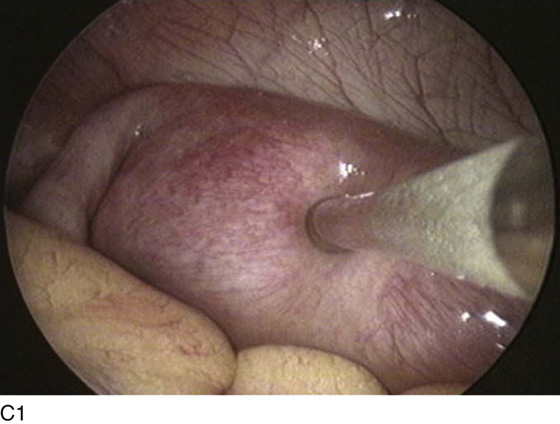
FIGURE 16–5 A. Hysterosalpingogram showing a bicornuate uterus. In actuality, the diagnosis was established laparoscopically. B. Hysterogram of what was considered to be a complete fusion defect. Note the two cervices and the two distinctly separate uterine horns. C. Laparoscopic photographs of Figure 16–5B show a single, broad structure that has the appearance of a bicornuate uterus.
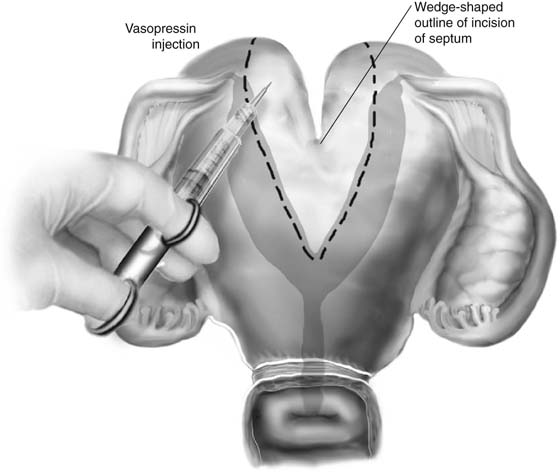
FIGURE 16–6 In preparation for unification of the two uterine cavities, a 1 : 200 solution of vasopressin is injected along the lines of intended resection.
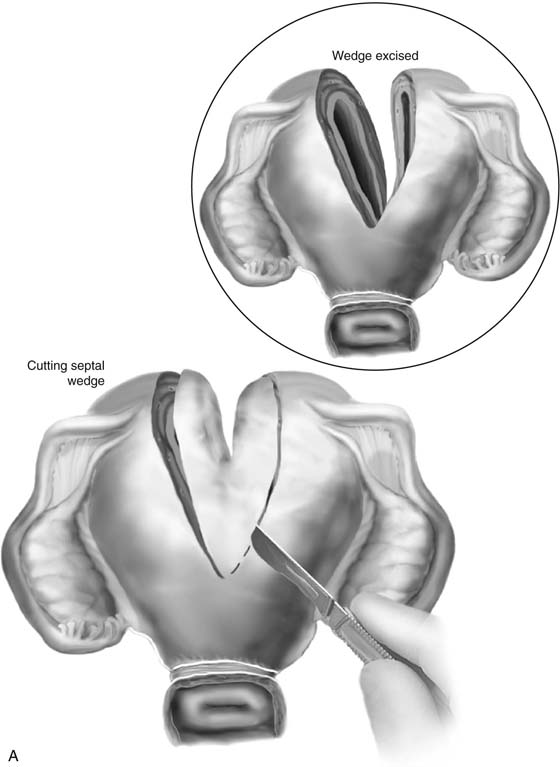

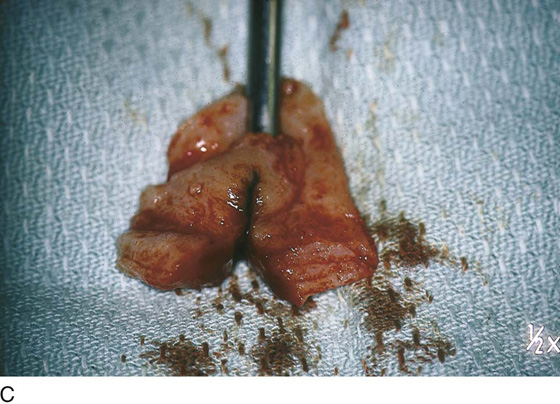
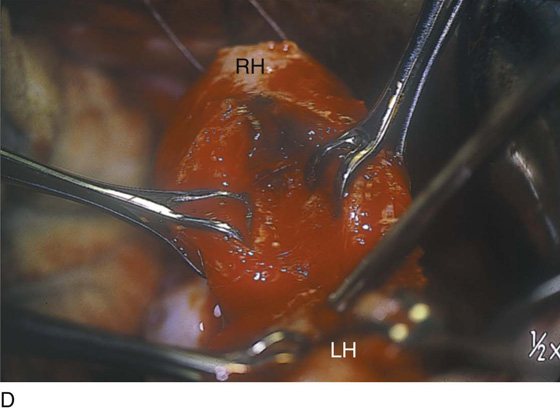
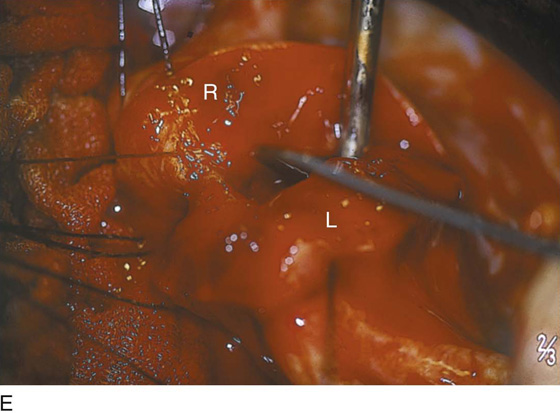
FIGURE 16–7 A. With the use of a knife, a carbon dioxide (CO2) laser, or an electrosurgical needle electrode, the septum and defect are wedged out. The inset shows the cavities after excision. Hemostasis is attained with 3-0 Vicryl figure-of-8 suture ligatures. B. The right horn (RH) of the uterus is exposed in the center of the photograph. The wedge has been removed. The left horn (LH) is held in Babcock clamps. C. The heart-shaped (inverted) wedge of uterus is held in the Kocher clamp. D. Each uterine horn is held with Babcock clamps and will be drawn together for the placement of myometrial stitches, which will unit the two horns (RH and LH) into a new single-cavity uterus. E. The figure-of-8 stitch is begun from the inside (submucosal) and through the inner two thirds of the myometrium (L), then is carried into the right myometrium (R) and out the right submucosa.
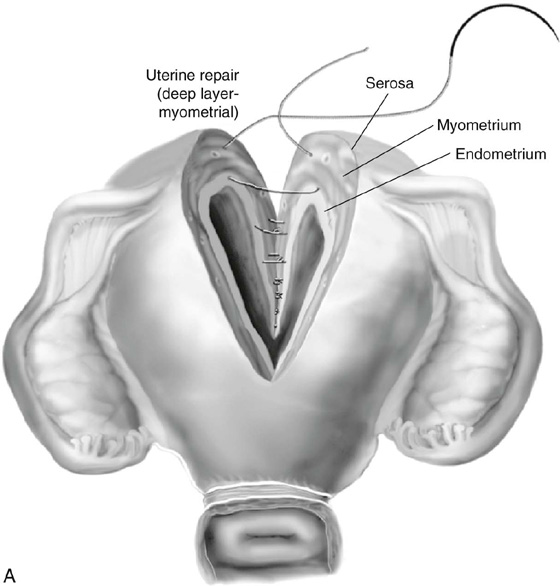
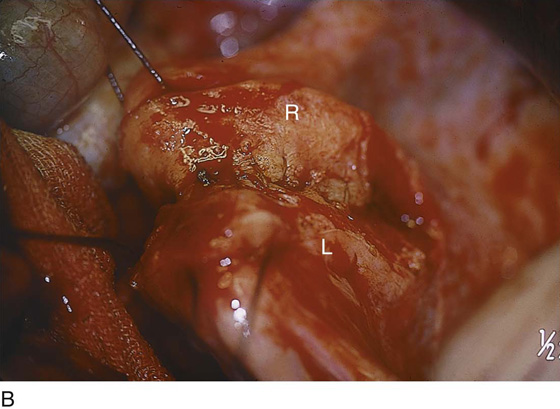
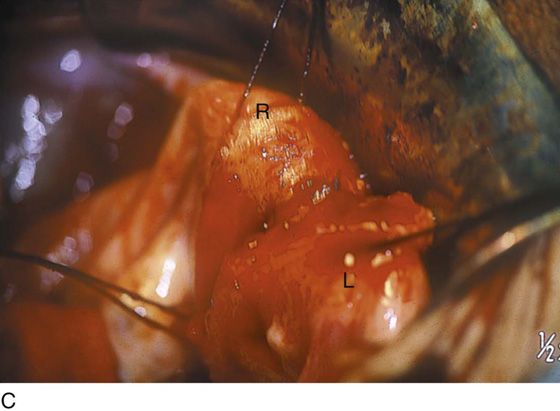
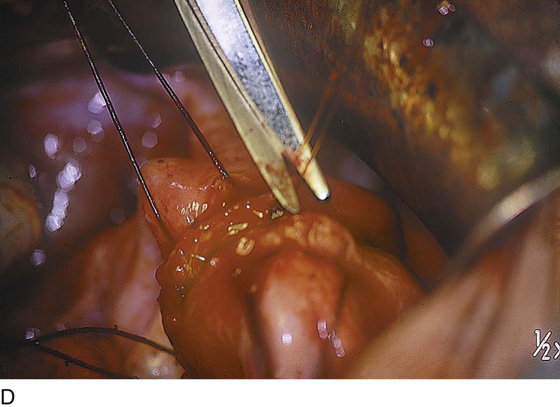
FIGURE 16–8 A. The uterine cavity is closed by placing subendometrial intramyometrial 0 Vicryl simple or figure-of-8 sutures, beginning on the posterior wall and terminating on the anterior uterine wall. B. Zero Vicryl sutures have been placed into the posterior uterine wall, uniting right (R) and left (L) horns. C. The closure is carried over the uterine fundus. D. The myometrial closure is complete. The somewhat blurred left oviduct is seen in the foreground.
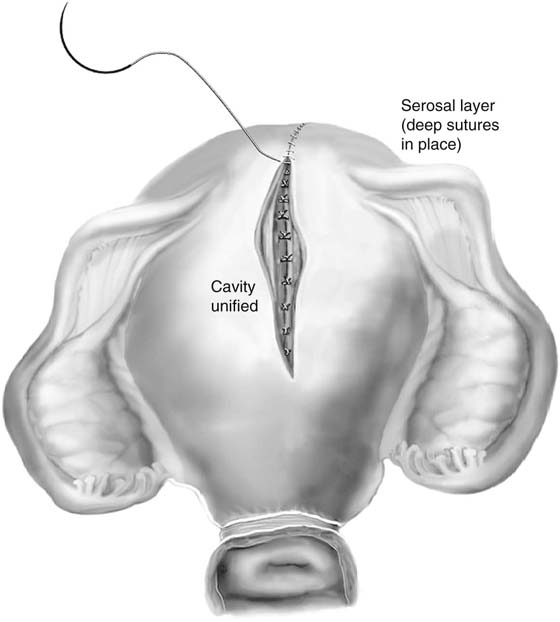
FIGURE 16–9 The operation is finished by closing the serosal surface of the uterus with a running 3-0 Vicryl or PDS suture.