CHAPTER 24 Robot-Assisted, Two-Stage, Three-Field Esophagolymphadenectomy—Video 24
Introduction
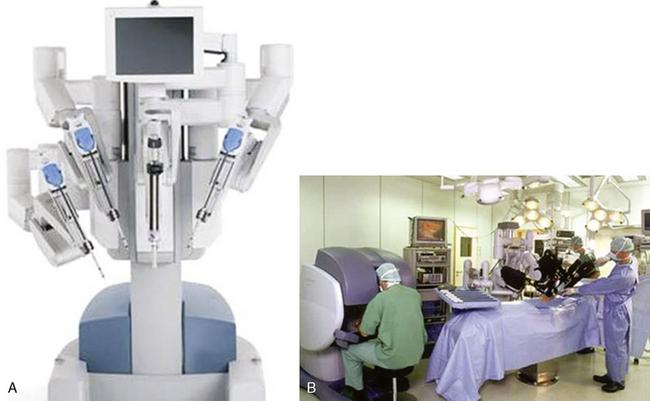
The da Vinci S system has three components: an operating console for the surgeon; a praying mantis–like chassis from which spring the robotic video unit and the three robotic arms; and the electronic communication tower system between the console and the chassis (Figure 24-1).
Approach to Robot-Assisted Esophagolymphadenectomy
Key Points
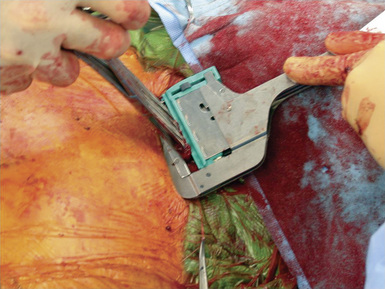
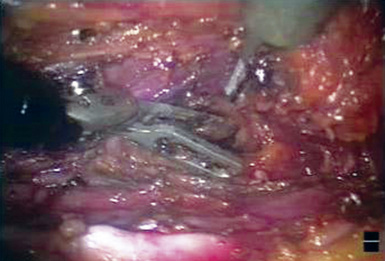
♦ A ring clamp with a heavy sponge or Surgicel attached should be available for immediate use at all times (Figure 24-2).
♦ Use continuous intrathoracic carbon dioxide insufflation to enhance the robot-assisted surgery. Keep the intrathoracic carbon dioxide pressure between 10 and 15 mm Hg to minimize a decrease in venous return and cardiac compliance.

 Robot-Assisted Esophagolymphadenectomy (Video 24)
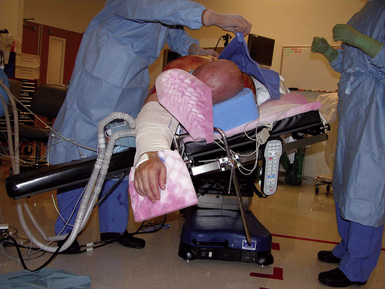
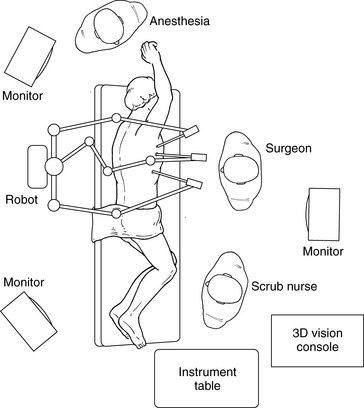
Step 1. Thoracic-Phase Patient Positioning
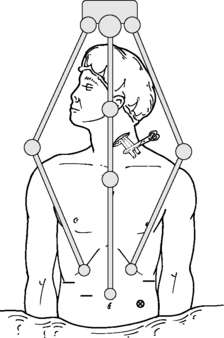
♦ The patient is intubated with a double-lumen endotracheal tube, positioned laterally to slightly face down, and strapped securely to the operating table.
♦ The right arm is well padded and positioned over the ear immediately adjacent to the face with the elbow below the horizontal plane of the right shoulder.
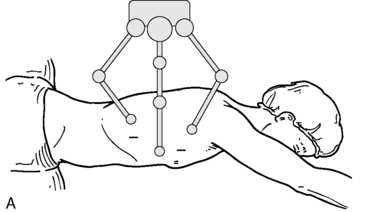
Step 2. Thoracic-Phase Port Placement
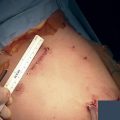
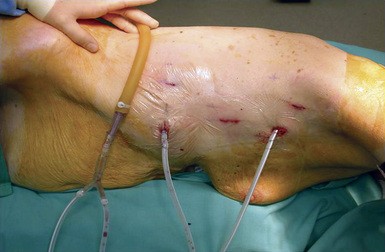
♦ Make five puncture wounds in the right mid-anterolateral chest. Place a 12-mm trocar for the viewing port in the fifth or sixth intercostal space in the posterior axillary line. Place an 8-mm trocar for the right robotic arm in the posterior axillary line just anterior to the border of the scapula in the third or fourth intercostal space. Place an additional 8-mm trocar for the left robotic arm in the seventh or eighth intercostal space in the posterior axillary line, each of the two robotic arms approximately one hand bredth away from the videoscope port (Figure 24-4).
♦ Place two accessory ports at the level of the anterior axillary line: a 5-mm port at the level of the third intercostal space and a 12-mm port at the level of the sixth or seventh intercostal space. The upper port is used for suctioning and grasping instruments, and the lower port is used for placing a fan retractor for the lung, suctioning and grasping instruments, and introducing the sutures used for the thoracic duct ligation.
Step 3. Thoracic-Phase Docking
♦ Roll the robot into position. Place the robotic arms through the 8-mm trocars, and place the 0-degree videoscope through the 12-mm viewing port (Figure 24-5).
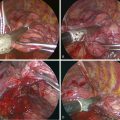
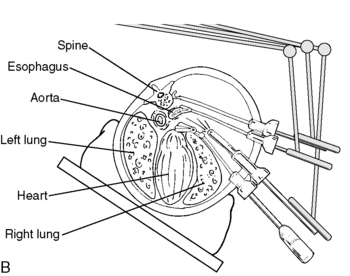
Step 4. En Bloc Esophageal Mobilization and Wide Nodal Resection
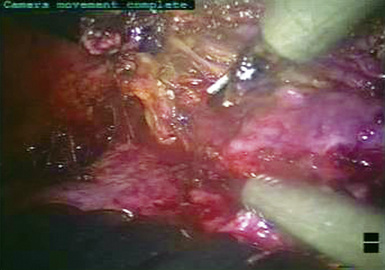
♦ Exposure: Direct the camera toward the pericardial bulge just cephalad to the inferior pulmonary vein.
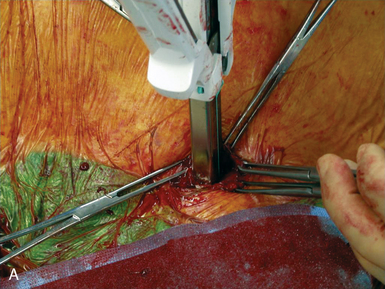
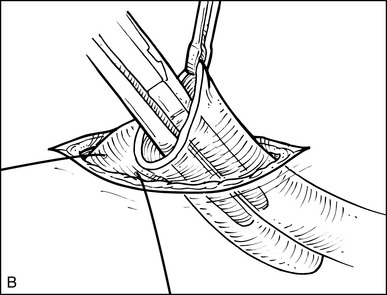
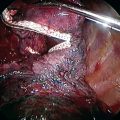
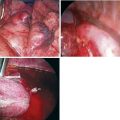
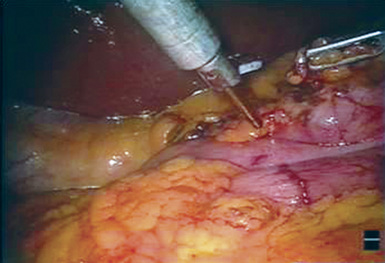
♦ Using the hook electrocautery, and/or ultrasonic shears, and Caudier grasper (Intuitive Surgical, Sunnyvale, Calif), initiate dissection along the anterior aspect of the esophagus at the pericardial bulge, just cephalad to the superior aspect of the inferior pulmonary vein (Figure 24-6).
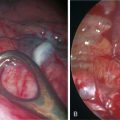
♦ Continue the dissection inferiorly to the esophageal hiatus, with the inferior pulmonary ligament and adherent lung taken down as necessary for access to the periesophageal nodes, completely cleaning the pericardium, hiatus, and left pleura (Figure 24-7).

Step 5. Cervical Lymphadenectomy
♦ Resect the supra-azygous esophagus and periesophageal tissue into the thoracic apex, well into the neck. Over the intended resection area, score the pleura with the hook electrocautery. Transect the associated peritracheal nodes and the right vagus nerve with the ultrasonic shears, reducing the potential of electrical transmission to the recurrent laryngeal nerve.
Step 7. Drain Placement
♦ At the conclusion of the thoracic phase, place two drains: a 19-French, round, fluted Silastic drain (Blake, Ethicon Incorporated, Johnson & Johnson) through the lower accessory trocar along the diaphragm and a 15-French drain to the superior aspect of the thoracic cavity through the upper accessory trocar (Figure 24-10).
Step 8. Isolation of the Cervical Esophagus
♦ Position the patient supinely, and reintubate with a single-lumen endotracheal tube. Turn the head upward and to the right, exposing the left side of the neck.
♦ Continue the dissection deeply and medially toward the spine, transecting the omohyoid muscle for exposure.
Step 10. Abdominal-Phase Port Placement
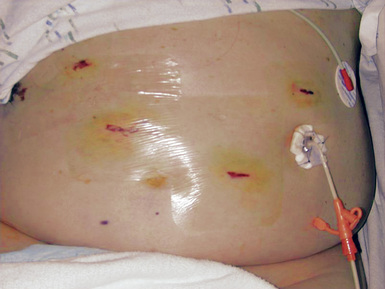
♦ A total of six abdominal puncture wounds are made. Place two 8-mm ports 8 cm subcostally at the right and left mid-clavicular lines for the robotic arms. Place an additional 12-mm trocar for the viewing port just cephalad to the umbilicus, maintaining a distance of 10 to 12 cm from either of the robotic arms (Figure 24-11).
Step 11. Abdominal-Phase Docking
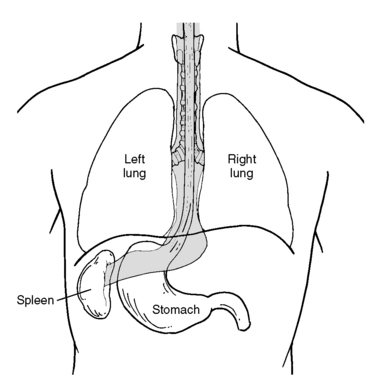
Step 14. Creation of a Gastric Conduit
♦ Using the SonoSurg (Intuitive Surgical), transect the lesser omentum from the base of the liver up to the esophageal hiatus. Take the short gastric arteries, but preserve the right gastroepiploic arcade along its entirely to the right gastroepiploic vein at the transverse mesentery.
♦ Transect the pyloric attachments to free the pylorus, allowing mobilization sufficient tissue to reach toward the esophageal hiatus. No Kocher maneuver or pyloroplasty is performed.
♦ Approximately 4 to 5 cm cephalad from the origin of the right gastric artery along the lesser gastric curve, clear the gastric wall of perigastric tissue.
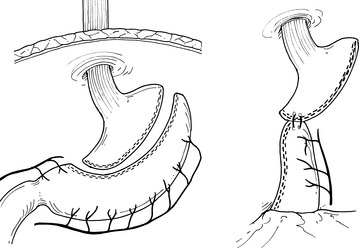
♦ Using 8 to 10 firings of an Ethicon 45 × 4.1-mm linear endostapler, create a 4-cm-wide (from the greater curvature) right gastroepiploic arterial arcade–supplied gastric tube (Figure 24-12).
♦ Suture the most cephalad aspect of the gastric tube to the most distal aspect of the specimen with two widely spaced figure-of-eight sutures (Figure 24-13).
♦ Briefly discontinue the ventilator and chest drain suction, and use the Penrose drain encircling the esophagus at the neck as a handle to pull the specimen up through the neck incision.
♦ Suture the intraperitoneal portion of the anterior gastric conduit serosa to each esophageal hiatus crus with two figure-of-eight, 3-0 Ethibond sutures to reduce the risk of later periconduit herniation.
Step 15. Esophagogastric Anastomosis
♦ At the incision in the left side of the neck, transect the specimen, and perform a stapled esophagogastrostomy. Create a side-to-side, functional end-to-end stapled anastomosis with a 45 × 4.1-mm linear endostapler and a 60 × 4.1-mm transverse stapler. This fashioned a 4 to 5 × 6-cm triangular anastomosis (Figure 24-15).
♦ Place a soft, multiholed drain in the neck beneath the platysma, avoiding the perimeter of the anastomosis.