CHAPTER 15 Robot-Assisted Right Upper Lobectomy
Introduction
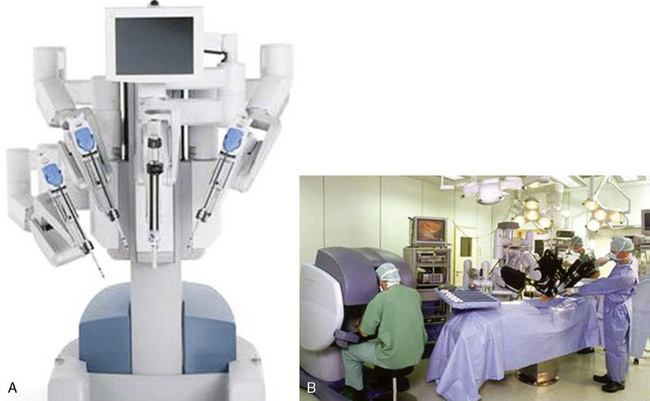
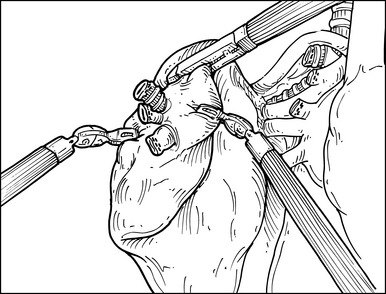
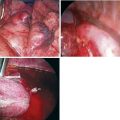
The da Vinci system (Intuitive Surgical, Sunnyvale, Calif) has three components: an operating console for the surgeon; a praying mantis–like chassis, from which spring the robotic video unit and the three robotic arms; and the electronic communication tower system between the console and the chassis (Figure 15-1).
Approach to Robot-Assisted Right Upper Lobectomy
Key Points
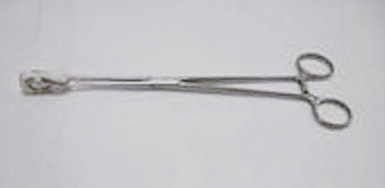
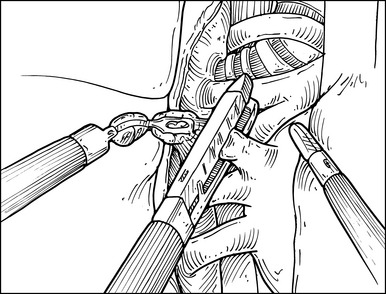
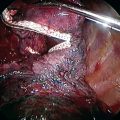
♦ A ring clamp with a heavy sponge or Surgicel attached should be available for immediate use (Figure 15-2).
♦ Continuous intrathoracic carbon dioxide (CO2) insufflation is used to enhance the robotically assisted surgery. Keep the intrathoracic CO2 pressure less than 10–15 mm Hg to minimize a decrease in venous return and cardiac compliance.
♦ Avoid grasping the lung, hilar structures, or the airway with robotic instruments to minimize the risk of injury and bleeding. Non-robotic, less traumatic instruments are recommended to grasp the lung and will be discussed later in this chapter. The robotic instruments used are better suited for sweeping and very precise grasping.
Robot-Assisted Right Upper Lobectomy
Step 1. Patient Positioning
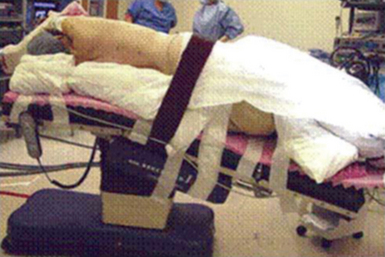
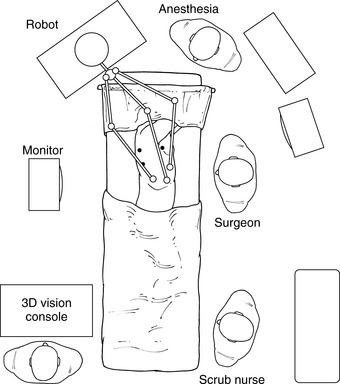
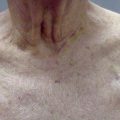
♦ The patient is placed in the lateral decubitus and reversed Trendelenburg position (Figure 15-3). This allows the diaphragm and intra-abdominal contents to drop away from the operative field to increase exposure and allows any bleeding that occurs to pool away from the operative field.
Step 2. Port Placement
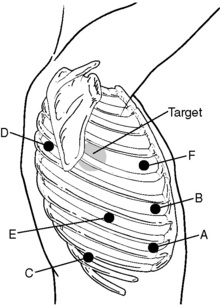
♦ The target is the hilum, and the approximate location is drawn onto the patient’s chest; this is a 4-cm-diameter circle whose center is approximately 3 cm anterior and 2 cm cephalad to the tip of the scapula.
♦ The camera port (A) is placed in the eighth or ninth intercostal space (ICS) adjacent to the anterior costal margin. After the port is slowly placed in position, the pleural space is visualized to ensure there has been no damage to intrathoracic structures.
♦ CO2 is slowly infused to pressures of 10 to 15 mm Hg. If there is no evidence of pleural metastatic disease, the remaining thoracoports are placed.
♦ Place the thoracoports under direct intrapleural visualization to avoid injury to the neurovascular bundles and postoperative neuralgia.
♦ The most anterosuperior port site, usually in the anterior axillary to lateral clavicular line in the fourth ICS, serves as the utility port (F).
♦ The inferoanterior port, located in the anterior axillary line in the eighth to ninth ICS (B) and another port located in the posterior axillary line in the eighth to ninth ICS (E) are 8-mm ports used for the robotic arms. Both robotic ports are placed 10 to 12 cm on a lateral plane away from the camera port (A).
♦ The superoposterior site is marked at roughly the fourth ICS posteriorly about 8 to 10 cm from the posterior spinous processes so that it enters the chest at or just below the posterior aspect of the major fissure (D).
♦ The inferoposterior port site is located at the tenth ICS along the same longitudinal line as the superoposterior port site (C).
Step 3. Docking
♦ Roll the robot into position approximately 30 degrees from directly over the head and in line with the camera port and the target (Figure 15-5).
♦ After the chassis is locked into the correct distance from the operating table, compress the setup button to pull the robotic arms into position.
♦ Instrument choice depends on the surgeon. We prefer using the ProGrasp instrument in the left arm and the Harmonic scalpel or Hook electrocautery in the right arm.
♦ A Landreneau ring grasper is placed into the superoposterior port (see Figure 15-4, port D) to grasp the upper lobe just superior to the hilar location. The grasper is allowed to rest under gravity, providing sufficient lateral traction.
Step 4. Right Upper Lobe Vein
♦ The videoscope is either the 0- or 30-degree scope in the down position. When interchanging scopes, 0- and 30-degree, make sure to adjust the view parameters at the console.
♦ The Harmonic scalpel divides the mediastinal tissue and pleura adjacent to the phrenic nerve up to the level of the upper hilum and azygous vein.
♦ Identify the bifurcation between the right middle and right upper lobe veins. The hilar lymphatic tissue between the middle and upper lobe veins is bluntly cleaned and lifted away from the intermedius and middle lobe pulmonary arteries.
♦ Bluntly sweep the hilar tissue toward the resection specimen, clearing the pulmonary artery and under aspect of the RUL vein.
♦ Blunt and Harmonic scalpel dissection clears away the tissue from the azygous vein and continues the en bloc dissection to the main pulmonary artery.
Step 5. Right Upper Lobe Pulmonary Artery
♦ Exposure: If necessary, regrasp the hilar tissue using the Landreneau clamp to provide better exposure of the main pulmonary artery and its branches.
♦ Use the ProGrasp forceps to sweep the hilar tissue off the cephalad aspect of the pulmonary artery to its junction so the middle lobe artery and the recurrent branch are cleanly exposed.
Step 6. Right Upper Lobe Bronchus
♦ Exposure: Prior to taking the bronchus and especially in cases when we do not have adequate 3-dimensional visualization of the bronchus, we like to visualize the posterior aspect of the hilum and sometimes perform some of the peribronchial dissection and exposure, especially when the tumors are close to the hilum or when there is an extensive amount of inflammation or fibrosis. To do so, release the Landreneau retractor to allow the right upper lobe to rotate anteriorly to expose the posterior hilum and airway.
♦ Identify the posterior aspect of the major fissure, and if not already separated, divide the posterior aspect of the major fissure by using the endostapler through the upper posterior port.
♦ Clear the bifurcation of the bronchus intermedius and the RUL bronchus with the ProGrasp forceps and the Harmonic scalpel. In this location, the subcarinal lymph nodes may be identified and resected. Dissected specimens are placed in an Endobag and brought out through one of the thoracoports.
♦ After the subcarinal nodes are removed, the attention is turned back to the anterior aspect of the main bronchus. The lung is again retracted posteriorly, and the Landreneau ring clamp from the posterosuperior port grasps the intended specimen.
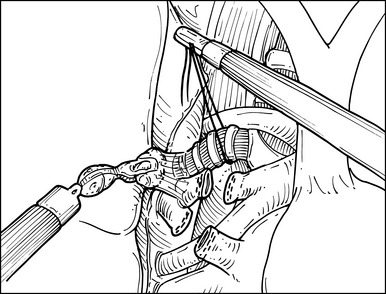
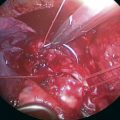
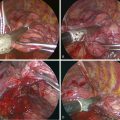
♦ Now with the peribronchial hilar tissue sufficiently thinned, carefully pass the ProGrasp forceps behind the right upper lobe airway, and retract the bronchus with a silk tie to facilitate stapling (Figure 15-8).
♦ Through the posteroinferior thoracoport, pass around and close an endostapler passes, but do not fire it on the bronchus.
♦ To make certain that the correct airway has been identified, we perform two maneuvers. First, the anesthesiologist bronchoscopically examines the airway, and the surgeon visually confirms the location of the bronchoscope by the transilluminated light through the airway. Second, while the CO2 insufflation is turned off, the remaining lung is inflated, confirming that it can inflate and deflate.
♦ After the bronchial transection, the hilum and mediastinum is flooded with irrigation fluid and the remaining lung inflated to 25 cm with H2O to make certain there is no leak at the bronchial stump. If there is a leak, attempt to identify it and reinforce the bronchus with 2-3 carefully placed simple sutures of 4-0 prolene on an S-H needle cut to 8 cm length. Avoid strangulation of the tissue.
Step 7. Minor Fissure
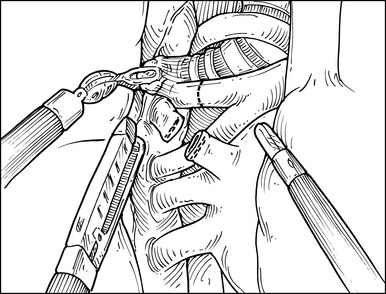
♦ An endoscopic stapler introduced through the anterosuperior port site completes the fissure. Identification of the middle lobe vein assists in identifying the anterior aspect of the minor fissure (Figure 15-9).
Step 8. Lobe Removal
♦ To prevent postoperative torsion of the right middle lobe in patients who have a near-complete fissure between the right middle and right lower lobes, a knifeless stapler attaches the most anteroinferior aspect of the right middle lobe to the most inferoanterior aspect of the right lower lobe.
♦ Insert a medium-sized Anchor bag into the apex of the chest through the anterosuperior thoracoport site (see Figure 15-4, port F). Prior to placing the Anchor bag, an intercostal incision with the robotic Hook Cautery is made about 6-7 cm in length along the intercostal where the most anterior superior port is located, the incision through which the specimen is to be removed. Avoid cauterizing the intercostal nerve and the rib periosteum.

