CHAPTER 8 Right Upper Lobectomy—video 8
Approach to Video-Assisted Right Upper Lobectomy
Order of Operative Steps
The order of the steps of the operation is as follows: level 10 nodes, RUL vein, anterior trunk of the pulmonary artery, minor fissure, posterior ascending artery, RUL bronchus, and the remainder of the fissure. The incisions are the standard incisions, with the utility incision placed directly up (lateral) from the superior pulmonary vein (see Chapter 1).
Key Points
♦ Complete resection of the tissue with the level 10 nodes exposes the right mainstem bronchus, superior vena cava (SVC), and anterior trunk. During dissection, the superior and posterior aspects of the anterior arterial trunk should be dissected well to mobilize the artery for subsequent transection.
Video-Assisted Right Upper Lobectomy (Video 8-1)
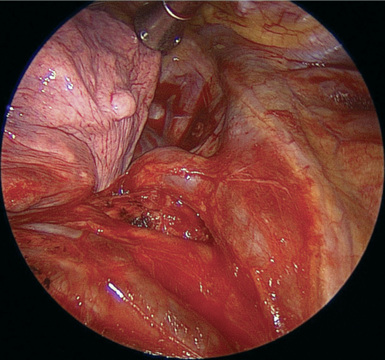
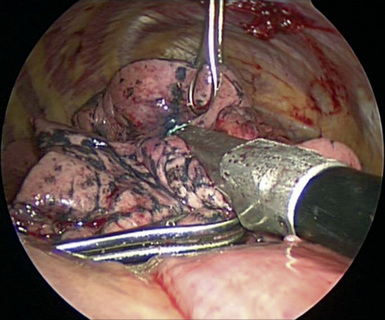
Step 1. Level 10 Nodes
♦ The level 10 nodes are located within a triangle bounded by the SVC, azygous vein, and superior hilum of the lung.
♦ Just posterior and parallel to the phrenic nerve, incise the pleura from the hilum to the azygous vein and then posteriorly along the azygous vein to the right mainstem bronchus (Figure 8-1).
♦ From the hilum, dissect posteriorly along the superior aspect of the RUL vein and along the vein from the apical segment. This exposes the anterior trunk.
♦ Remove all the tissue in this triangle, including the level 10 nodes. At this point, the right mainstem bronchus, anterior trunk, and SVC are well exposed.
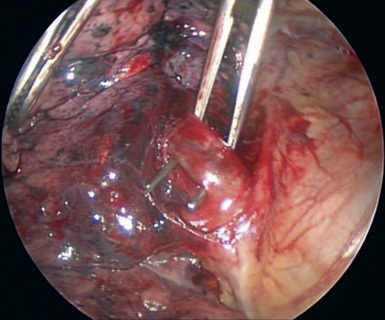
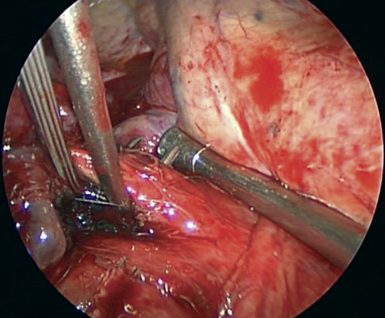
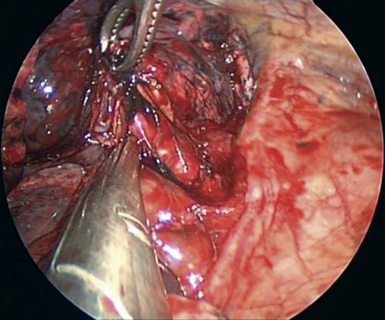
Step 2. Right Upper Lobe Vein
♦ Clearly identify the RUL vein and the right middle lobe vein. Viewing the remnant of the minor fissure can help with orientation.
♦ Spread along the inferior aspect of the RUL vein. Lifting the vein shows the plane between the vein and the underlying pulmonary artery.
♦ Rotate the thoracoscope posteriorly with the lens pointed anteriorly to view the dissection between the vein and the artery.
♦ To create a tunnel for the stapler, spread widely with a right-angle clamp between the RUL vein and the artery (Figure 8-2).
♦ Through incision 4, pass an endoscopic vascular stapler around the RUL vein. The anvil goes into the tunnel between the vein and artery. The stapler can be passed through incision 1, but the angle is better from the posterior incision (Figure 8-3).
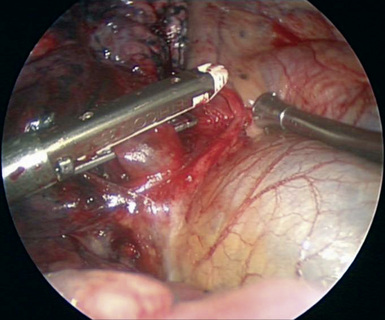
Step 3. Minor Fissure
♦ The thoracoscope is aimed anteriorly with the 30-degree lens pointed posteriorly, but it is pulled back as close as possible to the trocar.
♦ Look at the minor fissure on the lateral surface of the lung and at the confluence of the RUL and right middle lobe veins to determine the exact location of the minor fissure.
♦ Point the anvil of the stapler toward this venous confluence, and hold it in place. Pull the lung parenchyma into the jaws of the endoscopic stapler without moving the stapler. This is a key maneuver and ensures that the stapler remains above all vascular structures and avoids inadvertent injury. The 4.8-mm staple cartridge typically is used for stapling lung parenchyma.
♦ The first firing of the stapler usually completes about one half of the fissure. Another stapler is positioned with the anvil of the stapler between the veins and on the surface of the artery (Figure 8-4).
♦ Open the jaws of the stapler, and with ring forceps, pull the lung parenchyma into the jaws of the stapler.
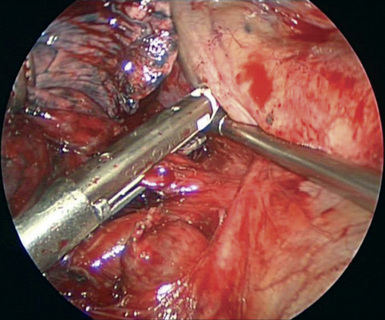
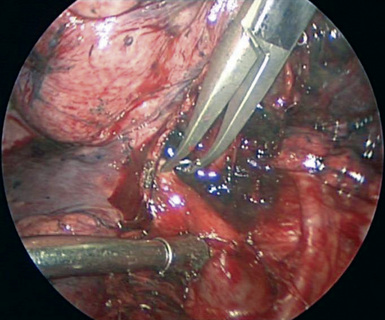
Step 4. Anterior Trunk
♦ The thoracoscope is positioned anteriorly with the 30-degree lens pointed posteriorly. Rotate the camera slightly clockwise.
♦ Mobilize the artery from the bronchus; a right-angle clamp then easily passes around the anterior trunk (Figure 8-6).
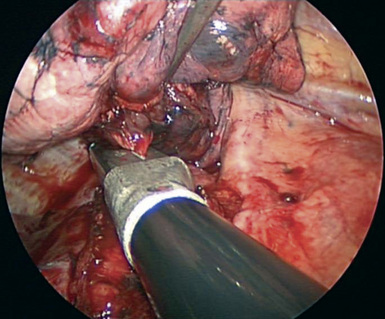
Step 5. Define Right Upper Lobe Bronchus
♦ With Metzenbaum scissors, spread between the artery and the RUL bronchus until the vertebral bodies can be felt posteriorly (Figure 8-9). Be careful to not close the scissors when dissecting along the bronchus because that can cut the posterior ascending artery.
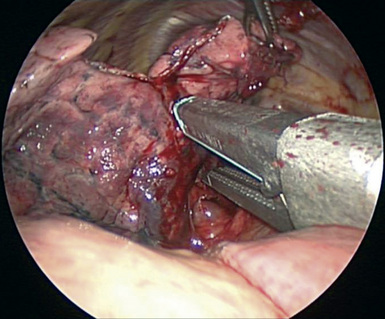
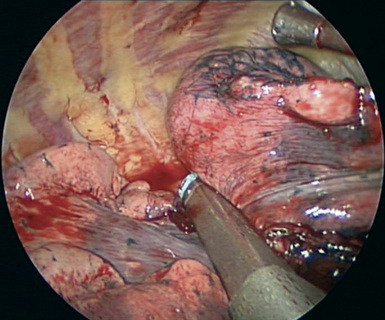
Step 6. Posterior Ascending Artery
♦ With the lobar nodes on the RUL bronchus removed, the RUL bronchus and the posterior ascending artery can be seen clearly.
♦ Dissect bluntly along the posterior ascending artery to determine if there is a common trunk for that artery and the artery for the superior segment of the lower lobe.
♦ After the anatomy is clarified, double clip the origin of the posterior ascending artery (Figure 8-10). Do not clip the distal side of the artery because the clip would be in the staple line when the remainder of the fissure is stapled.
Step 7. Right Upper Lobe Bronchus
♦ Spread the Metzenbaum scissors widely between the RUL bronchus and the posterior ascending artery. Remove the scissors before closing them, because they can cut the artery if they are closed before removal.
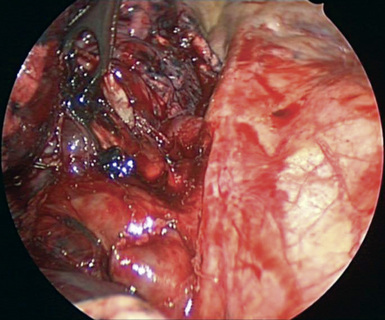
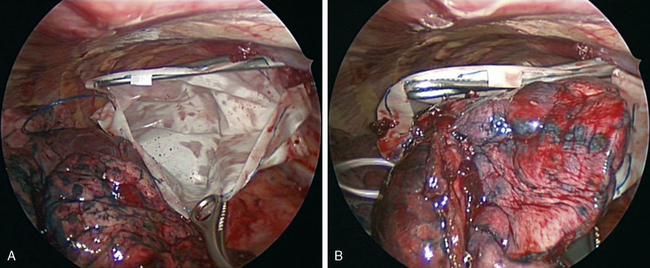
Step 9. Lobe Removal
♦ Exposure: With a ring forceps through incision 4, hold the right lower lobe by the diaphragm to keep it out of view.
♦ The thoracoscope is aimed anteriorly with the 30-degree lens pointed to the apex of the chest for a panoramic view of the chest.
♦ With a ring forceps through the incision in the auscultatory triangle, the RUL is held posteriorly by the diaphragm to keep it out of view.
♦ Pass the Lapsac bag through the utility incision; push the base of the bag to the apex of the chest. With a ring forceps through the utility incision and another through the mid-clavicular incision, hold the bag widely open so the lobe can be inserted (Figure 8-13A).
♦ After the lobe is partially inserted into the bag, pinch the two ring forceps to hold the lobe in the bag (Figure 8-13B).