[level-membership-for-cardiothoracic-surgery-category]
CHAPTER 19 Right Upper Lobe Anterior Segmentectomy—Video 19
 Video-Assisted Right Upper Lobe Anterior Segmentectomy (Video 19)
Step 2. Minor Fissure
♦ Aim the thoracoscope anteriorly, and point the 30-degree lens posteriorly, but it is pulled back almost to the trocar.
♦ The landmarks for completion of the minor fissure are the junction of the minor and major fissures for the staple cartridge and at the confluence of the right upper lobe and right middle lobe veins for the anvil of the stapler.
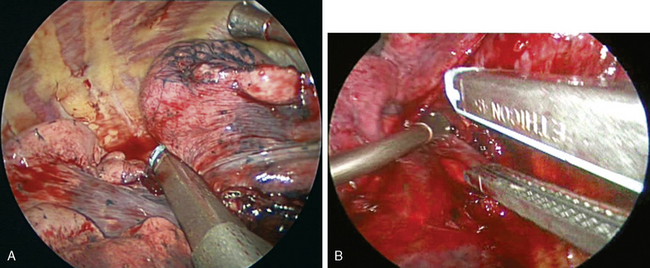
♦ Point the anvil of the stapler toward that venous confluence. Do not move the stapler. With ring forceps, pull the lung parenchyma into the jaws of the 4.8-mm endoscopic stapler pointed toward the fissure. The first firing of the stapler usually completes about one half of the fissure.
♦ With the Metzenbaum scissors through the utility incision, dissect along the inferior aspect of the right upper lobe vein to expose the pulmonary artery that lies posterior and perpendicular to the vein. Dissect the surface of the artery.
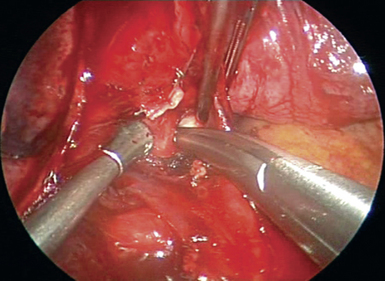
♦ Place the anvil of the stapler between the veins and on the surface of the artery for additional firings of the stapler (Figure 19-1A). Do not move the stapler.
Step 3. Anterior Segmental Vein
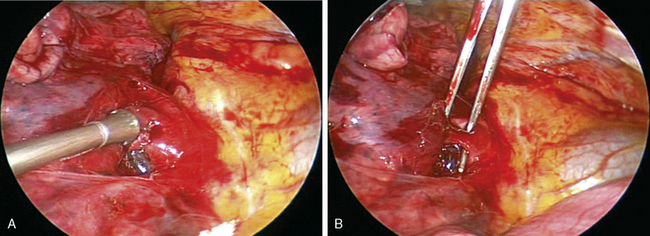
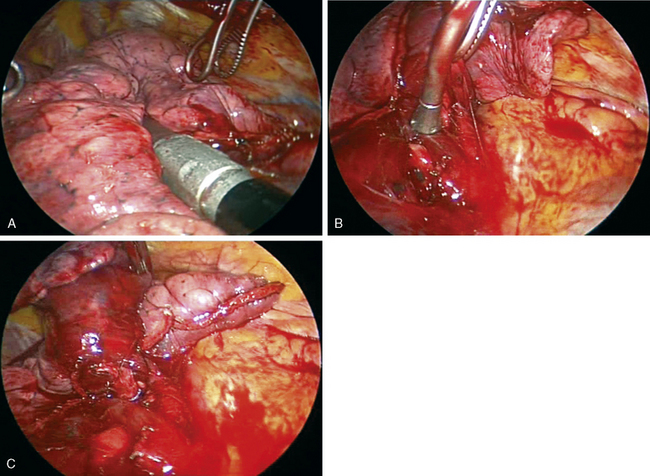
♦ Dissect along the inferior aspect of the upper lobe vein. The inferior-most branch is the vein from the anterior segment (Figure 19-2).
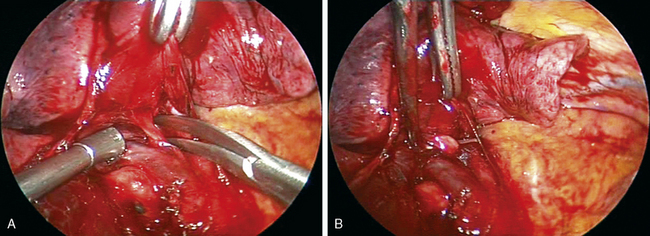
♦ With Metzenbaum scissors through incision 3, dissect the vein, and widely spread a right-angle clamp to create a wide tunnel through which to pass the anvil of the stapler (Figure 19-3).
Step 4. Anterior Segmental Artery
♦ Aim the thoracoscope anteriorly with the 30-degree lens pointed posteriorly. Rotate the camera slightly clockwise.
Step 5. Anterior Segmental Bronchus

[/level-membership-for-cardiothoracic-surgery-category][not-level-membership-for-cardiothoracic-surgery-category]
CHAPTER 19 Right Upper Lobe Anterior Segmentectomy—Video 19
Video-Assisted Right Upper Lobe Anterior Segmentectomy (Video 19)
Step 2. Minor Fissure
♦ Aim the thoracoscope anteriorly, and point the 30-degree lens posteriorly, but it is pulled back almost to the trocar.
♦ The landmarks for completion of the minor fissure are the junction of the minor and major fissures for the staple cartridge and at the confluence of the right upper lobe and right middle lobe veins for the anvil of the stapler.
♦ Point the anvil of the stapler toward that venous confluence. Do not move the stapler. With ring forceps, pull the lung parenchyma into the jaws of the 4.8-mm endoscopic stapler pointed toward the fissure. The first firing of the stapler usually completes about one half of the fissure.
♦ With the Metzenbaum scissors through the utility incision, dissect along the inferior aspect of the right upper lobe vein to expose the pulmonary artery that lies posterior and perpendicular to the vein. Dissect the surface of the artery.
Buy Membership for Cardiothoracic Surgery Category to continue reading. Learn more here
[/not-level-membership-for-cardiothoracic-surgery-category]
