CHAPTER 21 Right-Sided Mediastinal Lymph Node Dissection—Video 21
Approach to Video-Assisted Right-Sided Mediastinal Lymph Node Dissection
 Video-Assisted Right-Sided Mediastinal Lymph Node Dissection
Step 1. Level 9 and 8 Lymph Nodes
♦ Aim the thoracoscope anteriorly, and point the 30-degree lens downward toward the inferior pulmonary ligament.
♦ Bring the suction catheter and the long-tipped electrocautery through the anteroinferior incision. Press the curve of the Yankauer suction catheter onto the diaphragm to hold it out of the way.
♦ If the diaphragm is high and in the way, as is seen frequently in obese patients, place a heavy stitch in the ligamentous portion of the diaphragm. Pull the stitch through the incision for the trocar. Suture it to the skin to retract the diaphragm.
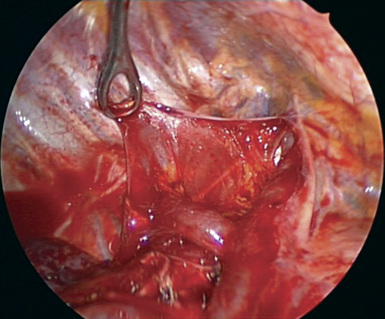
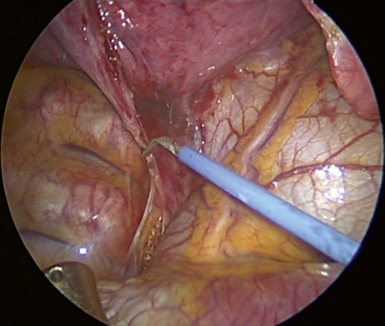
♦ Hold the inferior pulmonary ligament toward the apex of the chest. Level 9 lymph nodes can be seen.
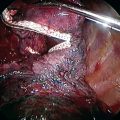
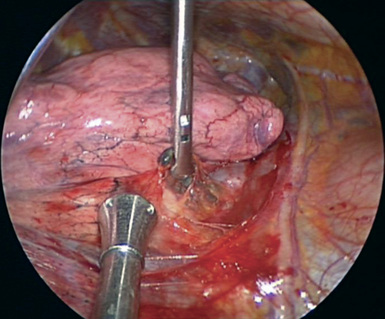
♦ Incise the inferior pulmonary ligament with the long-tipped electrocautery up to the level of the inferior pulmonary vein as shown in Figure 21-1. The tip of the suction catheter should be held close to the electrocautery tip to remove the smoke created.
Step 2. Level 7 Lymph Nodes
♦ Aim the thoracoscope anteriorly, and point the 30-degree lens downward toward the inferior pulmonary ligament.
♦ With ring forceps, which are brought through the inferior and the utility incisions, retract the right lower lobe medially toward the heart.
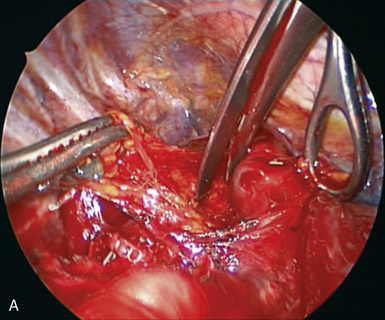
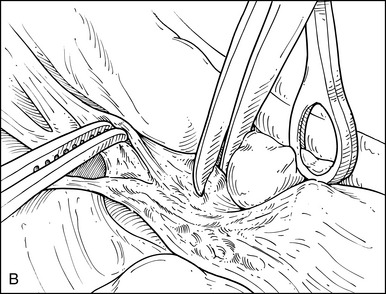
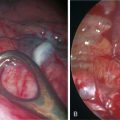
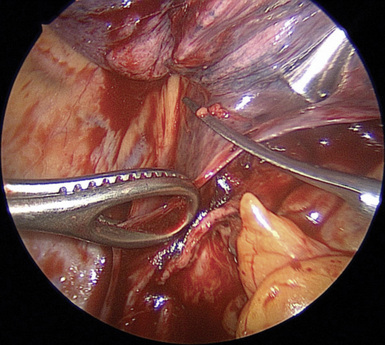
♦ Incise the posterior mediastinal pleura with scissors, which are brought through the anterior incision as shown in Figure 21-2. Carefully incise the pleura at its junction with the lung parenchyma. The natural tendency is to gravitate posteriorly toward the esophagus, but this should be avoided because it causes nuisance bleeding from the esophageal muscle.
♦ Multiple instruments can be brought through each incision. Remove lymph nodes through the utility incision. If lymph nodes containing metastases are pulled through a small incision, cancer cells may be squeezed into the tissues, and the cancer may recur in the incisions.
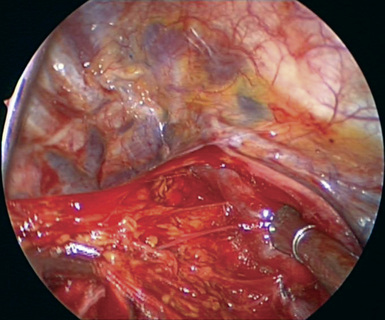
♦ At this point, the inferior pulmonary vein and the posterior aspect of the bronchus intermedius are evident.
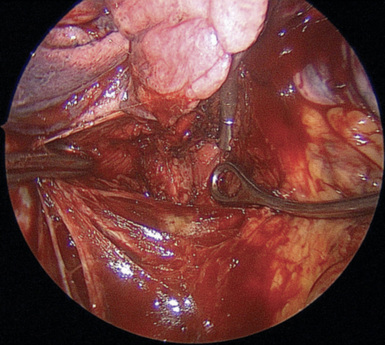
♦ Dissect the border of the bronchus intermedius, which ultimately leads to the subcarinal lymph node station. A combination of sharp and blunt dissection is used to reach station 7 and to remove the nodes as demonstrated in Video 21-1. The dissection planes include the esophagus posteriorly, the pericardium anteriorly, and the carina superiorly.
Step 3. Level 10 Lymph Nodes
♦ Exposure: Pull the right upper lobe (if a prior right upper lobectomy has not been performed) with a long, curved ring clamp inferiorly and posteriorly. If a right upper lobectomy has been performed, with a ring clamp through the anteroinferior incision, pull the middle and the lower lobes posteriorly. With this exposure, dissect the 10, 4, 2, and 3 lymph node stations through the utility incision.
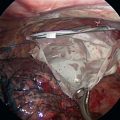
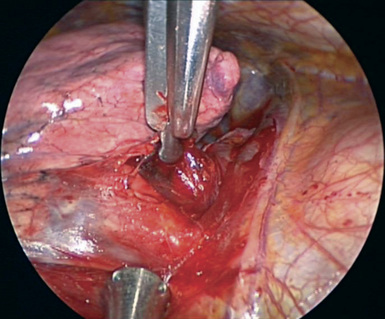
♦ Identify the triangle, which is bordered by the superior aspect of the right hilum, the azygous vein, and the superior vena cava (SVC) (Figure 21-4).
♦ With the Metzenbaum scissors brought through the anterior incision, incise the pleura along these named structures to begin the nodal dissection.
♦ Remove all the soft tissue in this level 10 station with a combination of sharp dissection using the scissors and blunt dissection using the suction catheter.
♦ Sharply dissect posteriorly on the surface of the vein from the apex of the right upper lobe as it passes over the superior hilum. This exposes the anterior trunk of the right pulmonary artery. After these lymph nodes are removed (Figure 21-5), bluntly dissect between the anterior trunk and the right mainstem bronchus if the right upper lobe is to be resected.
Step 4. Level 4 and 2 Lymph Nodes
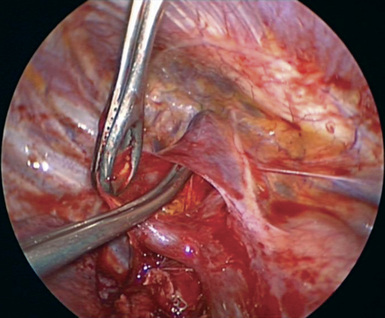
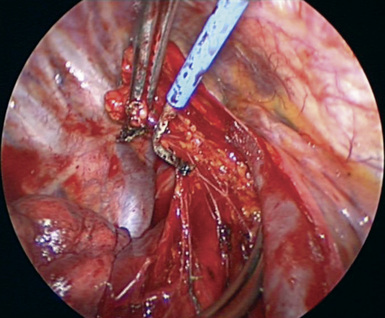
♦ Incise the mediastinal pleura on the superior aspect of the azygous vein and parallel to the SVC. Identify the phrenic nerve on the lateral aspect of the SVC (Figure 21-6). To avoid damaging the nerve, turn the scissors tips so the phrenic nerve can be seen (Figure 21-7).
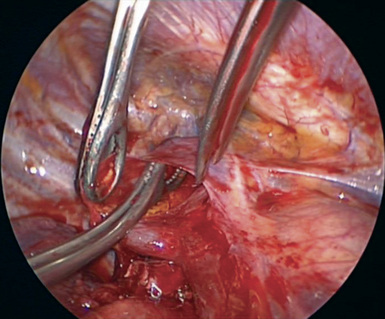
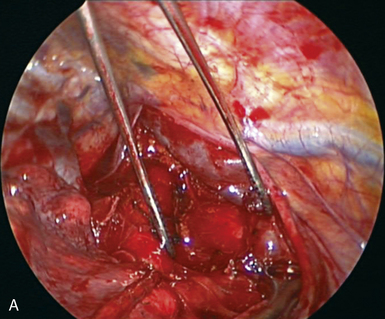
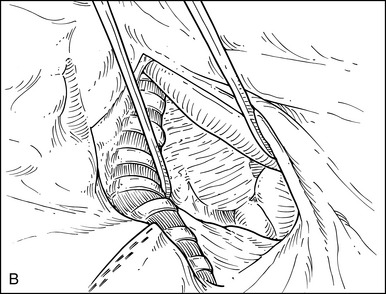
♦ Isolate the azygous vein with the right-angle clamp, which is brought through the utility incision (Figure 21-8).
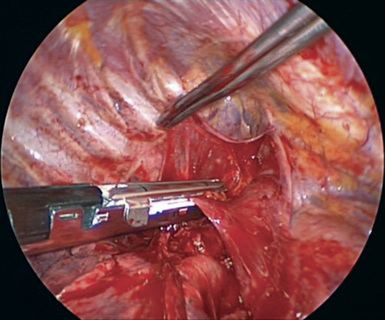
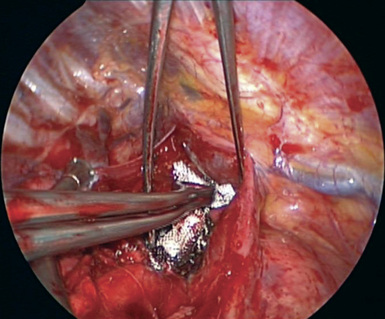
♦ Bring a vascular stapler through the posterior incision to transect the azygous vein (Figure 21-9).
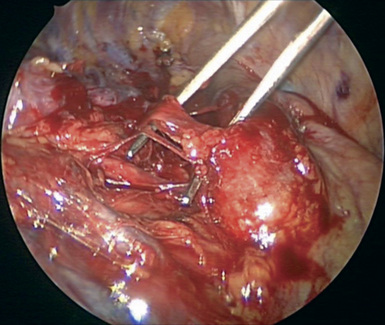
♦ With a combination of blunt and sharp dissection, remove all the tissue between the SVC, the pericardium over the ascending aorta, and trachea from the level of the pulmonary artery to the innominate artery. This removes all level 4 and 2 lymph nodes. Visualize but do not cut the vagus nerve posteriorly (Figure 21-10).
♦ Grasp the lymph node packet in each station with a ring clamp, which can be brought through the utility incision or through the posterior incision. Hold the tissue posteriorly and away from the SVC (Figure 21-11). Use electrocautery for the dissection to minimize bleeding.
♦ Often, a small vein drains the level 4 nodes into the SVC. It should be identified and clipped (Figure 21-12).
♦ Continue this process in a cephalad direction to dissect the level 3 and 2 lymph nodes (Figure 21-13).
♦ A complete mediastinal lymph node dissection done with video-assisted thoracic surgery (VATS) often provides better visualization than with a thoracotomy.
♦ On completion of the full lymph node dissection, the paratracheal region is bare, and the important anatomic landmarks are clearly identified (Figure 21-14).
♦ Minimize usage of electrocautery at the superior margin of this dissection to prevent damage to the recurrent laryngeal nerve. A Surgicel can be tucked into this space for improved hemostasis (Figure 21-15).