CHAPTER 10 Right Lower Lobectomy
Approach to Video-Assisted Right Lower Lobectomy
Key Points
♦ The utility incision is placed one intercostal space lower than the standard superior pulmonary vein level to allow better access to the structures in the lower thoracic cavity.
Video-Assisted Right Lower Lobectomy
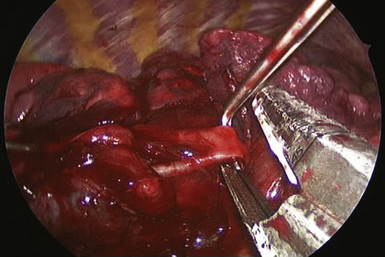
Step 1. Inferior Pulmonary Ligament Takedown
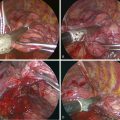
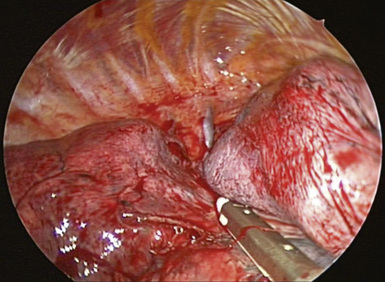
♦ Use electrocautery with an extended tip (or other energy source) to transect the inferior pulmonary ligament (Figure 10-1).
♦ Collect any station 9 inferior pulmonary ligament lymph nodes, and send them to pathology. Lymph nodes should be removed through the utility incision to avoid tumor implantation in smaller incisions.
♦ Electrocautery introduced from incision 1 transects the ligament up to the level of the right inferior pulmonary vein.
Step 2. Inferior Pulmonary Vein
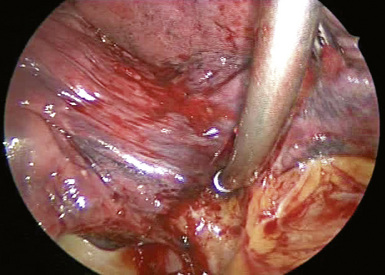
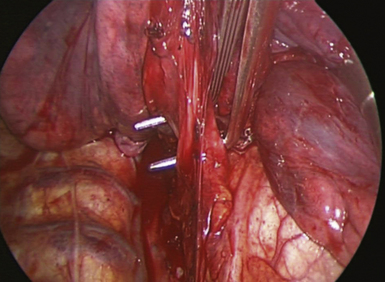
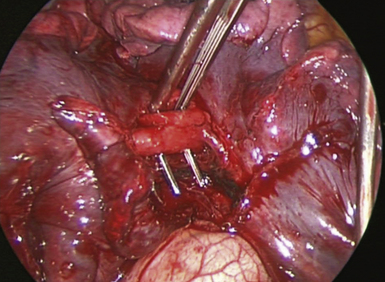
♦ Clearly identify the right inferior pulmonary vein. Ensure that the right middle lobe vein does not aberrantly drain into the right inferior pulmonary vein (Figure 10-3).
♦ Use Metzenbaum scissors and right-angle instruments to dissect along the superior border of the vein. Avoid injury to the back wall of the vein by directing instrument tips toward the bronchus (superiorly) rather than the vein wall.
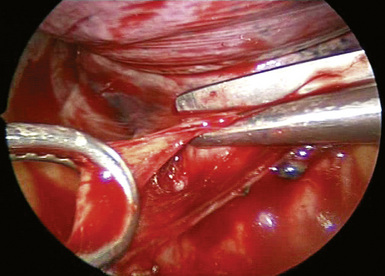
♦ Introduce an endoscopic vascular stapler through the utility incision. A suture can be passed around the vessel for retraction if the stapler does not easily pass around the vessel.
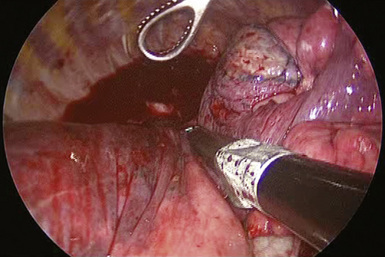
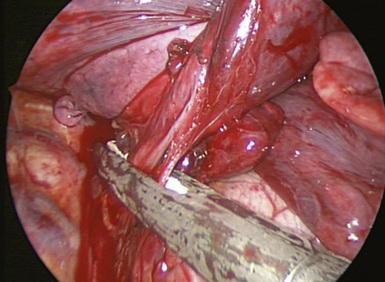
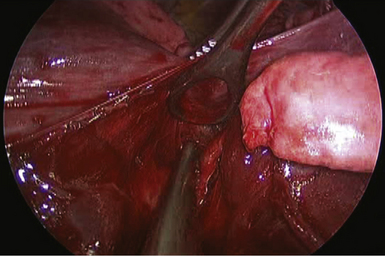
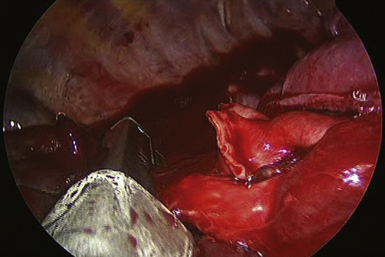
♦ Pass the cartridge between the vein and the bronchus because it extends farther than the anvil (Figure 10-4); this approach ensures that the stapler completely crosses the vein before stapling (Figure 10-5). Have a sponge stick immediately available for tamponade if bleeding occurs. After transecting the vein, the RLL bronchus can be seen (Figure 10-6) and blunt dissection should prepare it for transection.
Step 3. Right Lower Lobe Pulmonary Artery
♦ The thoracoscope is aimed anteriorly with the 30-degree lens pointed posteriorly. Intermittently, it is necessary to position the thoracoscope posteriorly with the 30-degree lens pointed anteriorly to see the opposite side of dissection.
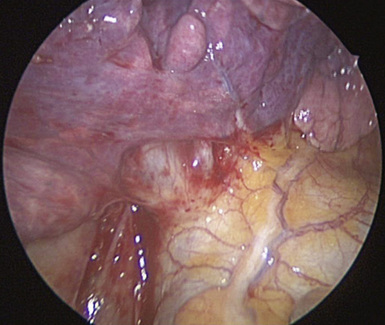
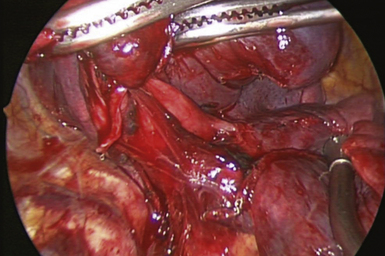
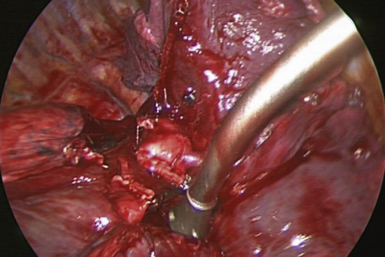
♦ Metzenbaum scissors dissect on the surface of the artery (Figure 10-7) to create a tunnel for the stapler to complete the fissure. The right lower lobe pulmonary artery should be clearly visible. If not, gentle blunt dissection of the lung parenchyma can expose the vessel (Figure 10-8).
♦ Use Metzenbaum scissors or right-angle instruments to dissect the right lower lobe pulmonary artery away from the lung parenchyma. Remain on guard for pulmonary artery branches that may not be visible. Do not force instruments during dissection.
♦ Suture may be used to encircle and gently retract vessels for insertion of endoscopic vascular staplers.
♦ Avoid tension on the pulmonary artery during use of the stapler. Stabilize the stapler at the chest wall level to prevent movement during stapling (Figure 10-9).
♦ Visualize the artery well to see that the stapler will not compromise a possible accessory artery for the right middle lobe, as seen in Figure 10-10.
Step 4. Right Lower Lobe Bronchus
♦ The thoracoscope is aimed anteriorly with the 30-degree lens pointed posteriorly. Intermittently, it is necessary to position the thoracoscope posteriorly with the 30-degree lens pointed anteriorly to see the opposite side of dissection.
♦ Any lymph nodes that obstruct the view of the bronchus should be removed separately or swept so that they can be removed en bloc with the specimen.
♦ Use cautery (or other energy source) for any small bronchial vessels. Avoid clips because they can disrupt later stapling.
♦ Use Metzenbaum scissors or right-angle instruments to dissect the right lower lobe bronchus away from the underlying pulmonary artery. Avoid injury to the pulmonary artery by keeping instrument tips close to the bronchus.
♦ Create the dissection plane distal to the right middle lobe bronchus but proximal to the bronchus to the superior segment of the right lower lobe. If this is not possible because of the proximity of the bifurcation, dissect and transect the right lower lobe superior segment bronchus separately.
♦ Bring an endoscopic stapler for thick tissue (usually a green load cartridge) into the chest through the utility incision and across the bronchus (Figure 10-11). Close the stapler without firing. Reinflation of the lung at this time helps to ensure that the correct bronchus is occluded and that there is no impingement on other bronchi (i.e., right middle lobe bronchus). Ensure there are no devices within the airway, and fire the stapler (Figure 10-12). Alternatively, if the stapler is rotated counterclockwise, the middle lobe bronchus can be clearly seen to avoid compromising it with the staple (Figure 10-12).
Step 5. Major Fissure Completion
♦ Using a tissue stapler (usually a green load cartridge for thick tissue) placed through incision 1, complete the fissure (Figure 10-13).