CHAPTER 30 Reduction and Deltoid Tensioning
Perhaps the most important and yet most subjective portion of the surgical technique for implantation of a reverse prosthesis is proper tensioning of the deltoid. The most frequent complication of a reverse prosthesis that requires further treatment is dislocation of the glenohumeral prosthesis. Proper tensioning of the deltoid can help minimize this complication.
HUMERAL COMPONENT TRIALING
After the humeral component has been inserted as described in Chapter 28, humeral component trialing begins. In patients with proximal humeral bone loss, component trialing should not begin before complete curing of the polymethylmethacrylate. In patients with good proximal support of the humeral component, prosthetic trialing commences immediately after insertion of the humeral component within the bone cement.
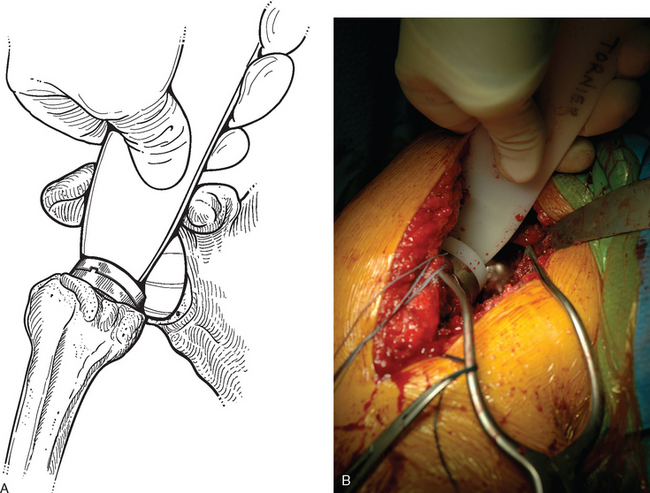
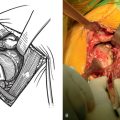
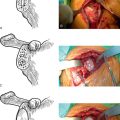
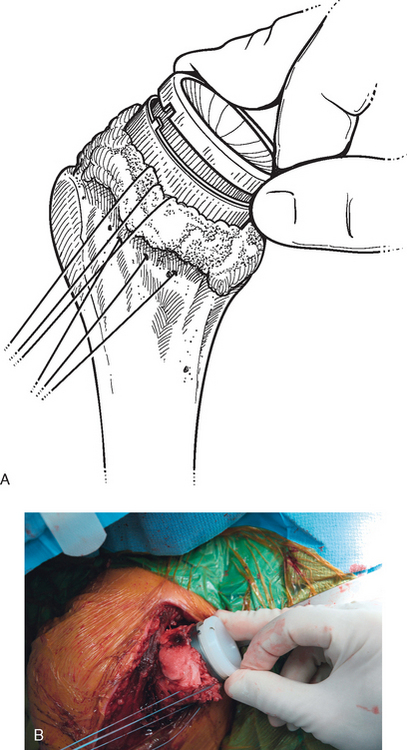
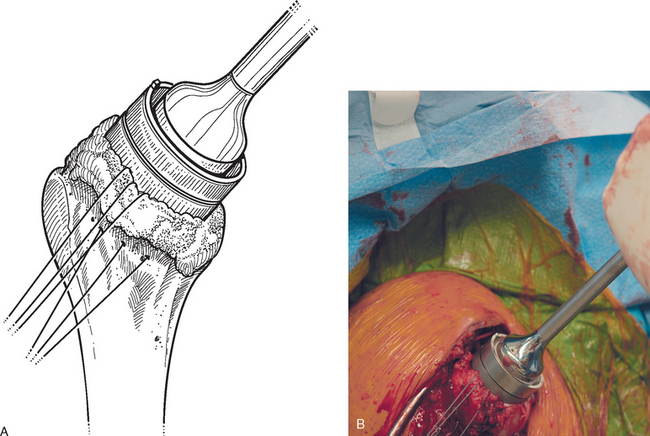
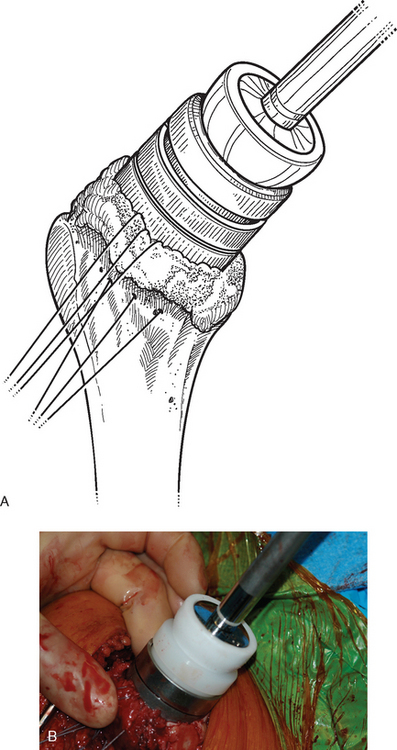
Trial reduction starts with insertion of the 6-mm polyethylene trial insert into the metaphyseal portion of the final implant (Fig. 30-1). The glenohumeral joint is reduced (this should be somewhat difficult) by applying longitudinal traction to the arm and placing a finger in the “cup” of the trial insert to guide the humeral component toward the glenosphere (Fig. 30-2). Gradually flexing the arm as traction is applied assists in reduction. Deltoid tension is evaluated by stabilizing the scapula and applying longitudinal traction to the arm in neutral position (Fig. 30-3). We have anesthesia personnel maintain neuromuscular paralysis during this portion of the procedure, and the anterior glenoid rim retractor holding the conjoined tendon medially is relaxed. A finger is placed at the interface of the humeral and glenoid components (Fig. 30-4). Minimal (<2 mm) “pistoning” should occur with this maneuver. If tension is inadequate, the 9-mm insert is placed and reduction and testing are repeated. A 12-mm insert is available, as is a 9-mm metallic metaphyseal augment, to further increase tension if necessary (Fig. 30-5). Once appropriate tension has been obtained, it may be difficult to dislocate the implant with the trial polyethylene insert. We routinely use a bone hook on the edge of the trial insert to provide traction on the prosthesis (Fig. 30-6). As traction is applied, the arm is extended to dislocate the prosthesis.

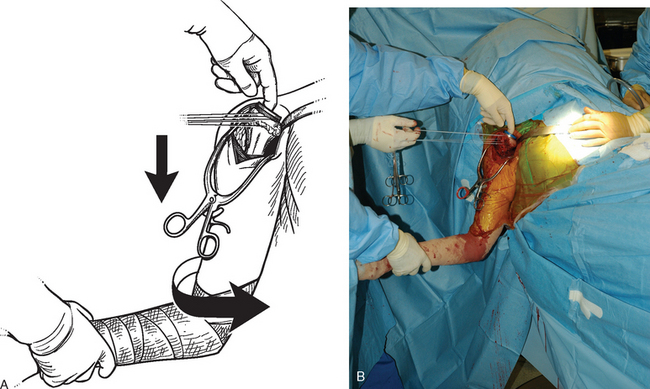
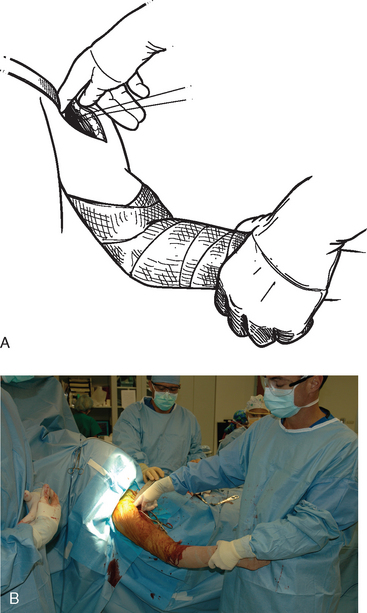
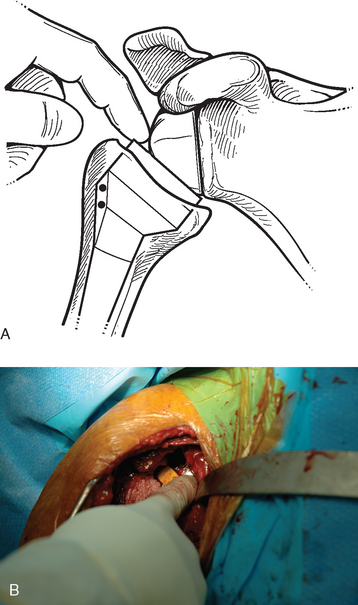
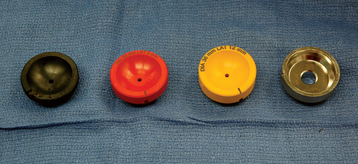
Figure 30-5 Polyethylene inserts of various sizes and a metallic metaphyseal augment used to increase deltoid tension.
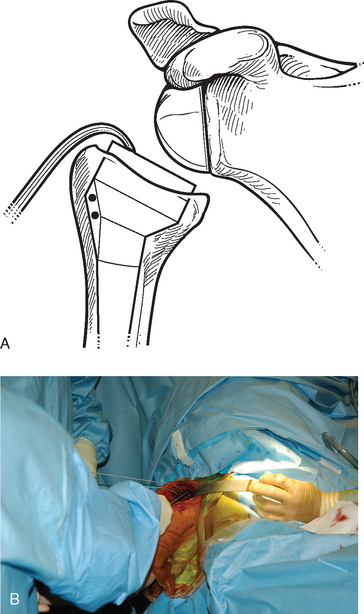
Figure 30-6 A and B, Dislocation after trial reduction of an adequately tensioned reverse prosthesis with a bone hook.
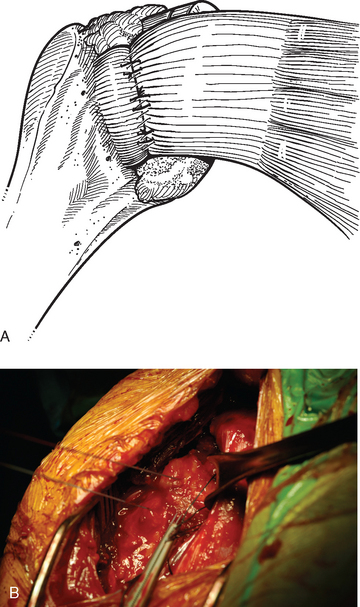
After an insert of appropriate size is selected, the final spacer implant is impacted into the metaphyseal portion of the humeral component while taking care to align the notch in the insert appropriately (Fig. 30-7). When necessary, a metallic metaphyseal augment is placed first by impacting it into the humeral component like the polyethylene insert and then further securing it with a central screw (Fig. 30-8). The polyethylene insert is then impacted into the augment (Fig. 30-9). If present, the subscapularis is repaired with the previously placed transosseous sutures to further enhance prosthetic stability (Fig. 30-10).
SPECIAL CONSIDERATIONS—METAPHYSEAL BONE LOSS
Severe humeral metaphyseal bone loss merits special consideration during implantation of a reverse prosthesis. Nearly all cases of prosthetic dislocation that we have observed have occurred in this situation. During primary arthroplasty with a reverse prosthesis, metaphyseal bone loss most commonly occurs when treating fracture sequelae (Fig. 30-11). With metaphyseal bone loss, no capsular or rotator cuff attachments exist between the scapula and humerus, thus leaving the large muscles of the shoulder girdle (deltoid, short head of the biceps, coracobrachialis) to provide nearly all the soft tissue tension and hence stability for the reverse prosthesis. Although the initial reduction of the reverse prosthesis may seem adequately tensioned, the biomechanical properties of these large muscles (compliance, stretch) allow them to lengthen over time and cause the initial tension to dissipate, thereby potentially leading to prosthetic instability (Fig. 30-12).
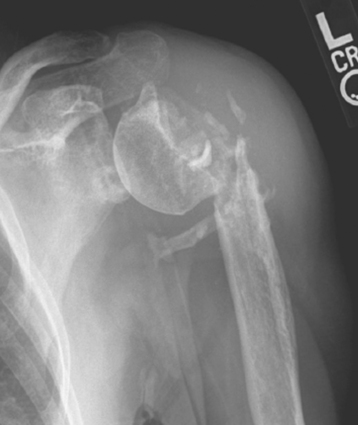
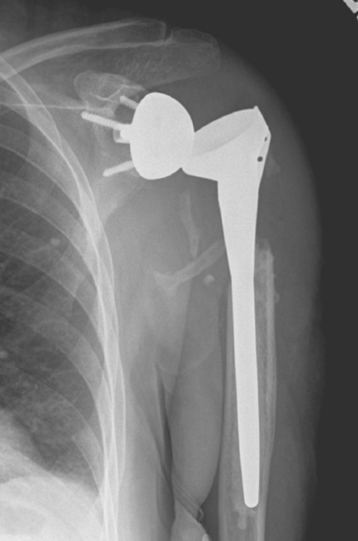
Figure 30-12 Case of prosthetic instability occurring in a patient with significant proximal humeral bone loss.
We address metaphyseal bone loss at the time of insertion of the reverse prosthesis by maximizing soft tissue tension during implantation and reduction of the prosthesis. In this situation, after insertion of the glenoid component, we reinsert the trial humeral stem with the 6-mm polyethylene insert and reduce the prosthetic glenohumeral joint. With longitudinal traction placed on the arm, the humeral component is manually telescoped maximally out of the humerus to the glenoid component (Fig. 30-13), and the level of the trial humeral implant with respect to the proximal humerus is marked (Fig. 30-14). The distance between the metaphyseal-diaphyseal prosthetic junction and the mark made with respect to the proximal humerus is compared with the distance templated preoperatively (see Chapter 25) to evaluate restoration of appropriate humeral length. This enables an estimation of the appropriate level at which to cement the humeral component. If the humeral component is cemented too distally within the humerus, adequate tension may not be obtainable. Conversely, if the humeral component is cemented too proximally within the humerus, the prosthetic joint may be irreducible.

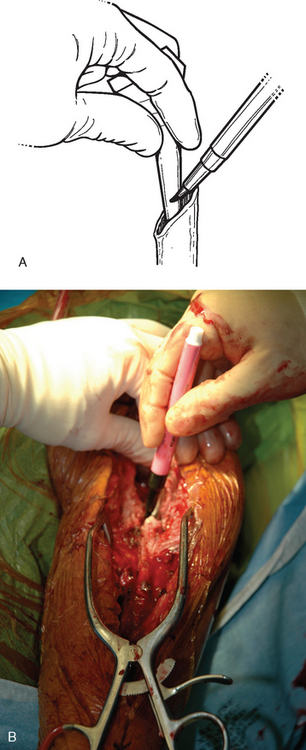
Figure 30-14 A and B, The implant is marked to assist in placing the humeral component at the appropriate level.
Once the humeral component has been cemented in place within the humerus (see Chapter 28), trialing of the various inserts commences as previously described. In the scenario of metaphyseal bone loss, however, no pistoning is accepted between the components. Additionally, we often use a “shoe horn” instrument to aid in reduction by levering the humerus distally to engage the glenoid (Fig. 30-15). Once appropriate tension has been achieved, the final polyethylene insert is placed as described previously.