CHAPTER 7 Pneumonectomy—Video 7
Approach to Video-Assisted Pneumonectomy
 Left Pneumonectomy (Video 7-1)
Step 1. Level 5 and 6 Node Dissection on the Left
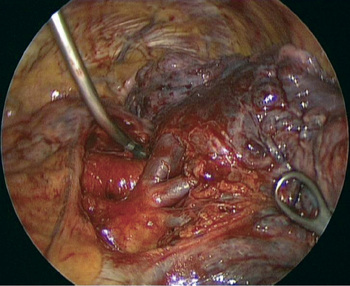
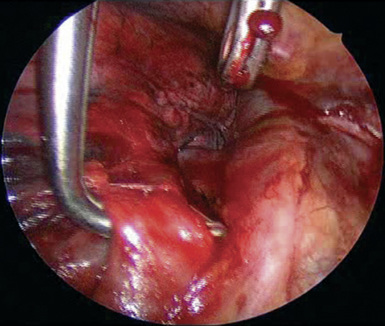
♦ Dissect at the inferior aspect of the SPV. Lift the inferior aspect of the fat with a ring forceps. Use Metzenbaum scissors at the junction of the fat and the pericardium.
♦ Pull the fat inferiorly and posteriorly to expose the phrenic nerve. Metzenbaum scissors incise the pleura, just posteriorly to the phrenic nerve. Rotate the Metzenbaum scissors clockwise to see the nerve well and avoid cutting it.
♦ Incise the pleura along the superior aspect of the SPV and the vein from the apex of the lung. Continue over the superior aspect of the hilum, because this mobilizes the anterior trunk of the artery (Figure 7-1).
Step 2. Left Superior Pulmonary Vein
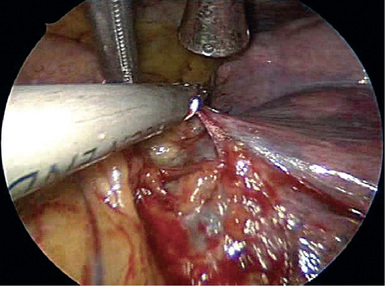
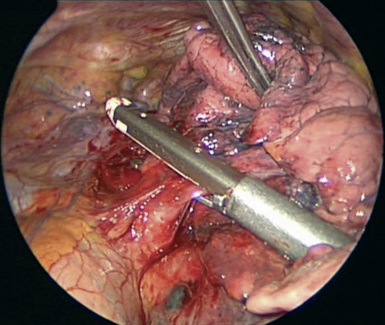
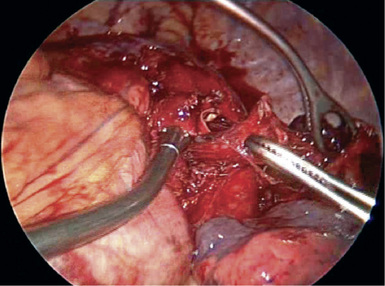
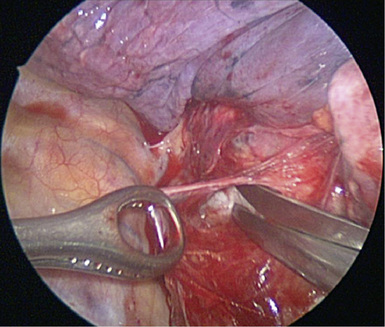
♦ Lift the SPV with a ring forceps (Figure 7-3), and with the Metzenbaum scissors or the Yankauer suction catheter through incision 1, dissect under the SPV. The bronchus is directly behind the vein.
♦ With DeBakey forceps through incision 3, lift the soft tissue between the SPV and the pulmonary artery.
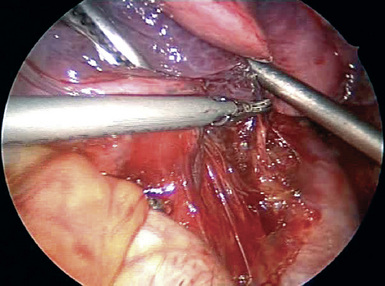
♦ A right-angle clamp through incision 1 moves inferiorly to superiorly around the SPV (Figure 7-4). Blunt dissection with the right-angle instrument can be performed several times to mobilize the SPV. Progress of the dissection can be seen better if the 30-degree lens is rotated to look from posterior to anterior and if the SPV is lifted with a ring forceps or a pickup.
♦ Be careful when lifting pulmonary vessels. The vein should be held with a good purchase to minimize the chances of injury. A small purchase on a pulmonary vessel may tear the surface of the vessel.
♦ When the right-angle clamp has nearly passed around the SPV, look for the tip of the right-angle instrument on the superior aspect of the SPV. This can be seen better if the 30-degree lens is rotated to look from anterior to posterior.
♦ Spread widely with the right-angle clamp to create a large tunnel that easily allows passage of the stapler from incision 4.
♦ Staple the vein (Figure 7-5). Have a ring forceps in the chest through incision 3 as the stapler fires. The staple line may leak, and a ring forceps in the chest can control the bleeding.
Step 3. Left Inferior Pulmonary Vein
♦ The diaphragm can be retracted with the curve of the Yankauer suction and the tip of the suction pointed toward the inferior pulmonary ligament.
♦ Retract the lung slightly posteriorly to dissect bluntly between the IPV and the SPV. This can be accomplished quickly with the Yankauer suction. The vein from the superior segment can be seen.
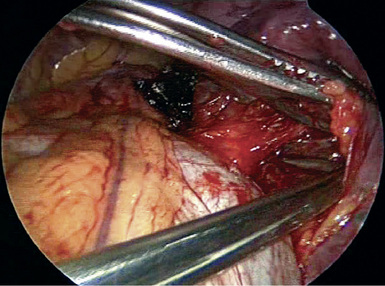
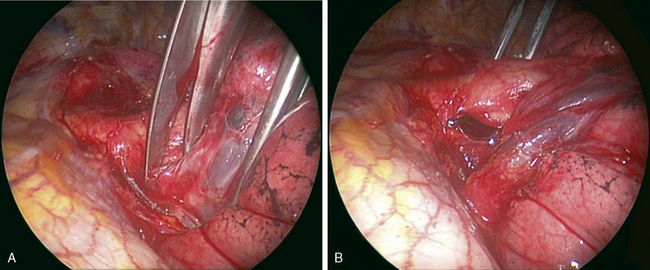
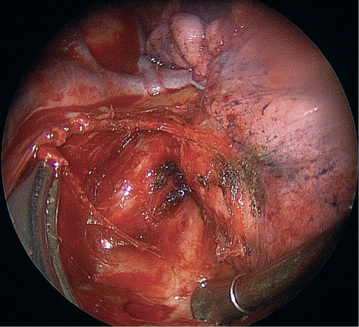
♦ Retract the lung anteriorly. Metzenbaum scissors through incision 1 incise the pleura posterior to the IPV. Dissection continues along the pericardium. A lymph node located posterior and superior to the IPV can be held with a ring forceps from incision 4. Removal of that node greatly facilitates IPV mobilization (Figure 7-6).
Step 4. Left Subcarinal Node Dissection
♦ Use Metzenbaum scissors through incision 1 to cut the pleura along the bronchus and just anterior to the vagus nerve.
♦ Blunt dissection with the Yankauer suction or the Metzenbaum scissors through incision 1 begins on the surface of the pericardium. A ring forceps from incision 4 holds the soft tissue in the subcarinal space. The esophagus and the vagus nerve constitute the posterior border for the dissection. There is a tendency to dissect toward the esophagus, but the dissection should be away from the esophagus and toward the bronchus.
Step 5. Left Pulmonary Artery
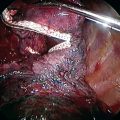
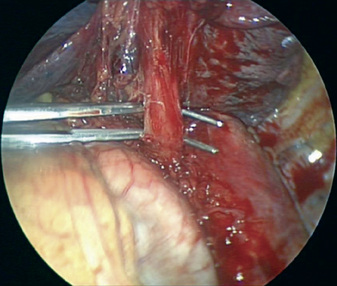
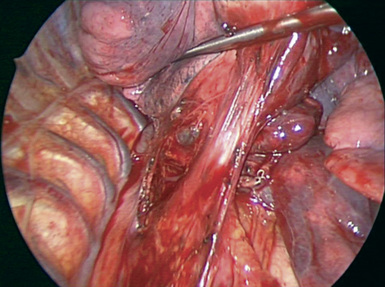
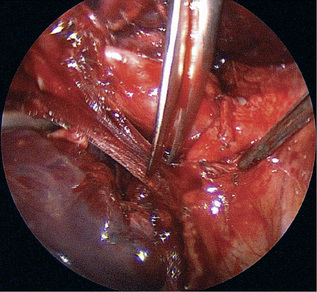
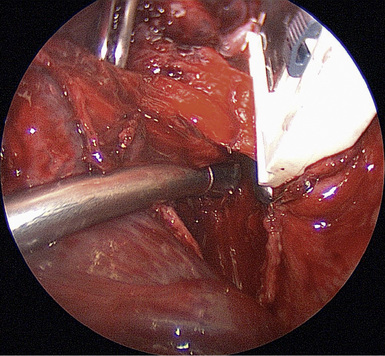
♦ The inferior aspect of the pulmonary artery is well exposed after the SPV and IPV have been transected. Perform blunt dissection with a Yankauer suction or Metzenbaum scissors through incision 3 between the pulmonary artery and the bronchus (Figure 7-10).
♦ The superior aspect of the pulmonary artery is well exposed after the nodes have been dissected. Perform blunt dissection with a Yankauer suction or Metzenbaum scissors through incision 3 into the aortopulmonary window.
♦ Through incision 3, a right-angle clamp passes around the pulmonary artery after the blunt dissection has nearly completely mobilized the artery.
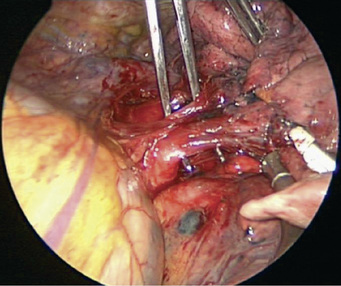
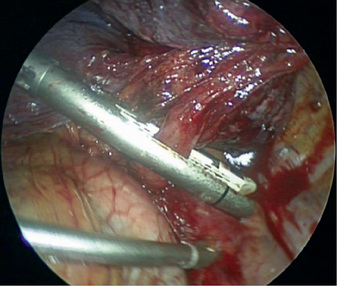
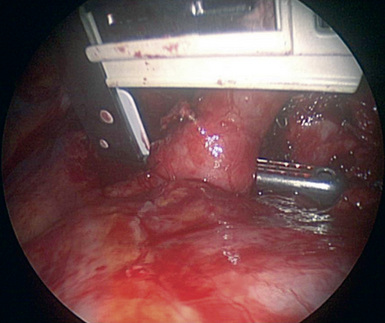
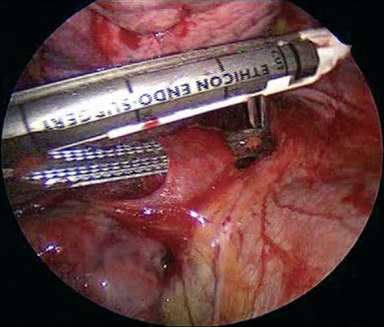
♦ Use an open stapler, such as the Covidien TA 30 or Ethicon TX 30 for the artery. Put the pin down, and pull the lung through the stapler to position the stapler (Figure 7-11).
♦ Placement of an additional stapler more distally on the artery can prevent back bleeding when the artery is transected with scissors or a scalpel through incision 3.
Step 6. Left Mainstem Bronchus
♦ Anteriorly, the bronchus needs to be mobilized from the pericardium. Accomplish this with blunt or sharp dissection through incision 3.
 Right Pneumonectomy (Video 7-2)
Step 1. Level 10 Node Dissection
♦ The Metzenbaum scissors and the DeBakey pickups incise the pleura just posterior to the phrenic nerve and from the SPV to the azygous vein.
♦ Incise the pleura along the inferior aspect of the azygous vein. To see this area well, retract the lung slightly more inferiorly. The 30-degree lens and the thoracoscope are rotated slightly clockwise (Figure 7-12).
♦ Incise the pleura on the superior aspect of the IPV and the vein from the apex of the right upper lobe.
♦ Lift the fat and level 10 nodes to dissect along the pericardium, vessels, and the right mainstem bronchus.
♦ When the nodes have been removed, through incision 3, apply a Yankauer suction tip or the Metzenbaum scissors bluntly along the superior aspect of the right main pulmonary artery.

Step 2. Right Superior Pulmonary Vein
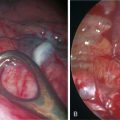
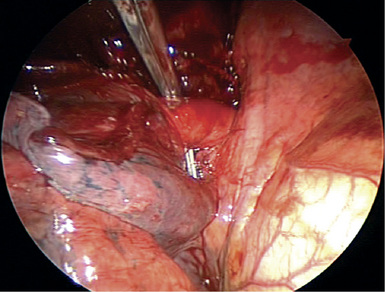
♦ With the Metzenbaum scissors or the Yankauer suction catheter through incision 1, bluntly dissect between the SPV and the IPV (Figure 7-13).
♦ Lift the SPV with a ring forceps or DeBakey pickups. With the Metzenbaum scissors or the Yankauer suction catheter through incision 1, dissect under the SPV. The artery is directly behind the vein.
♦ With DeBakey forceps through incision 3, lift the soft tissue between the SPV and the pulmonary artery.
♦ A right-angle clamp through incision 1 runs inferiorly to superiorly around the SPV (Figure 7-14). Blunt dissection with the right-angle clamp can be performed several times to mobilize the SPV. Progress of the dissection can be seen better if the 30-degree lens is rotated to look from posterior to anterior and the SPV is lifted with a ring forceps or a pickup.
♦ Be careful when lifting pulmonary vessels. The vein should be held with a good purchase to minimize the chances of injury. Inadequate purchase on a pulmonary vessel may tear the surface of the vessel.
♦ When the right-angle clamp has nearly passed around the SPV, look for the tip of the right-angle instrument on the superior aspect of the SPV. This can be seen better if the 30-degree lens is rotated to look from anterior to posterior.
♦ Spread widely with the right-angle clamp to create a large tunnel that easily allows passage of the stapler from incision 4.
♦ Staple the vein (Figure 7-15). Have a ring forceps in the chest through incision 3 as the stapler fires. If the staple line leaks, use a ring forceps to apply pressure and control the bleeding.
Step 3. Right Inferior Pulmonary Vein
♦ Retract the diaphragm with the curve of the Yankauer suction and with the tip of the suction pointed toward the inferior pulmonary ligament.
♦ The extension of the electrocautery through incision 1 takes down the inferior pulmonary ligament.
♦ Retract the lung slightly posteriorly to dissect bluntly between the IPV and the SPV. This can be accomplished quickly with the Yankauer suction tip. The vein from the superior segment can be seen.
♦ Retract the lung anteriorly. Metzenbaum scissors through incision 1 incise the pleura posterior to the IPV. Dissection continues along the pericardium. A lymph node located posteriorly and superiorly to the IPV can be held with a ring forceps from incision 4. Removal of the node greatly facilitates IPV mobilization (Figure 7-16).
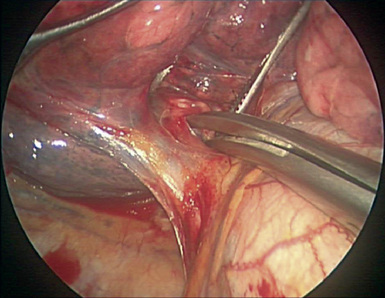
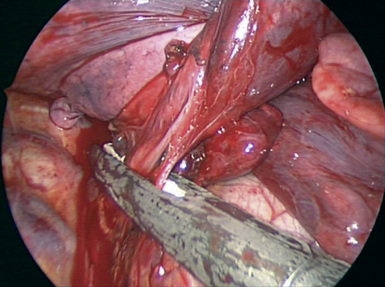
♦ Metzenbaum scissors, the Yankauer suction tip, or a right-angle clamp introduced through incision 1 or 3 passes around the IPV (Figure 7-17).
Step 4. Right Subcarinal Node Dissection
♦ Metzenbaum scissors through incision 1 cut the pleura from the IPV to almost the level of the azygous vein.
♦ Blunt dissection with the Yankauer suction tip or the Metzenbaum scissors through incision 1 begins on the surface of the pericardium (Figure 7-18). A ring forceps from incision 4 holds the soft tissue in the subcarinal space. The esophagus and the vagus nerve constitute the posterior border for the dissection. There is a tendency to dissect toward the esophagus, but the dissection should be away from the esophagus and toward the bronchus.
Step 5. Right Pulmonary Artery
♦ Blunt dissection with a Yankauer suction tip or Metzenbaum scissors through incision 3 separates the intermediate bronchus from the pericardium.
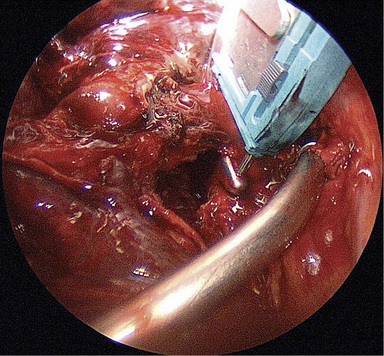
♦ The superior aspect of the right main pulmonary artery is well exposed after the level 10 nodes have been dissected. Blunt dissection with a Yankauer suction tip or Metzenbaum scissors through incision 3 mobilizes the inferior aspect of the artery away from the bronchus (Figure 7-20).
Step 6. Right Mainstem Bronchus
Step 7. Lung Removal
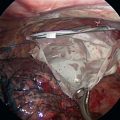
♦ Pull the lung with a ring forceps to the bottom of the chest to create a space for the removal bag.
♦ Using a ring forceps through incision 3, place the base of the Lapsac bag at the apex of the chest.
♦ Using a ring forceps from incision 4 or 1, push the lung into the bag. This usually takes several steps. When the lung is partially placed in the bag, the ring forceps pinches the lung, and the ring forceps that was holding the lung grabs a lower purchase on the lung and again pushes it into the bag.