Chapter 5 Open Retromuscular Ventral Hernia Repair 
1 Clinical Anatomy
 Retrorectus repair requires a thorough knowledge of the relative anatomy of the myofascial components of the abdominal wall.


 The lateral abdominal wall consists of three flat muscles: external oblique, internal oblique, and transversus abdominis. The flat muscles cross each other similar to a three-ply corset that strengthens the abdominal wall and diminishes the risk of herniation between the muscle bundles. One important consideration for the retrorectus repair is the fact that in the upper third of the abdomen, the transversus abdominis extends medially beyond the overlying linea semilunaris as a primary muscular component not as fascia (Fig. 5-1).
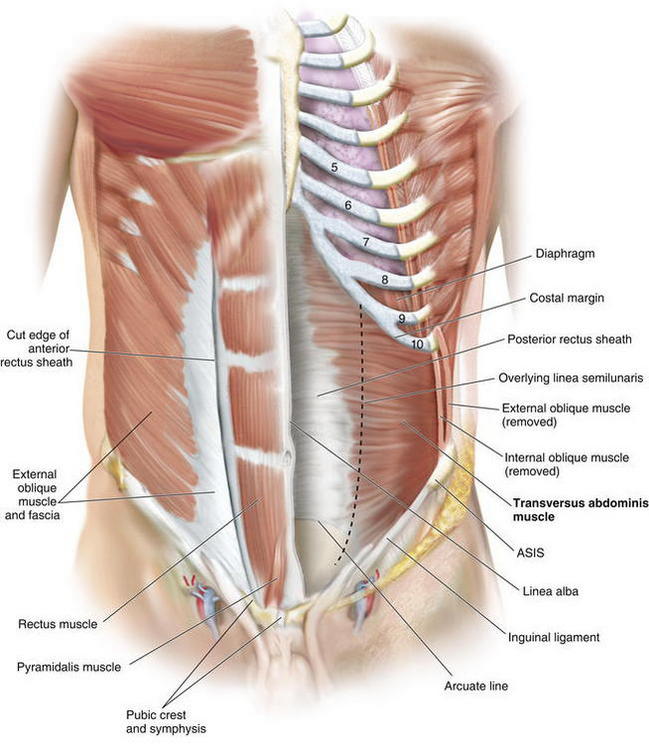
2 Preoperative Considerations
 Preoperative Imaging
 I recommend routine abdominal/pelvic computed tomography (CT) imaging. CT delineates all abdominal wall defects, assessment of the integrity of the remaining abdominal wall musculature, allows for detection of previous synthetic meshes and/or occult infection, and facilitates perioperative planning. I also mandate a screening colonoscopy in appropriate patients before undertaking major abdominal wall reconstructions.
 Preoperative Optimization


3 Operative Steps


 Lysis of Adhesions, Removal of Old Mesh


 Incision of the Posterior Rectus Sheath (Rives-Stoppa-Wantz Technique)
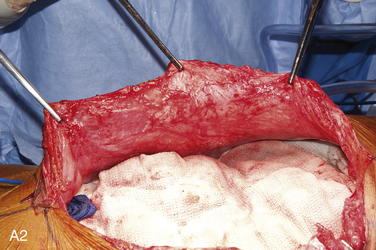
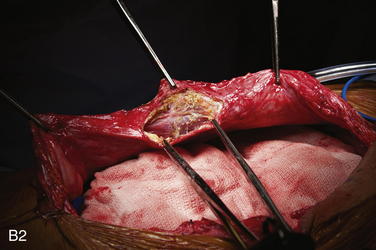
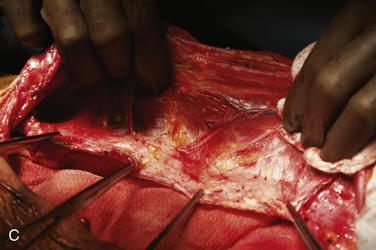
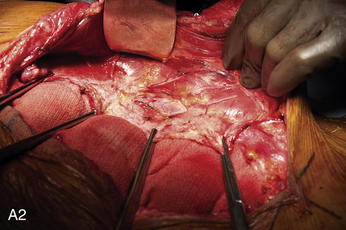
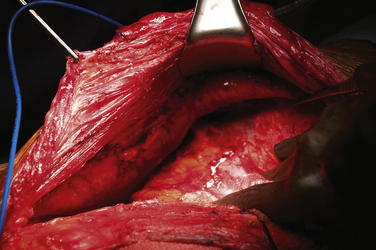
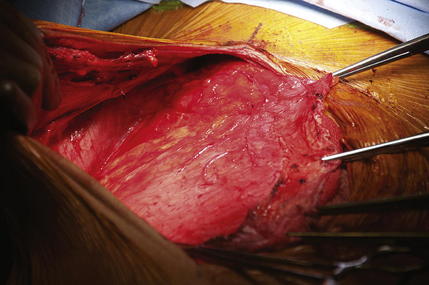
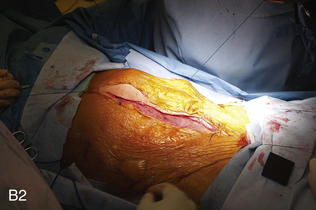
 To dissect the retromuscular space to the linea semilunaris, the posterior rectus sheath is incised sharply about 0.5 cm from its edge (Fig. 5-2, A). This typically is initiated at the level of the umbilicus. The retromuscular plane is then developed using a combination of blunt dissection and electrocautery. The lateral extent of this dissection is the linea semilunaris, confirmed by visualizing the junction between the posterior and anterior rectus sheaths (Fig. 5-2, B). Careful identification of the intercostal nerves and vessels is critical to maintaining an innervated functional abdominal wall (Fig. 5-2, C).
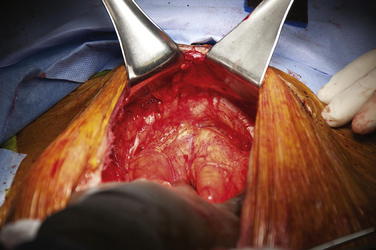
 Exposure of Cooper’s ligaments/pubis is shown in Figure 5-3. Inferiorly, the space or Retzius is entered to expose the pubis symphysis and both Cooper’s ligaments. This dissection is blunt in what is typically a bloodless plane. Since this area is below the arcuate line, posterior layer includes peritoneum and transversalis fascia only. Because both of these layers are very thin, fenestrations are not uncommon and should be repaired. Care should be taken to identify and preserve inferior epigastric vessels that course along the deep surface of the rectus muscles. The urinary bladder may be filled with saline to facilitate its identification and dissection. This is particularly prudent in patients with a previous history of pelvic surgery.
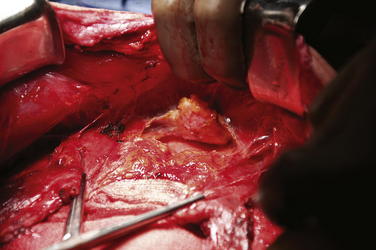
 Exposure of the subxiphoid space is shown in Figure 5-4. The retromuscular plane can be extended cephalad to the costal margin and to the retroxiphoid/retrosternal areas.
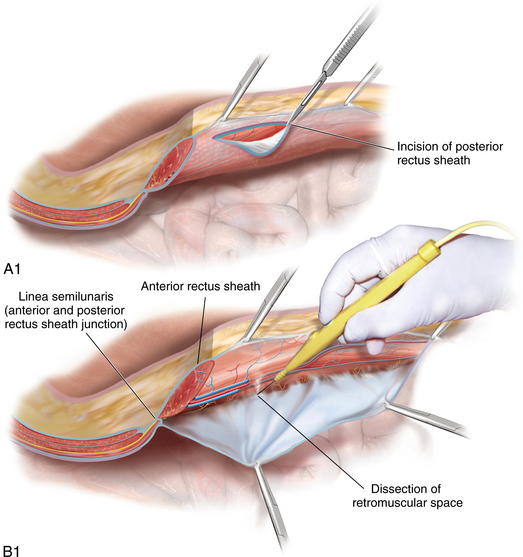
 Lateralization of the Dissection Plane Beyond the Linea Semilunaris
 Traditional Rives-Stoppa-Wantz dissection is carried out to the lateral edge of the rectus sheath. However, such dissection is insufficient for some patients undergoing major abdominal wall reconstructions for three main reasons: (1) insufficient medial advancement of the posterior rectus sheath, (2) decreased potential for medialization of the rectus muscles, and (3) insufficient space for large prosthetic reinforcement.
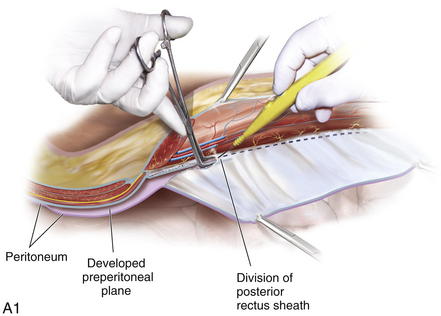
 Three techniques for lateral extension of the retromuscular plane have been described. They are the preperitoneal, posterior component separation with intramuscular dissection, and the posterior component separation with transversus abdominis release (TAR). A description of each follows.
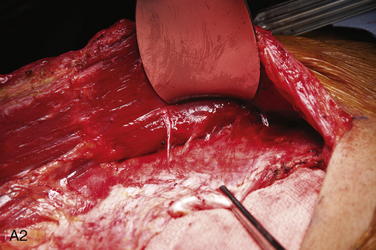
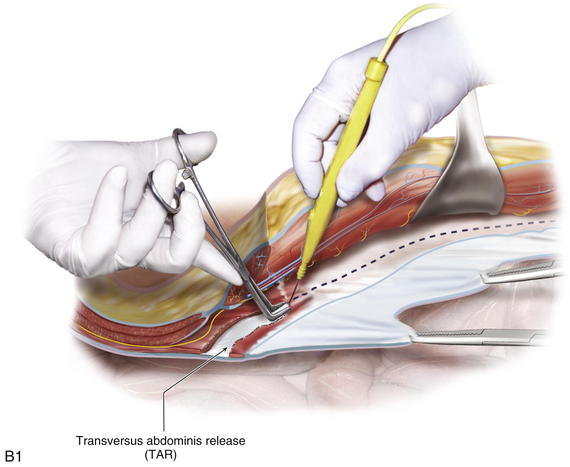
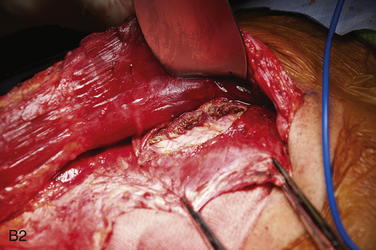
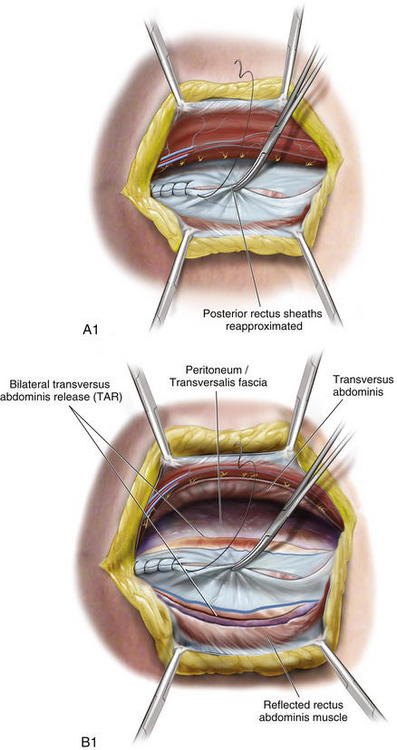
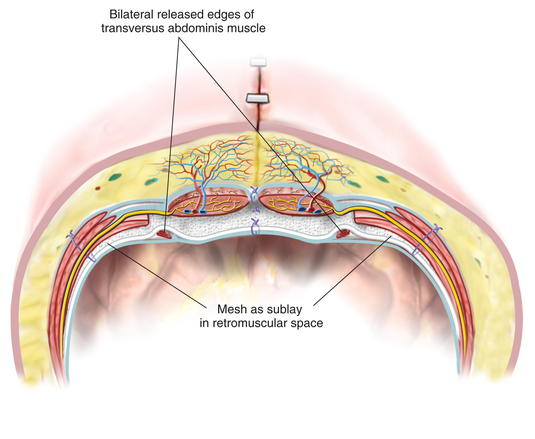
 The key component to the release is the division of the entire medial edge of the transversus abdominis muscle. The main function of the transversus is to act as a “corset” around the abdomen. The synergistic action of the transversus and the posterior fibers of the internal oblique produce hoop tension through the thoracolumbar fascia. By dividing the transversus abdominis, I am able to release the circumferential muscle tension and not only provide for expansion of the abdominal cavity but also afford significant medial advancement of the posterior rectus fascia (Fig. 5-10).
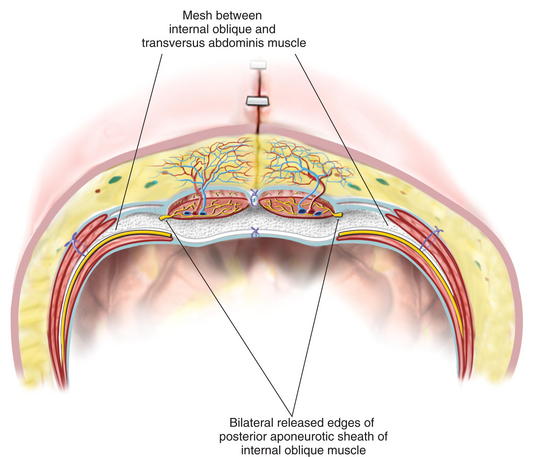


 Posterior Layer Reconstruction
 Once release is performed on both sides, the posterior rectus sheaths are reapproximated in the midline with a running monofilament suture (Fig. 5-11, A and B). Interrupted figure-of-8 sutures may be used if there is significant tension or pulmonary plateau pressures increase by 5 mm Hg or more.


 Mesh Fixation


 Reconstruction of the Linea Alba


4 Postoperative Care
 General
 Intraoperative hemodynamics and airway pressures affect postoperative care. Overnight intensive care unit admission is recommended for patients undergoing major abdominal wall reconstructions. Long operative times and prolonged exposure of the abdominal cavity to room air lead to significant insensible losses and predispose to large fluid shifts. As a result, patients undergoing complex abdominal wall reconstructions often remain intubated overnight. In addition, those patients with poor pulmonary reserve and/or significant increase in plateau airway pressures are kept paralyzed for 24 to 48 hours postoperatively.


 Diet
Diet
 Routine nasogastric tube decompression is reserved for patients with intestinal resections, significant intestinal manipulations, and prolonged adhesiolysis. Diet advancement is very conservative in order to avoid early postoperative bloating, retching, and vomiting, which may lead to pulmonary complications, as well as disruption of the repair. As a result, diets are not advanced until return of bowel function occurs.
5 Outcomes
 Retromuscular (Rives-Stoppa-Wantz) repair has been shown to result in an effective repair of most ventral hernias. Recurrence rates of 3% to 6% at mid- to long-term follow-ups have been reported. In fact, in 2004, given its superior track record, this approach was proclaimed to be the gold standard for open ventral hernia repair by the American Hernia Society.

6 Pearls and Pitfalls
1 Anatomy
 Neurovascular bundles supplying rectus muscles run in between transversus abdominis and internal oblique muscles and traverse posterior rectus sheath near the linea semilunaris, entering rectus muscle at its lateral edge. Care should be taken to identify and preserve these nerve bundles during the retrorectus dissection to prevent denervation of the rectus muscles
2 Preoperative Considerations


3 Intraoperative Considerations


4 Technical Considerations
 In many patients, retromuscular dissection to the extent of the lateral edge of both rectus sheaths may be sufficient.


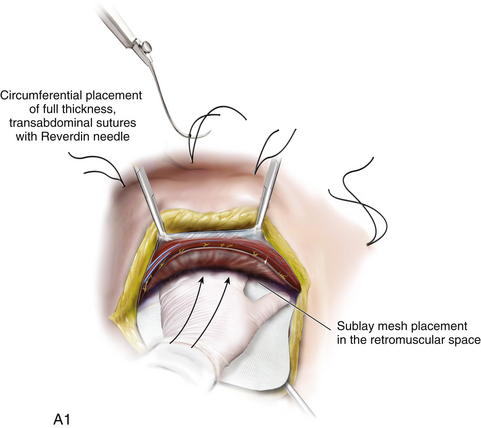
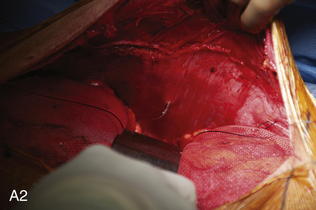
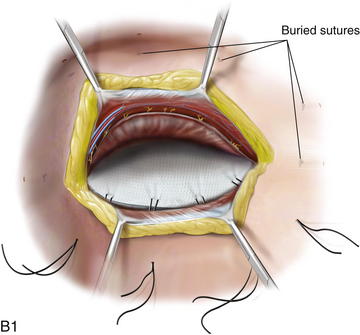
 Mesh fixation is performed with a wide lateral overlap. Full-thickness transabdominal sutures are used to fixate the mesh and to provide physiologic tension across the entire abdominal wall. “Tension-free” repair of the abdominal wall is not adequate if preservation of the abdominal wall function is intended.


Carbonell A.M., Cobb W.S., Chen S.M. Posterior components separation during retromuscular hernia repair. Hernia. 2008;12(4):359-362.
Conze J., Prescher A., Klinge U., et al. Pitfalls in retromuscular mesh repair for incisional hernia: the importance of the “fatty triangle. Hernia. 2004;8(3):255-259.
Hammond D.L., Ackerman L., Holdsworth R., Elzey B. Effects of spinal nerve ligation on immunohistochemically identified neurons in the L4 and L5 dorsal root ganglia of the rat. J Comp Neurol. 2004;475(4):575-589.
Iqbal C.W., Pham T.H., Joseph A., et al. Long-term outcome of 254 complex incisional hernia repairs using the modified Rives-Stoppa technique. World J Surg. 2007;31(12):2398-2404.
Novitsky Y.W., Porter J.R., Rucho Z.C., et al. Open preperitoneal retrofascial mesh repair for multiply recurrent ventral incisional hernias. J Am Coll Surg. 2006;203(3):283-289.
Rives J., Pire J.C., Flament J.B., et al. [Treatment of large eventrations. New therapeutic indications apropos of 322 cases]. Chirurgie. 1985;111(3):215-225.
Rosen MJ, Fatima J, Sarr MG: Repair of abdominal wall hernias with restoration of abdominal wall function. J Gastrointest Surg 14(1):175–185.
Stoppa R.E. The treatment of complicated groin and incisional hernias. World J Surg. 1989;13(5):545-554.
Wirhed R. Athletic Ability & the Anatomy of Motion. Wolfe Medical Publications Ltd; 1984.
