Chapter 14 Lower Extremity Splints and Casts
Hip spica cast
Overview
2. The hip spica cast generally is composed of an abdominal portion attached to long leg casts, which is a so-called “double spica cast.” When the unaffected extremity is placed into a thigh-only cast, the cast is termed a “1½ spica cast.” A “single leg” hip spica cast is composed of an abdominal portion attached to a single long leg cast of the affected leg. All three types of spica casts have been shown to be successful in treating diaphyseal femoral fractures in children younger than 6 years.
Precautions
1. The following complications of hip spica casting may occur:
a. Compartment syndrome has been reported in the 1½ spica cast with the hip and knee flexed to 90 degrees.
2. Close monitoring of the patient for complications is necessary during the first 2 weeks after application of the cast.
Pearls
1. We prefer a relaxed leg position with the knee at 60 degrees of flexion and the hip in 45 degrees of flexion rather than the traditional 90-90 position. An assistant should help the patient maintain this position throughout the application of the cast to avoid any bunching or creasing of the casting material.
2. Application of the cast can be performed in the emergency department with use of conscious sedation or in the operating room (OR) with use of general anesthesia.
3. Although they may not always be available, use of waterproof Gore-Tex pantaloons and a cast liner significantly improves the ability of the family to care for a child with a spica cast.
Equipment


Basic Technique: 1½ Spica Cast
Detailed Technique
1. Prepare a stockinette:
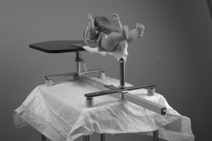
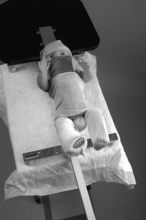
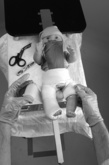
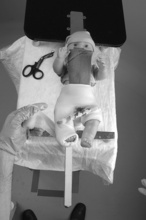
2. Place the patient on the spica table. Have an assistant consistently hold the patient in the desired position.
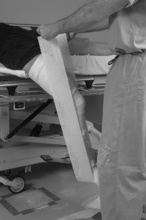
3. Position the stockinette (Figure 14-4):
4. Place two to four blue OR towels on the abdomen under the stockinette to allow for abdominal excursion after application of the cast.
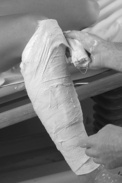
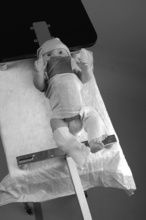
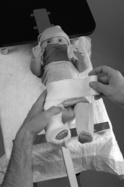
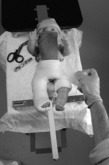
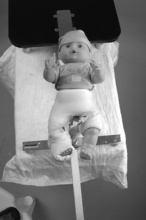
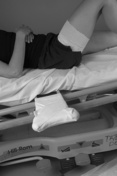
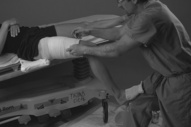
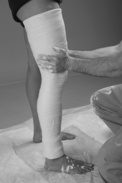
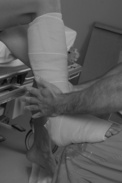
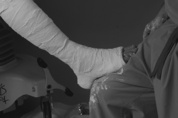
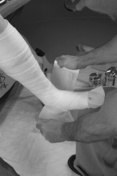
6. Wrap the extremity in cast padding (Figure 14-5).
a. Start at the gluteal fold and circumferentially wrap distally to the area immediately above the lateral malleolus.
b. Span the joint line with cast padding at the anterior aspect of the tibiotalar joint (see aforementioned precautions for the long leg cast).
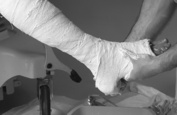
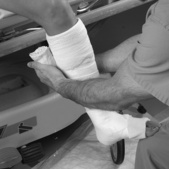
e. Once sufficient padding has been wrapped around the malleoli and the foot, the heel can be addressed.
f. Tear strips of cast padding and lay them on top of the heel (Figure 14-6). Repeat several times to ensure sufficient padding.
7. Create a cast padding cuff (see Chapter 12) for the metatarsal heads. This cuff should form a “V” at the lateral aspect of the foot to allow for the cascade of the digits (Figure 14-7).
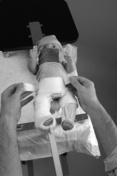
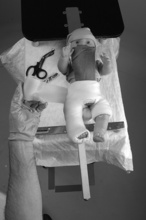
8. Wrap the abdomen in cast padding (Figure 14-8). Ensure that the anterior superior iliac spine, posterior superior iliac spine, and sacrum are very well padded.
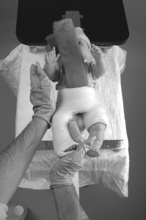
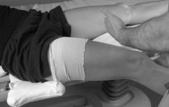
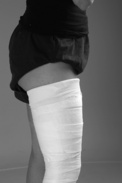
9. Wrap the contralateral thigh in cast padding. Start immediately proximal to the popliteal fossa and continue proximally to the gluteal fold.
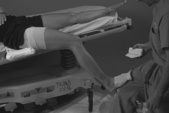
10. Create a cuff of cast padding (Figure 14-9) and place it over the most distal part of the rib cage.
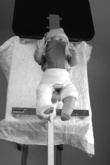
12. Finish the cast edges (Figure 14-10). All exposed areas should have the stockinette pulled up and folded over the cast padding.
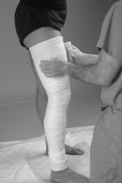
14. Apply cast material as for a long leg cast.
15. Begin application of the abdominal portion of the spica cast and the contralateral thigh portion of the cast for the unaffected leg.
19. Create a side strut for the affected extremity if plaster is being used.
20. Apply a broomstick or bar of fiberglass to span both legs. Incorporate the strut and the bar into the spica cast with an additional roll of fiberglass (Figure 14-15).


Long-leg splint
Precautions
Pearls
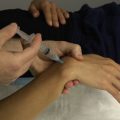
1. Before starting, ensure that adequate analgesia has been achieved, either with intravenous opioids or conscious sedation.
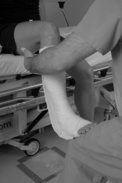
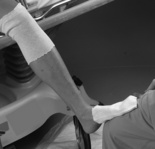
2. The long-leg splint is one of the most difficult splints to apply; having the aid of two assistants facilitates the process. If help is not available, use either the technique described below or this alternative method to elevate the limb (Figure 14-17):
d. Lay one roll of rolled gauze under the patient’s thigh and the other under the calf, with equal lengths on each side of the limb.
3. It is recommended that cool water be used (to delay plaster setting) and that all three plaster slabs be prepared in water prior to application of the splint. This approach reduces the amount of time the patient needs to be elevated and thus reduces patient discomfort. It also reduces the amount of work that needs to be done by the assistants.
4. For high-energy injuries, we prefer to use Jones’ cotton in place of regular cotton cast padding.
5. Use of a “mega-ACE” bandage that is 11 yards long makes securing this splint much more manageable because it eliminates the need for multiple elastic bandages.
Detailed Technique
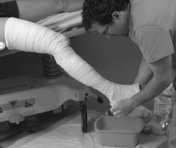
3. Prepare the plaster in the usual fashion. Use the standard technique of wetting and laminating (see Chapter 12).
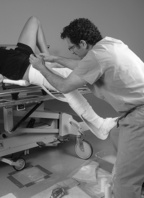
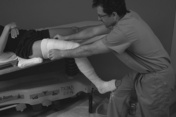
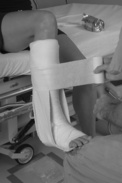
4. Place a padded crutch beneath the mattress on the stretcher so that only a foot of the top of the stretcher remains visible (Figure 14-20).
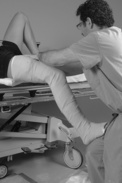
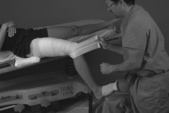
5. Position the patient:
a. The patient is supine with his or her pelvis halfway onto the crutch (Figure 14-21). Make sure the patient and the crutch are secure.
b. Allow the limb to hang down, or support it by placing the patient’s foot on your thigh (Figure 14-22). If assistants are available, they can elevate the limb.
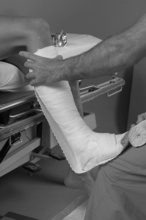
6. Apply Jones’ cotton or regular cast padding (Figure 14-23):
7. Apply the splint.


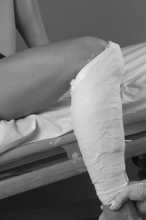
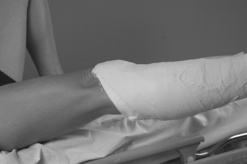
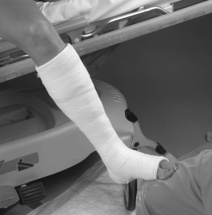
Long leg cast
Precautions
Pearls
1. Before starting, ensure that adequate analgesia has been achieved, either with intravenous opioids or conscious sedation. Occasionally, long leg casts are placed under general anesthesia in the operating room to allow for fluoroscopic-guided reduction and maximum patient comfort.
2. Two techniques may be used for application of a long leg cast:
3. Application of a long leg cast is difficult; having the aid of an assistant makes it easier. If an assistant is unavailable, use the following technique:
Basic Technique
1. Patient positioning:
Detailed Technique
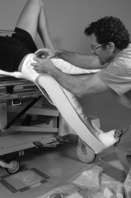
3. Position the patient.
a. Place a padded crutch beneath the mattress on the stretcher so that only 1 foot of the top of the stretcher remains visible (see Figure 14-20).
b. The patient is supine with his or her pelvis halfway onto the crutch (see Figure 14-21). Make sure the patient and the crutch are secure to prevent a fall.
c. Allow the limb to hang down or support it by placing the patient’s foot on your thigh (see Figure 14-22). If available, an assistant can elevate the limb.
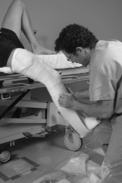
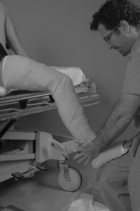
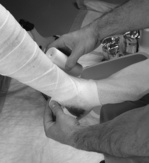
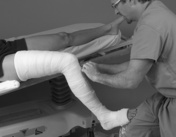
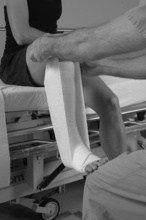
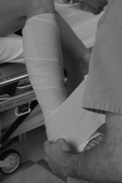
4. Wrap the extremity in cast padding.
b. Span the joint line with cast padding at the posterior aspect of the knee (see aforementioned precautions) (Figure 14-31).
c. Continue distally to around the foot:
d. Once sufficient padding has been wrapped around the malleoli and the foot, the heel can be addressed.
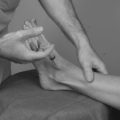
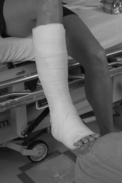
e. Tear 4-inch strips of cast padding and lay them on top of the heel (Figure 14-34). Repeat several times to ensure sufficient padding.
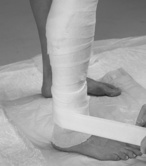
5. Create a cast padding cuff (see Chapter 12) for the metatarsal heads (Figure 14-35). This cuff should form a V at the lateral aspect of the foot to allow for the cascade of the digits.
Cylinder cast
Precautions
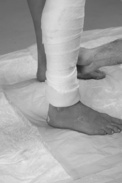
Be sure to pad the malleoli thickly to avoid pressure sores on the ankle and to limit distal migration of the cast (Figure 14-40).
Detailed Technique
3. Wrap the extremity in cast padding.
AO splint
Overview
Precautions
2. Swelling is a significant concern for ankle fractures; the degree of swelling often worsens after 2 to 3 days.
Pearls
1. Many ankle fractures are reduced with use of the Quigley maneuver. By having the patient keep his or her leg in extension during the Quigley maneuver, the ankle will naturally be kept out of equinus.
2. For instances in which a reduction maneuver is not used, two techniques can be used to keep the foot out of equinus:
3. When applying Jones’ cotton, splitting it in half width-wise is useful. Halving the thickness of the cotton by splitting it longitudinally also is possible.
Basic Technique
1. Patient positioning:
a. If the Quigley maneuver is used: The patient is supine on a stretcher with his or her leg elevated by traction.
Detailed Technique: Application Sitting
2. Measure the length of the splint (Figures 14-50 and 14-51):
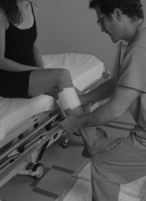
4. Position the patient:
a. The patient should be supine or sitting with the knee and lower leg off the bed and the ball of the foot resting on your knee or thigh.
5. Apply cast padding (or Jones’ cotton, if desired) (Figures 14-52, 14-53, and 14-54):


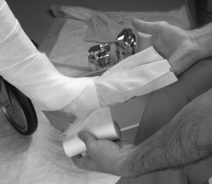
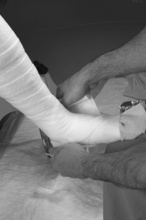
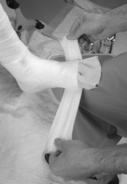
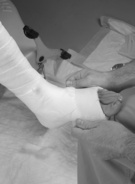
Short-leg cast
Precautions
1. The position of the foot in the plaster is of paramount importance.
Pearls
2. Keeping the foot out of equinus sometimes can be difficult. If no reduction is necessary, placing the patient in a prone position can facilitate proper positioning of the ankle:
a. The patient may lay prone with his or her knee bent to 90 degrees. Gravity will aid but not completely prevent equinus.
Basic Technique
1. Patient positioning:
Detailed Technique
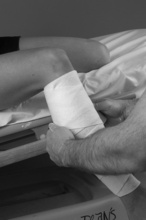
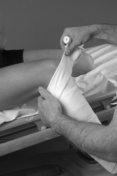
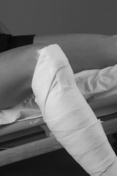
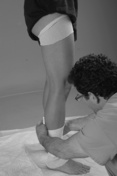
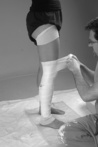
4. Wrap the extremity in cast padding:
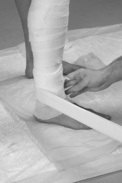
a. Start at the level of the tibial tubercle and circumferentially wrap distally to the area immediately above the lateral malleolus.
b. Span the joint line with cast padding at the anterior aspect of the ankle (see aforementioned precautions) (Figure 14-65).
e. Once sufficient padding has been wrapped around the malleoli and the foot, the heel can be addressed.
f. Tear 4-inch strips of cast padding and lay them on top of the heel (Figure 14-66). Repeat several times to ensure sufficient padding.
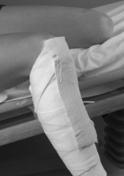
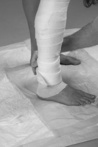
5. Create two cast padding cuffs (see Chapter 12):
a. Metatarsal heads (see Figure 14-35): This cuff should form a “V” at the lateral aspect of the foot to allow for the cascade of the digits.

Patellar tendon bearing (PTB) cast
Precautions
Pearls
2. Keeping the foot out of equinus sometimes can be difficult. If no reduction is necessary, placing the patient in a prone position can facilitate proper positioning of the ankle:
a. The patient may lay prone with his or her knee bent to 90 degrees. Gravity will aid, but not completely prevent equinus.
Basic Technique
Detailed Technique
2. Prepare a stockinette by cutting one piece of the stockinette for the distal portion at the foot.
4. Wrap the extremity in cast padding.
a. Start as proximal as possible on the lower leg and circumferentially wrap distally to the area immediately above the lateral malleolus (Figure 14-70).
b. Span the joint line with cast padding at the anterior aspect of the ankle (see aforementioned precautions).
5. Create two cuffs of cast padding (see Chapter 12):