CHAPTER 11 Left Upper Lobectomy – Video 11
Approach to Video-Assisted Left Upper Lobectomy
 Video-Assisted Left Upper Lobectomy
Step 2: Resection of Level 5 and 6 Nodes
♦ Exposure: The lung is retracted posteriorly and slightly inferiorly with a ring forcep through the posterior incision.
♦ Bring the Metzenbaum scissors through the inferior incision, and lift the hilar tissue with the long DeBakey forceps, which is brought through the utility incision.
♦ The scissors should be rotated so the tips of the scissors do not obstruct visualization of the phrenic nerve.
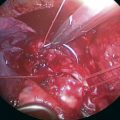
Step 3: Superior Hilar Dissection

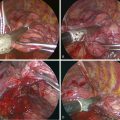
Step 4: Station 5 and 6 Lymph Node Dissection
♦ Lift the anteroposterior lymph nodes with a ring forceps to dissect on the surface of the SPV and the PA. Identify the vagus and recurrent laryngeal nerves in this region, so they can be kept out of harm‘s way.
♦ Station 6 (para-aortic) lymph nodes are dissected away from the aorta and the pericardium. To achieve this, the retraction on the lung is not changed, but the 30-degree lens is pointed medially.
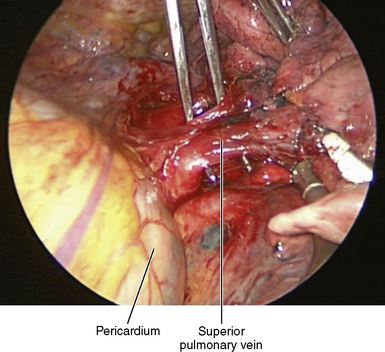
Step 5: Superior Pulmonary Vein
♦ Exposure: The lung is retracted laterally and posteriorly through the posterior and anterior incisions.
♦ The thoracoscope is aimed anteriorly and slightly medially, and the lens is pointed toward the mediastinum and slightly posteriorly.
♦ Dissect the inferior border of the SPV. Bring the Metzenbaum scissors through the inferior incision while passing the Yankauer suction through the utility incision.
♦ Define the inferior pulmonary vein to ensure there is not a common trunk for the superior and inferior veins.
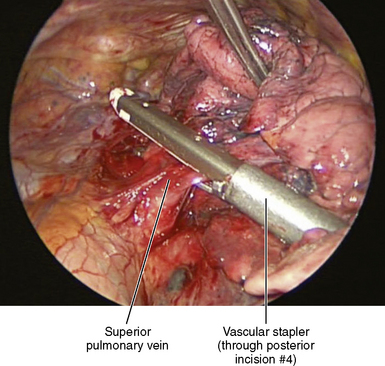
♦ A ring forceps through the utility incision lifts the entire SPV for the Metzenbaum scissors to dissect between the SPV and the LUL bronchus, which is just posterior to the SPV. A large purchase on the vein minimizes the chances of damaging the SPV, whereas a small purchase may tear the vessel.
♦ After this dissection is complete, use the Metzenbaum scissors through the utility incision to complete dissection on the superior border of the SPV.
♦ A tie around the vein may elevate the vein to facilitate passing the stapler around the vein, although this is not often needed.
Step 6: Anterior Trunk
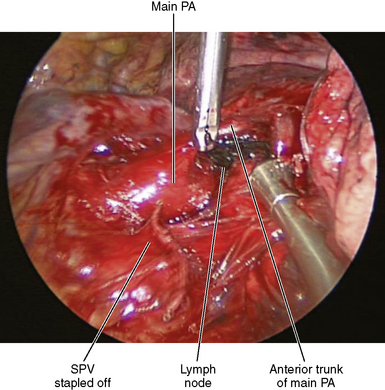
♦ After stapling the SPV, the anterior trunk of the PA is readily visualized. Incise the lymphatics on the superior aspect of the LUL bronchus, and remove lymph nodes to better expose the PA. Remove the lymph node between the bifurcation of the anterior trunk and the main PA for easier isolation of the anterior trunk (Figure 11-4).
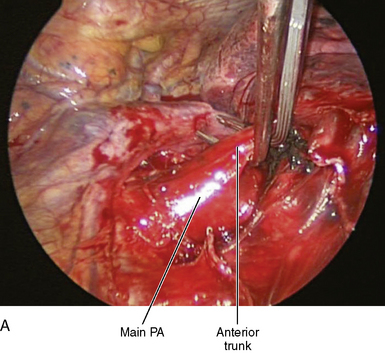
♦ A right-angle clamp introduced through the utility incision passes around the anterior trunk of the PA (Figure 11-5). Adjust the angle of the camera to allow complete visualization of the right-angle clamp as it encircles the anterior trunk. There should be little or no resistance to the passage of the right-angle clamp after prior dissection of the superior aspect of the hilum. The right-angle clamp is spread widely to create an adequate tunnel for subsequent stapler placement.
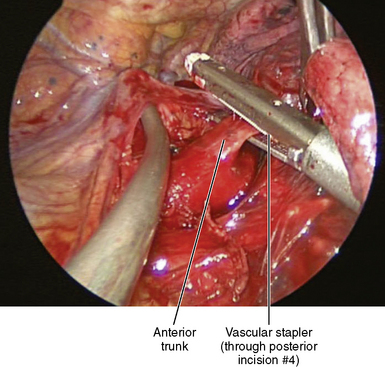
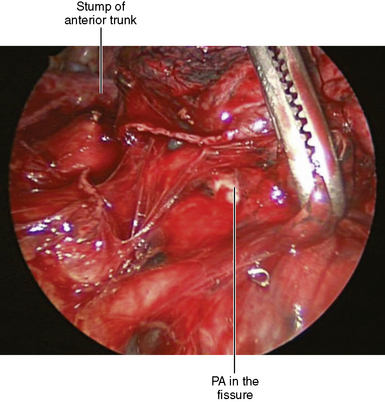
♦ The vascular stapler is brought through the posterior incision and placed across the anterior trunk. The anvil of the stapler should be placed in the tunnel between the PA and the anterior trunk (Figure 11-6).

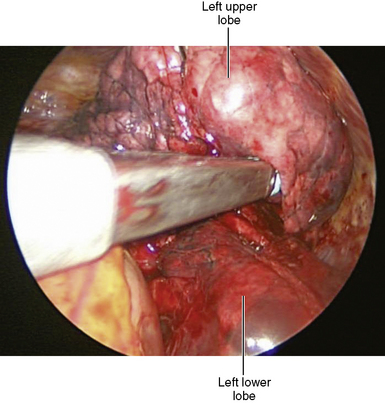
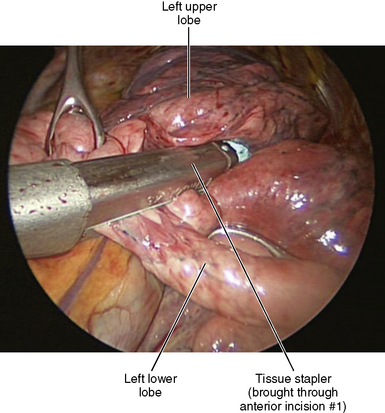
Step 7: Fissure
♦ Exposure: The lung is returned to its anatomic position. Through the posterior incision, the lower lobe is retracted posteriorly, and through the utility incision, the upper lobe is retracted anteriorly.
♦ For an incomplete fissure, the stapler introduced through incision 1 separates the lingula from the lower lobe (Figure 11-7). The stapler is well away from the PA in patients with an incomplete fissure.
♦ A ring forceps lifts the lung parenchyma of the incomplete fissure away from the surface of the artery (Figure 11-8).
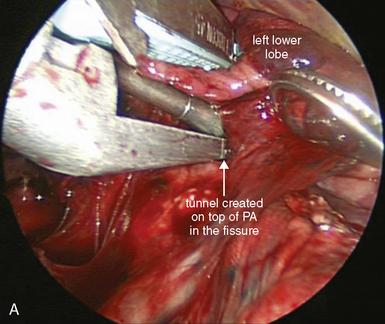
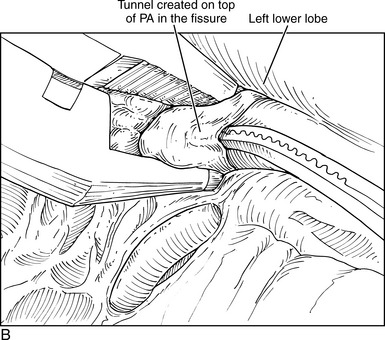
♦ The LUL and the left lower lobe (LLL) bronchi are identified. A lymph node between the bronchi is removed to expose the PA, which runs parallel to and adjacent to the LLL bronchus.
♦ Use Metzenbaum scissors through incision 1 to dissect on the surface of the PA to create a tunnel. The dissection is on the anterior surface of the PA. On the superior side of the PA are the lingular and posterior ascending arteries, and on the inferior aspect of the PA is the artery to the superior segment of the LLL.
♦ When an adequate tunnel has been created on the surface of the artery, the stapler completes the fissure. The anvil of the stapler is placed into the tunnel and rests on the surface of the artery. Once in position, the stapler is not moved. This is a key maneuver (Figure 11-9).
♦ While the stapler is held in position, ring forceps on the upper and lower lobes pull the lung parenchyma into the stapler. My colleagues and I typically use a 4.8-mm stapler to complete the fissure. However, if the fissure is well developed and there is not much lung parenchyma to be stapled, smaller (vascular) staples may be used.
♦ Repeat the process of opening the fissure by creating the tunnel until the fissure is completed. The PA and the bronchus should be clearly visualized.
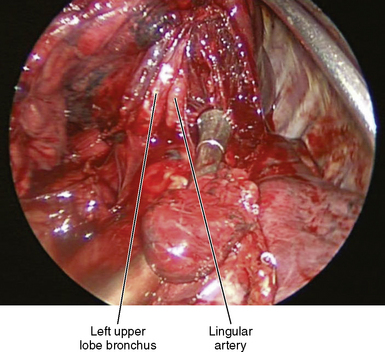
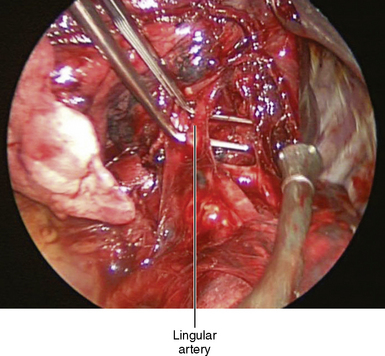
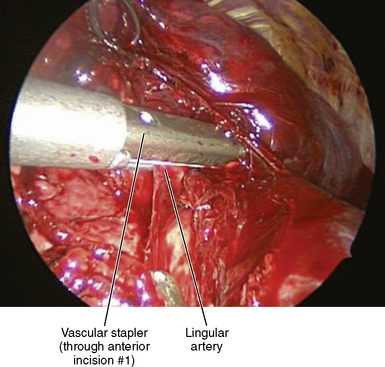
Step 8: Lingular Artery
♦ Metzenbaum scissors brought through the inferior incision dissect the lingular artery. After adequate dissection is accomplished, the right-angle clamp is brought through the utility incision to mobilize the lingular artery by spreading widely enough to make room for the anvil of the stapler (Figure 11-11).
♦ The lingular artery can be stapled using the vascular stapler, which is brought through the inferior incision (Figure 11-12) or through the posterior incision.
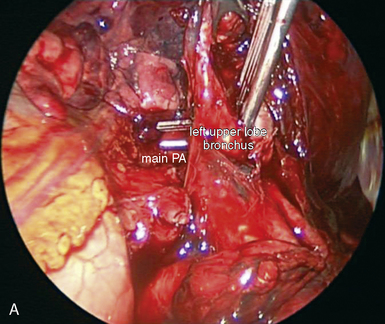
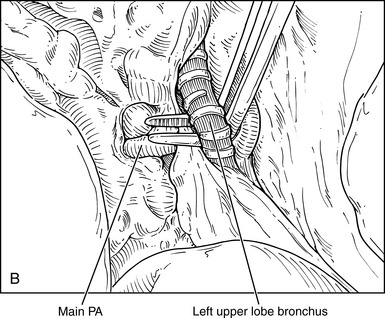
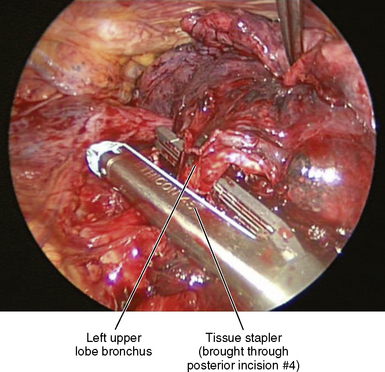
Step 9: Upper Lobe Bronchus
♦ Encircling and isolation of this bronchus is the most dangerous move in VAB left upper lobectomy, because it is partially a blind move between the bronchus and the main PA.
♦ Ring forceps through the utility incision lift the LUL bronchus away from the PA. Facilitate visualization of the posterior aspect of the bronchus by lifting it away from the PA. Aim the thoracoscope posteriorly, and point the lens anteriorly.
♦ Use Metzenbaum scissors brought through the inferior incision to dissect the inferior border of the left upper lobe bronchus.
♦ Dissect the superior aspect of the LUL bronchus. Visualization of the superior aspect of the bronchus is achieved by retracting the bronchus posteriorly while the thoracoscope is pointed anteriorly and the lens is pointed posteriorly. Blunt dissection on the surface of the artery separates the bronchus from the PA.
♦ At this point, the bronchus is almost completely separated from the PA. The right-angle clamp is brought through the utility incision and is passed between the upper lobe bronchus and the PA (Figure 11-13).
♦ This move is the only partially blind move in this operation and should be done with care to prevent damage to the PA, which resides just behind the bronchus. Continuously manipulate the angle of the thoracoscope to enable maximal control and viewing of the right-angle clamp as it encircles the bronchus.
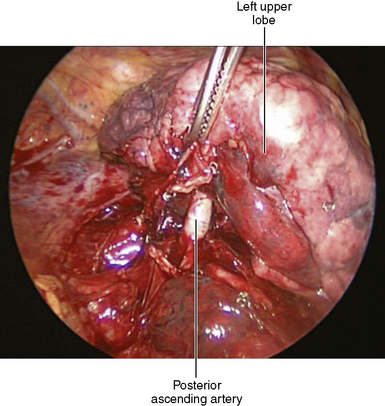
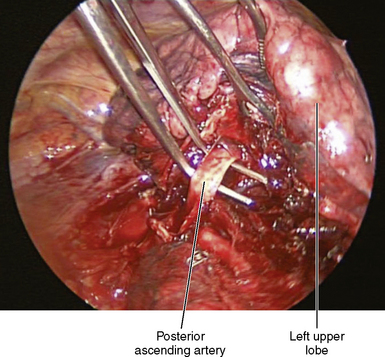
Step 10: Remaining Arterial Branches
♦ Exposure: A ring clamp through the utility incision lifts the upper lobe to expose any remaining arterial branches to the left upper lobe.
♦ The thoracoscope is positioned with the 30-degree lens pointing medially, and the lens pointing posteriorly.
♦ Begin a combination of blunt and sharp dissection on the surface of the main PA to expose any remaining arterial branches to the left upper lobe.
♦ There may be up to five additional arterial branches that can be stapled, clipped, or tied (Figures 11-15 and 11-16).
♦ A 4.8-mm stapler through the inferior incision completes the remainder of the fissure (Figure 11-17).