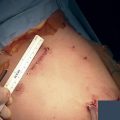
CHAPTER 12 Left Lower Lobectomy—Video 12
 Video-Assisted Left Lower Lobectomy
Step 2: Inferior Pulmonary Ligament and Level 9 Lymph Nodes
♦ Aim the thoracoscope anteriorly, and point the 30-degree lens toward the inferior pulmonary ligament.
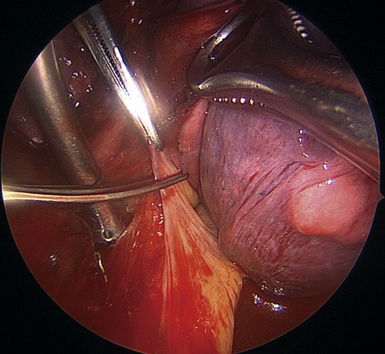
♦ Retract the lower lobe superiorly with a ring forceps through the utility incision. Apply enough tension to keep the inferior pulmonary ligament on stretch (Figure 12-1).
♦ Bring the cautery with an extension and the Yankauer suction into the chest through incision 1. If the diaphragm obstructs the view, push the diaphragm inferiorly with the Yankauer suction positioned so that its “bend” pushes the diaphragm downward while the tip is pointed toward the dissection to suck the smoke from the electrocautery.
♦ Alternatively, if the diaphragm is high and obstructing the view, retract it downward with a stitch. A needle holder through incision 1 places a suture in the ligamentous portion of the diaphragm, near the esophageal hiatus. Bring the suture with its needle out through incision 2. Pull it as tightly as possible and suture it to the chest wall inferior to incision 2.
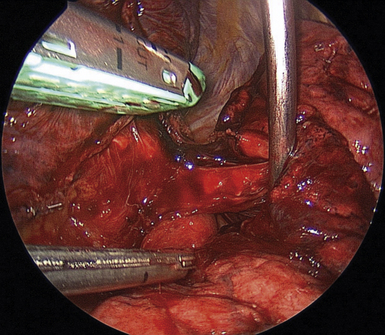
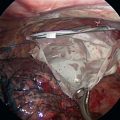
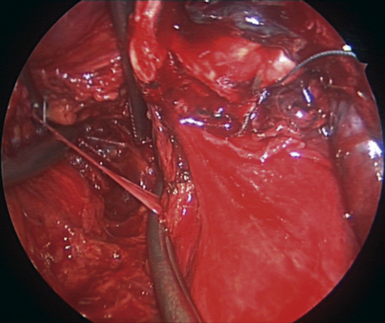
♦ Cauterize the inferior pulmonary ligament parallel to the esophagus up to the level of the inferior pulmonary vein (IPV) (Figure 12-2).
Step 3: Posterior Pleura
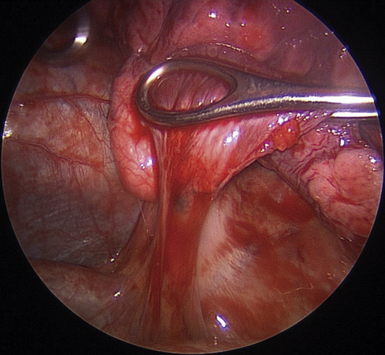
♦ With the lung retracted anteromedially, open the posterior pleura along the posterior surface of the IPV. Use a combination of sharp dissection with the Metzenbaum scissors and the long-tipped electrocautery, which are brought through anterior incision (Figure 12-3).
♦ The line of dissection posteriorly should be at the junction of the pleura and the lung parenchyma.
♦ In the course of this dissection, cut branches of the vagus nerve to the lung, and clip or cauterize bronchial arteries. Perform blunt dissection on the surface of the pericardium.
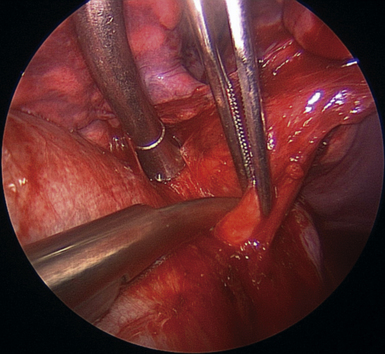
Step 4: Inferior Pulmonary Vein
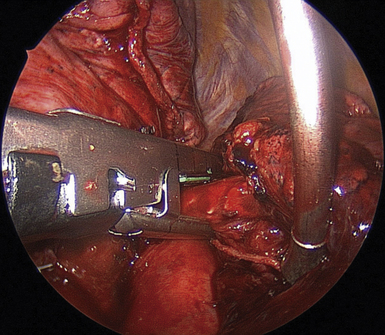
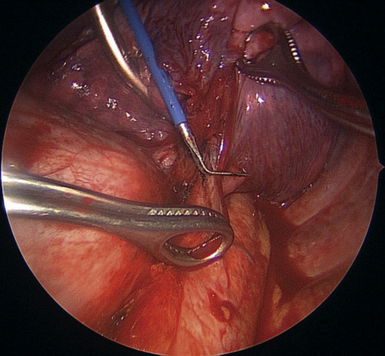
♦ With the Metzenbaum scissors brought through the anterior incision, cut the pleura at its junction with the pericardium. Define the superior aspect of the IPV, and perform blunt or sharp dissection between the IPV and the superior pulmonary vein (SPV), as shown in Figure 12-4. The vein from the superior segment can be seen.
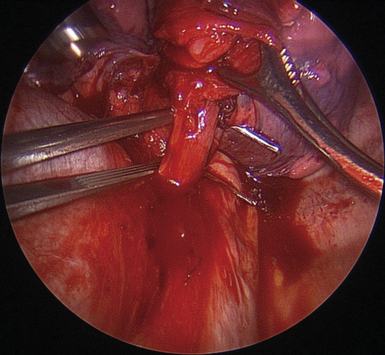
♦ Pass a right-angle clamp through the utility incision around the IPV. Because of the previously performed dissections on the anterior and posterior aspects of the IPV, the right-angle clamp should pass with little effort. Spread the right angle widely to create a tunnel for the stapler (Figure 12-5).
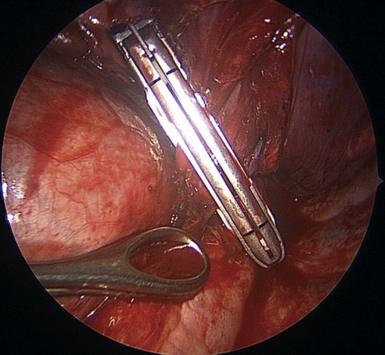
♦ Bring a vascular endoscopic stapler through the anterior or utility incision to staple the vein. If the staple cartridge is placed in the tunnel created by the right angle, it is easier to see that the stapler is completely across the vein (Figure 12-6).
♦ If the stapler is not completely across the entire vein, partial firing or misfiring of the stapler at this point can lead to massive, life-threatening hemorrhage.
♦ Keep a sponge stick readily available throughout this operation to control bleeding with direct pressure.
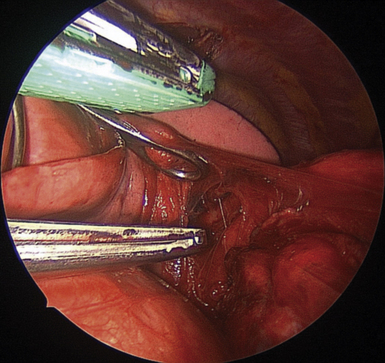
♦ After transecting the vein, the bronchus can be seen. Remove the lobar nodes from the bronchus, and perform blunt dissection with this exposure to prepare the bronchus for subsequent transection.
Step 5: Subcarinal Lymph Node Dissection
♦ Exposure: With a ring forceps through the utility incision and a long, curved ring forceps through the lower anterior incision, retract the lower lobe superiorly and medially.
♦ Dissection of the subcarinal lymph nodes is more difficult on the left than on the right. If it is done before the lower lobe has been removed, pulling on the lower lobe can help to open the space for the nodal dissection. With the previously described exposure, carry the dissection cephalad to the subcarinal space for the lymph node removal.
♦ The planes of dissection should be the pericardium medially and the esophagus posterolaterally. Dissect parallel but anterior to the esophagus and the vagus nerve. Dissecting too close to the esophagus can cause nuisance bleeding and possibly cause esophageal injury.
♦ Retract the esophagus posteriorly to open the subcarinal space. A ring forceps can be opened widely to open the subcarinal space for nodal dissection.
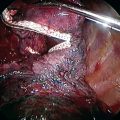
♦ After the subcarinal space is reached, lymph nodes can be taken out and sent to the pathology department as separate specimens. With thorough dissection, the carina and the right mainstem bronchus are visualized (Figure 12-7).
Step 6: Completing the Fissure
♦ Exposure: Return the lung to its anatomic position. Grasp the lower lobe with a ring forceps through the posterior incision, and grasp the upper lobe with a ring forceps through the utility incision. Subsequent dissection and stapling is done through the anterior incision.
♦ If the fissure is not complete (as is often the case), fire a tissue stapler across the fissure to separate the lower lobe and the lingula (Figure 12-8). This initial firing is peripheral enough to be well away from the pulmonary artery. This advances the dissection into the fissure and closer to the bronchus and the artery.
♦ A lobar node between the upper and lower lobe bronchus hides the pulmonary artery; remove this lobar node to expose the artery.
♦ To complete the remainder of the fissure, create a tunnel on the surface of the artery with blunt dissection or sharp dissection with the Metzenbaum scissors through incision 1 (Figure 12-9).
♦ Expose the artery by lifting the lung parenchyma with ring forceps and working on the surface of the artery. Take care not to injure the artery.
♦ Place the anvil of the stapler into the tunnel, and rest it on the anterior surface of the artery (Figure 12-10). Once in position, the stapler is not moved. This is a key maneuver.
♦ While the stapler is held steady, pull the lung parenchyma into the stapler. After adequate advancement has been made, fire the stapler. Normally, use a green load stapler to complete the fissure; however, if the fissure is well developed and there is not much lung parenchyma to be stapled, use a vascular load.
♦ Continue this process of opening the fissure by creating the tunnel until the fissure is completed. The pulmonary artery and the bronchus should be clearly visualized.
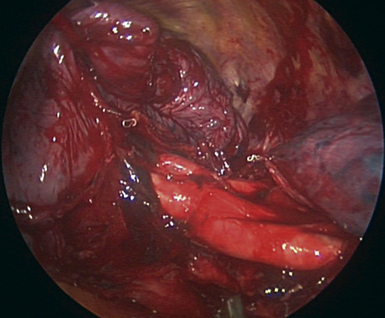
♦ With this view, the left lower lobe (LLL) bronchus is seen running underneath the artery. The lingular artery and the left upper lobe bronchus are seen to the left of the screen traveling to the upper lobe. The basilar trunk arteries and the LLL bronchus are seen going to the right of the screen to the lower lobe (Figure 12-11).
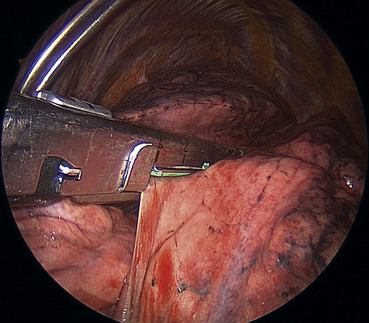
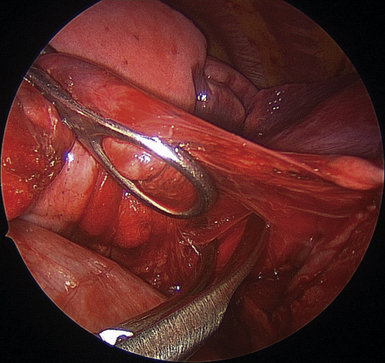
Figure 12-9 To complete the remainder of the fissure, a tunnel is created on the surface of the artery with blunt or sharp dissection. The anvil of the tissue stapler is placed in this tunnel (see Figure 12-10).
Step 7: Transecting the Pulmonary Artery
♦ With the Metzenbaum scissors through the lower anterior incision, dissect between the LLL bronchus and the lower lobe artery.
♦ When the artery has been almost completely mobilized, isolate the artery with the right-angle clamp brought through the utility incision.
♦ Usually, with one firing of the vascular stapler, all branches of the lower lobe artery can be transected. Occasionally, the superior segmental branch is addressed separately.
♦ If it is difficult to pass the stapler around the artery, lift the artery with a tie, or pass a red (rubber) Robinson-Nelaton (Rob-Nel) catheter to guide the stapler (Figure 12-12).