Laparoscopic Transperitoneal Radical Nephrectomy
Preoperative Imaging
Typically, a contrast-enhanced computed tomography (CT) scan or a magnetic resonance (MR) image is obtained before surgery. Although not necessarily required, CT and MRI offer precise mapping of the kidney, its vasculature, and relation to adjacent organs. Also, imaging of the renal vein and vena cava helps ensure no evidence of tumor thrombus and provides preoperative clinical staging. It is also prudent to visualize the contralateral kidney to confirm adequate function. Cross-sectional images are usually sufficient, but coronal images can be extremely helpful as well (Fig. 53-1, A).
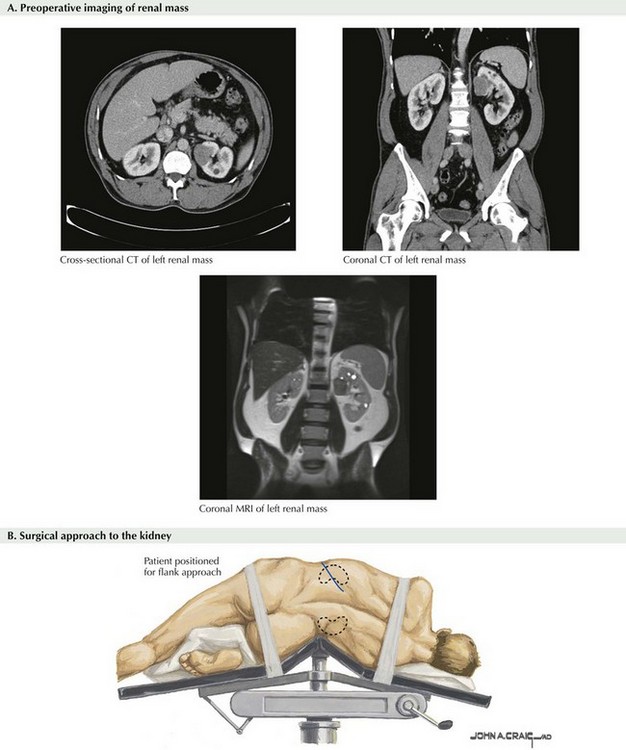
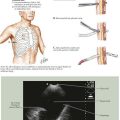
Patient Positioning and Trocar Placement
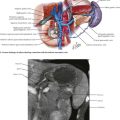
For a left radical nephrectomy, the patient is placed in the right lateral decubitus position with the left flank up (Fig. 53-1, B). The patient is centered over the break in the bed. The lower leg is bent and the top leg straight, and the dependent hip, knee, and ankle padded appropriately. Pillows can be placed between the legs. An axillary roll should be placed under the axilla, to protect from nerve damage. The patient’s lower arm is placed straight out on an arm board, and the upper arm should be secured to an upper arm board. The upper arm must be safely positioned away from the working field to ensure full access to laparoscopic instrumentation.
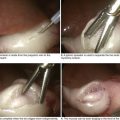
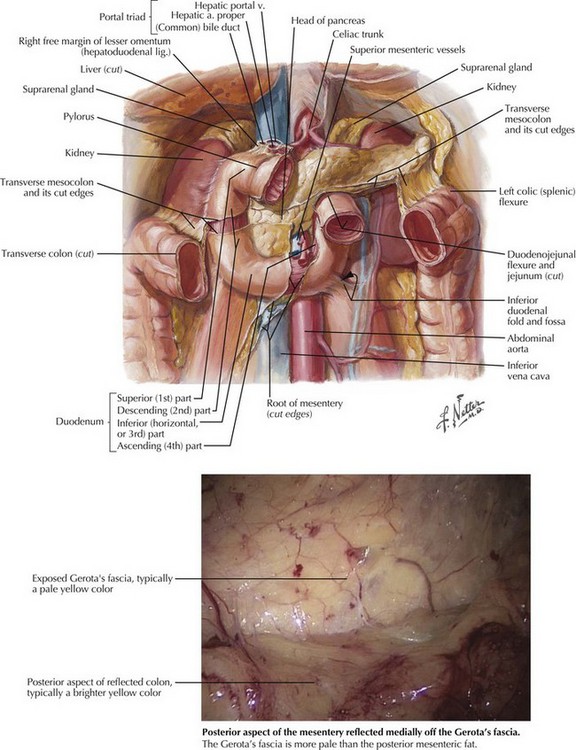
Mobilization of Left Colon
Once the abdomen is entered, a brief survey completed, and any adhesions dissected free, the first step is to reflect the left colon. Although the standard description of mobilizing the colon describes incising along the white line of Toldt, it is not necessary to incise that laterally; in fact, it could be more challenging to incise that laterally because the peritoneum needs to be dissected off Gerota’s fascia posteriorly and reflected medially to expose the retroperitoneum and kidney (Fig. 53-2).
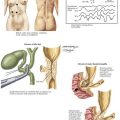
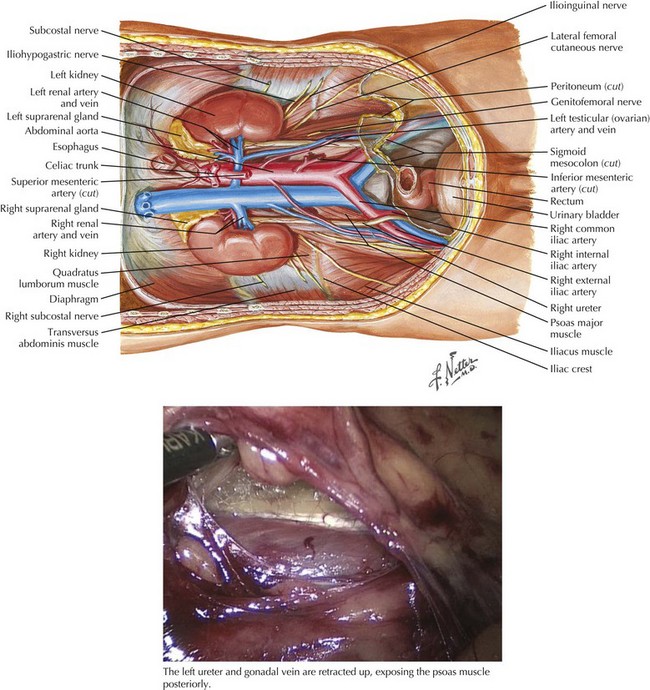
Dissection
Once the colon is reflected, it is helpful to dissect the ureter free. Starting below the lower pole of the kidney, the surgeon should dissect lateral to the aorta, identifying the ureter and gonadal vein (Fig. 53-3). Once identified, the ureter should be retracted laterally, exposing the psoas muscle posteriorly. At that point, the ureter can be clipped and divided with the lateral attachments to the ureter all the way to the abdominal side wall. The proximal end of the divided ureter can then be used for gentle retraction to help follow the psoas muscle, ureter, and gonadal vein (on the left) as landmarks up to the renal hilum.
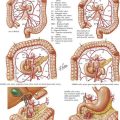
Renal Hilum
Typically the renal vein will be anterior to the renal artery. Once the attachments overlying the hilum are divided, the renal artery should be identified posterior to the renal vein. Some variation may be seen, because the renal artery can be directly posterior, inferior, or slightly superior to the renal vein, but typically is directly posterior (Fig. 53-4, A).

Adrenal Gland
If the surgeon desires to preserve the adrenal gland, the dissection should start immediately superior to the renal vein (Fig. 53-4, B). On the left, the renal vein should be divided distal to the adrenal vein insertion into the renal vein. The adrenal gland should be dissected from the upper pole of the kidney. On the right side, special caution is taken because the right adrenal vein is short, with its insertion directly into the vena cava.
Colombo, JR, Jr., Haber, GP, Jelovsek, JE, et al. Seven years after laparoscopic radical nephrectomy: oncologic and renal functional outcomes. Urology. 2008;71(6):1149–1154.
Maurice, MJ, Ponsky, L. Laparoscopic radical nephrectomy (adrenal gland sparing). http://www.urologybook.com/laparoscopic-radical-nephrectomy-adrenal-gland-sparing/.
Pareek, G, Hedican, SP, Gee, JR, Bruskewitz, RC, Nakada, SY. Meta-analysis of the complications of laparoscopic renal surgery: comparison of procedures and techniques. J Urol. 2006;175(4):1208–1213.
Ponsky, L, Cherullo, E, Moinzadeh, A, et al. The Hem-o-lok clip is safe for laparoscopic nephrectomy: a multi-institutional review. Urology. 2008;71(4):593–596.