Laparoscopic Surgery for Pelvic Organ Prolapse
Mark D. Walters  Tommaso Falcone
Laparoscopic Sacral Colpopexy
In addition to the intraumbilical port, a 5/12-mm trocar should be placed in both lower quadrants for suture introduction. One or two additional 5-mm ports are placed at the level of the umbilicus lateral to the rectus muscle for retraction. The deep pelvis is then visualized, noting the pelvic structures and central enterocele (Fig. 120–1). A sponge stick or obturator is placed in the vagina to elevate the vaginal apex (Fig. 120–2). The peritoneum is dissected off the vaginal apex to delineate the vaginal wall and endopelvic fascia. Anterior dissection is performed as needed, taking care to avoid damage to the bladder (Fig. 120–3). We dissect the peritoneum from the posterior vaginal wall as deeply as possible in the rectovaginal space, sometimes extending almost to the perineal body. Occasionally, a lubricated sponge stick can be placed in the rectum, as well as in the vagina, to delineate both of these structures (Fig. 120–4). A 15 × 2.5-cm strip of polypropylene mesh is introduced through the 5/12-mm port. Three or four pairs of permanent sutures are placed to attach the mesh to the distal two thirds of the posterior vaginal wall (mesh should be attached as close to the perineal body as possible) (Fig. 120–5). An additional small strip of mesh is connected to the anterior vaginal wall near the apex using two pairs of permanent sutures. The posterior and anterior meshes can then be connected at the vaginal apex, forming a Y- or T-shaped mesh. An alternative technique is to fashion the Y-shaped mesh extracorporeally and then bring it into the abdomen for suturing. Care should be taken to avoid twisting of the mesh and tangling of the sutures. Fig. 120–6 illustrates the completed vaginal mesh attachment. The mesh is then elevated, and the uterosacral ligaments are plicated in the cul-de-sac below the mesh using permanent sutures. One to three sutures may be necessary (Fig. 120–7). Alternatively, a Moschcowitz or Halban procedure can be done. The peritoneum over the sacral promontory then is examined, and key structures such as the aortic bifurcation, iliac arteries and veins, and right ureter are visualized. The peritoneum over the sacral promontory is carefully incised longitudinally, and, using elevation and blunt dissection, the sacral promontory is exposed (Fig. 120–8). The surgeon should identify the middle sacral artery and vein. A 3- to 4-cm section of anterior sacrum should be exposed if possible. The peritoneum running down the right pararectal space should be opened toward the cul-de-sac as well. Special care should, of course, be taken to avoid the ureter. Two to three permanent sutures are used to attach the mesh to the sacral promontory using extracorporeal knot-tying (Fig. 120–9). Alternatively, titanium tacks or hernia staples may be used to attach the mesh to the anterior longitudinal ligament of the sacrum. The peritoneum is then closed over the mesh using running or interrupted sutures (Fig. 120–10).
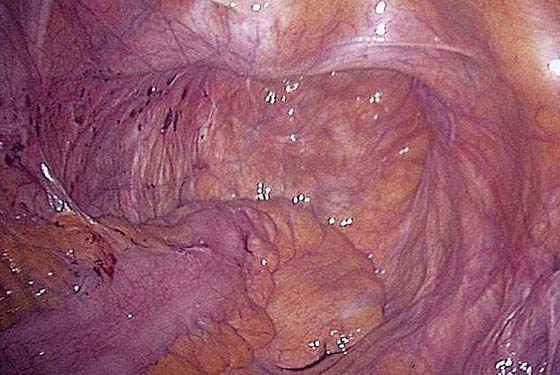
FIGURE 120–1 The deep pelvis is visualized in a woman with vaginal prolapse and a central enterocele.
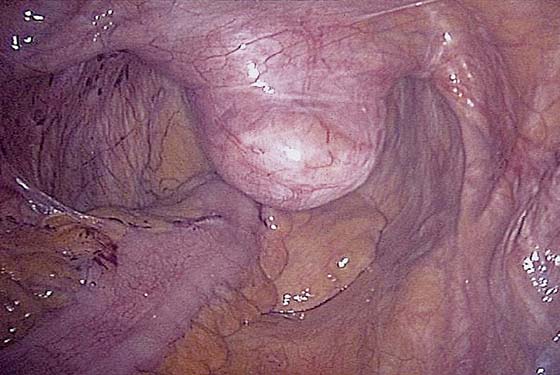
FIGURE 120–2 A sponge stick or obturator is placed in the vagina to elevate the vaginal apex.
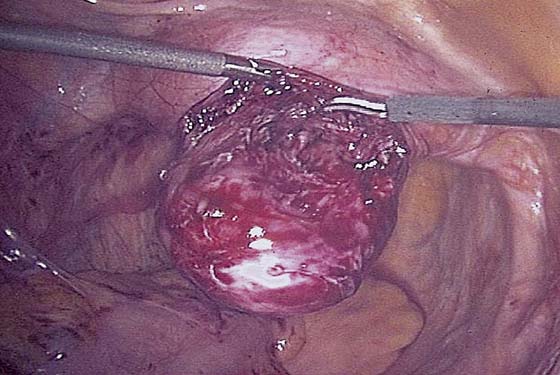
FIGURE 120–3 The peritoneum is dissected from the vaginal apex, taking special care to avoid damage to the bladder.
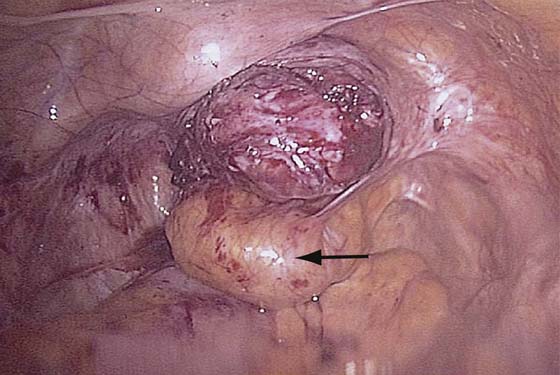
FIGURE 120–4 A lubricated sponge stick is inserted in the rectum (arrow) as well as in the vagina to delineate both of these structures.
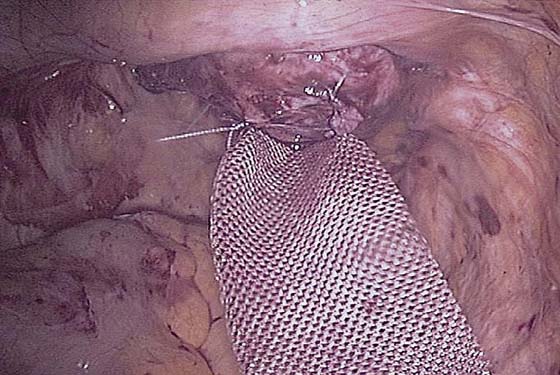
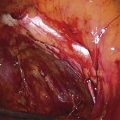
FIGURE 120–5 The mesh used for the sacral colpopexy is sutured along the posterior wall of the vagina.
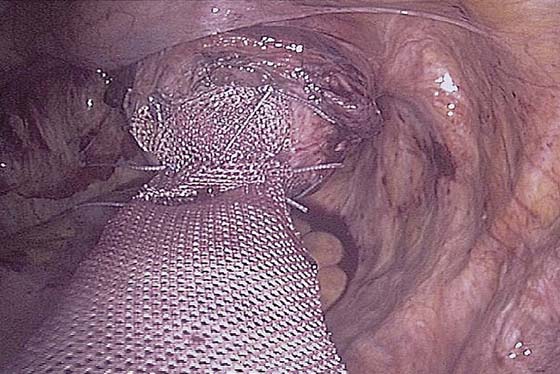
FIGURE 120–6 The completed vaginal mesh attachment is ready for connection to the sacral promontory.
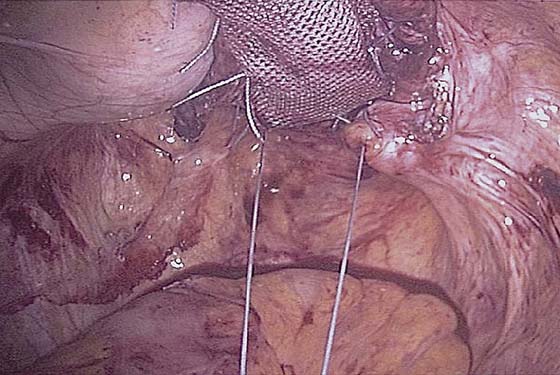
FIGURE 120–7 A uterosacral ligament plication can be done to close the cul-de-sac below the mesh.
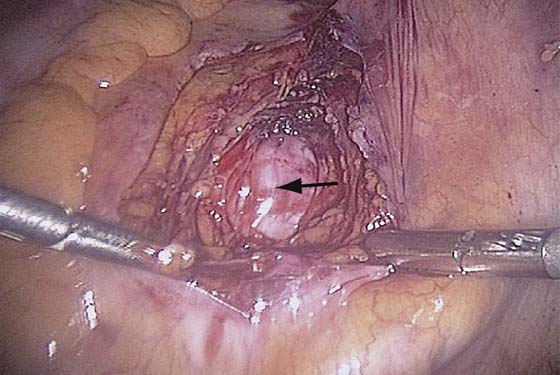
FIGURE 120–8 The anterior longitudinal ligament (arrow) of the sacral promontory is exposed.
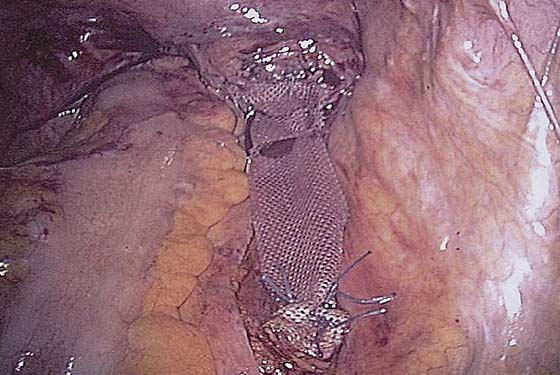
FIGURE 120–9 The mesh is sutured to the sacral promontory, completing the sacral colpopexy procedure.
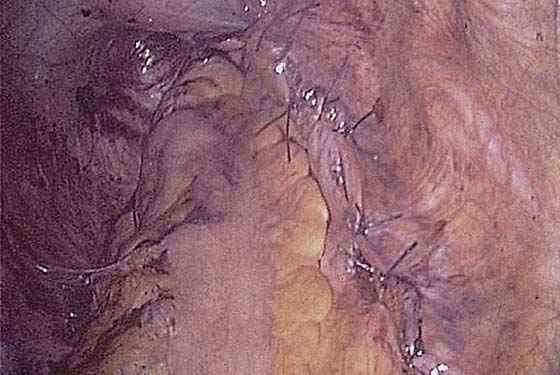
FIGURE 120–10 The peritoneum is closed over the mesh.
Laparoscopic Uterosacral Ligament Plication and Shortening
Occasionally, the uterus has a mild degree of prolapse or a very deep cul-de-sac, and the surgeon and the patient do not wish to have a hysterectomy done. This frequently occurs in women with stress urinary incontinence who are having a Burch procedure. It has been recommended that this be done prophylactically at the time of all Burch procedures, but the efficacy of this procedure to prevent future enterocele or uterine prolapse has not been established.
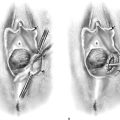
To perform uterosacral ligament plication and shortening, the posterior cervix, cul-de-sac, and uterosacral ligaments are identified. Pulling the uterus cephalad or ventral will place the uterosacral ligaments on stretch for easier identification. The uterosacral ligaments should be followed toward the sacrum bilaterally. Both ureters should be clearly visualized and avoided during the procedure. Permanent sutures are generally used. The first suture is placed near the insertion of each uterosacral ligament into the cervix, plicating these sites with an extracorporeal knot. This places the rest of the uterosacral ligaments under greater tension for easier identification. Two or three more sutures are placed and tied to bring the uterosacral ligaments together (Fig. 120–11). A suture is then placed into the proximal uterosacral ligament 2 to 4 cm from the sacrum. Again, care should be taken to avoid the ureter that lies several centimeters laterally. The suture is then placed into the uterosacral ligament near its attachment to the cervix and should be held until the second suture is placed. The second suture is placed, and both sutures are tied using extracorporeal knots to shorten the ligaments. The uterus can be elevated during this time to facilitate knot-tying.
Laparoscopic Uterosacral Ligament/Vaginal Vault Suspension and Abdominal Enterocele Repair
As with the abdominal sacral colpopexy, the entire pelvis is inspected, and any adhesions are lysed. Fig. 120–12 shows an enterocele sac in association with vaginal prolapse. Both pelvic sidewalls are visualized, including the right uterosacral ligament (Fig. 120–13) and the left uterosacral ligament. The course of each ureter should be carefully identified lateral to each uterosacral ligament. A sponge stick or obturator is placed in the vagina to elevate the vaginal apex. The peritoneum is dissected off the vagina to delineate the vaginal wall and endopelvic (pubocervical and rectovaginal) fasciae (Fig. 120–14). Both the bladder anteriorly and the peritoneum posteriorly are dissected free. One should attempt to visualize the rectovaginal septum posteriorly and the pubocervical fascia anteriorly. There may be an area at the vaginal apex that is devoid of endopelvic fascia associated with the enterocele. The repair is begun by suturing the pubocervical fascia anteriorly (Fig. 120–15) to the rectovaginal septum posteriorly, then tying. Three to five sutures are placed across the vaginal apex to close any apical defects that are found (Fig. 120–16). A suture is then placed in the right uterosacral ligament approximately two thirds of the way up toward the sacrum. This suture is connected to the vaginal apex on the right. This procedure is repeated on the left (Fig. 120–17) and extracorporeal knot-tying is used. The ureters are again inspected, and any additional defects in the peritoneum can be closed. Fig. 120–18 shows the completed uterosacral ligament vaginal vault suspension.
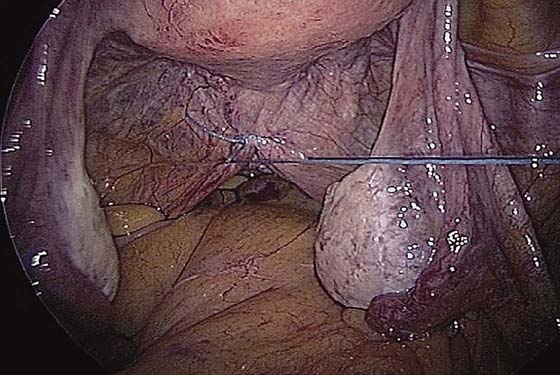
FIGURE 120–11 Uterosacral ligament plication.
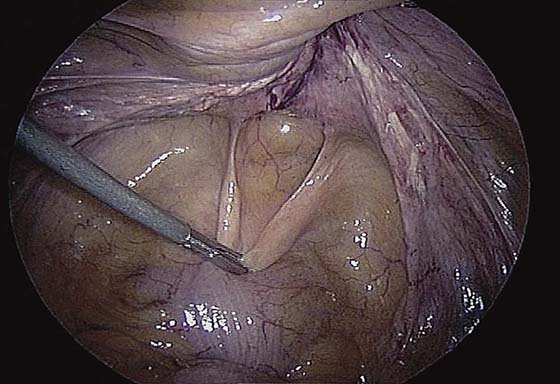
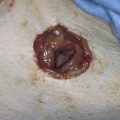
FIGURE 120–12 A laparoscopic view of an enterocele sac in association with vaginal prolapse.
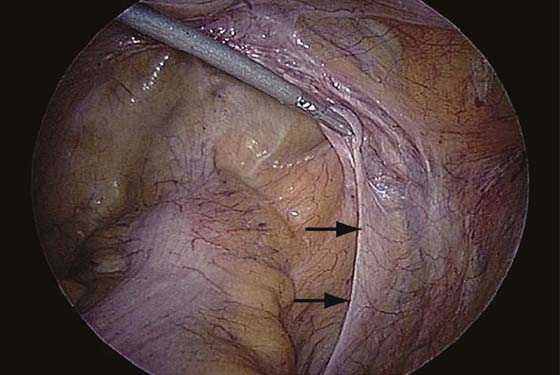
FIGURE 120–13 The right uterosacral ligament (arrows) is grasped and placed under tension.
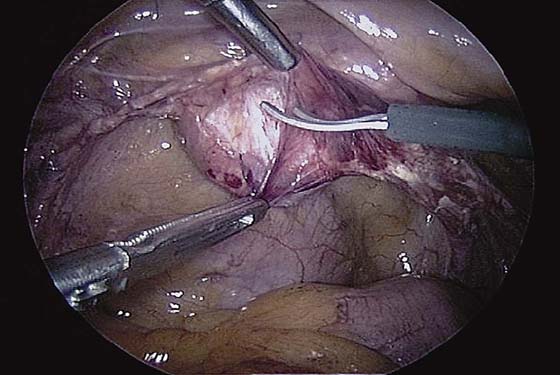
FIGURE 120–14 The peritoneum is dissected off the vagina.

FIGURE 120–15 The endopelvic fascia repair is begun by suturing the anterior pubocervical fascia (as shown) to the posterior rectovaginal fascia.
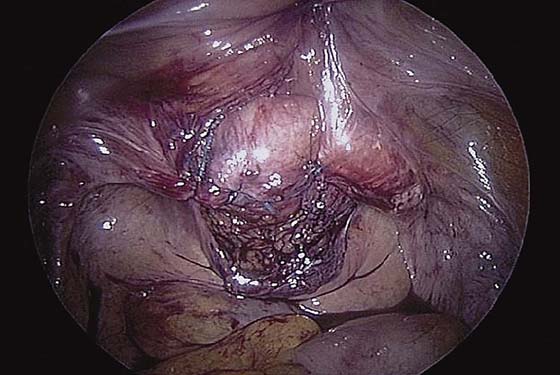
FIGURE 120–16 The completed endopelvic fascia repair at the vaginal apex.
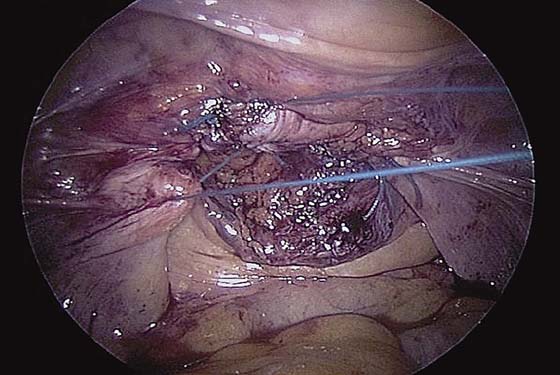
FIGURE 120–17 The left uterosacral ligament is sutured to the vaginal apex.
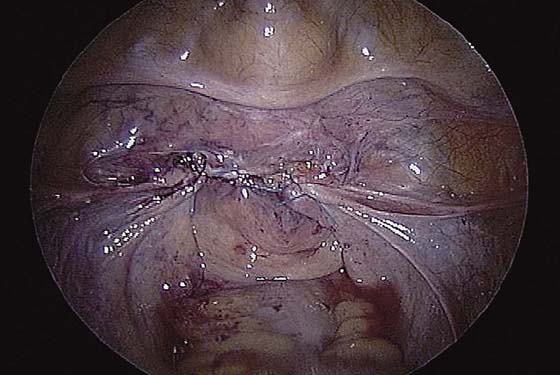
FIGURE 120–18 Completed uterosacral ligament vaginal vault suspension.