CHAPTER 38 Humeral Stem Removal and Glenoid Exposure
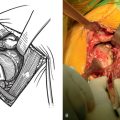
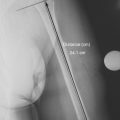
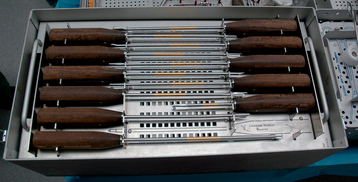
Humeral stem removal can be simple or one of the most difficult and time-consuming aspects of revision shoulder arthroplasty. Preoperative planning becomes very important in facilitating removal of the humeral stem during revision shoulder arthroplasty. Whereas relatively smooth press-fit humeral stems may be easy to remove, extensively porous-coated stems can be especially difficult to extract, particularly when they have been inserted with bone cement. Identification of the brand and type of implant used in the primary shoulder arthroplasty by radiographs or the primary arthroplasty operative report (or both) allows the surgeon to have an instrument set available to assist in extraction of the humeral implant (Fig. 38-1). Controlled extraction of the humeral implant, even if a humeral osteotomy is required, is certainly preferable to an intraoperative fracture of the proximal humerus caused by ill-fated attempts at extracting a well-fixated humeral stem without performing an osteotomy.
Once the humeral stem is removed, glenoid exposure proceeds in much the same manner as for primary shoulder arthroplasty (see Chapter 10). This chapter details our techniques for humeral stem removal and glenoid exposure during revision shoulder arthroplasty.
TECHNIQUE FOR HUMERAL STEM REMOVAL
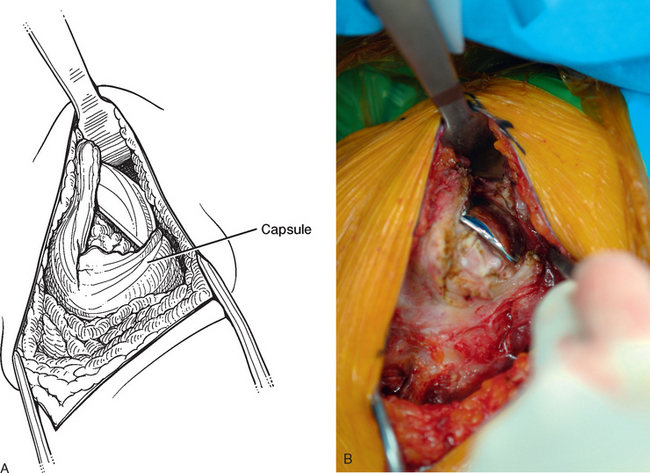
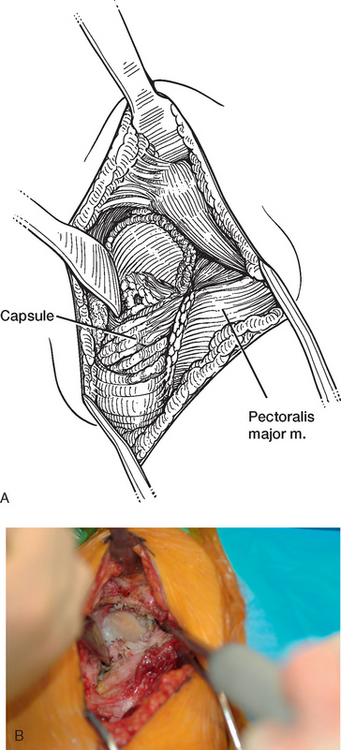
Tenotomy of the subscapularis with subsequent release of the superior, middle, and inferior glenohumeral ligaments (see Chapters 9 and 37) is performed if the subscapularis is intact. If the subscapularis is absent, any subscapularis bursa is excised to expose the anterior aspect of the humeral head component (Fig. 38-2). A humeral head retractor is placed for retraction of the proximal humerus posteriorly (Fig. 38-3). If this provides sufficient visualization of the anterior glenoid and inferior capsule, inferior capsular release is performed, as described in the following section on glenoid exposure. Frequently, because of its size, however, the humeral implant sufficiently hinders glenoid visualization to prevent inferior capsular release. In these cases it is necessary to remove the humeral stem before proceeding with glenoid exposure.
The proximal humerus must be dislocated before attempts at removal of the humeral stem. The dislocation must be done with great care to avoid humeral injury. Frequently, capsular stiffness prevents dislocation by simple external rotation and extension of the arm. If this maneuver is not initially successful, a humeral-based inferior capsular release is performed (Fig. 38-4). Progressive release of the inferior medial capsule from the humerus with the needle tip electrocautery allows dislocation of the proximal humerus. Care must be taken to keep the electrocautery in contact with the humerus to avoid injury to the axillary nerve. Dislocation maneuvers must be done slowly and with great care in revision cases to prevent humeral fracture because the humerus is often osteopenic and compromised (Fig. 38-5).
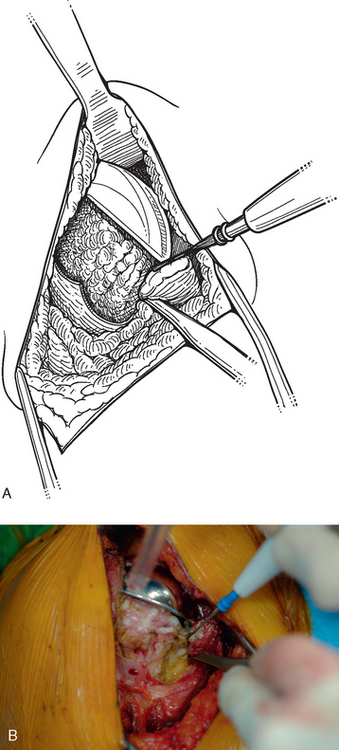

Figure 38-5 A and B, Gentle dislocation maneuver consisting of external rotation and extension of the arm.
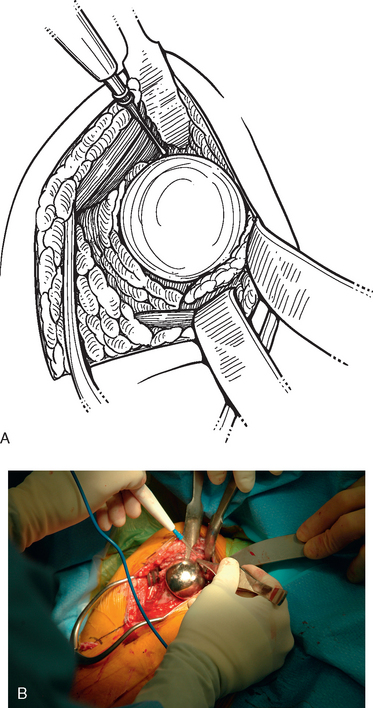
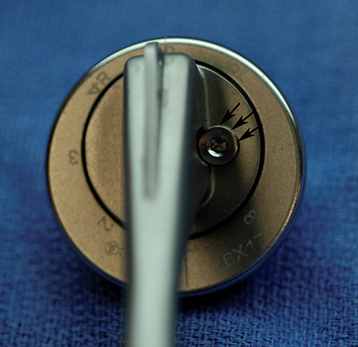
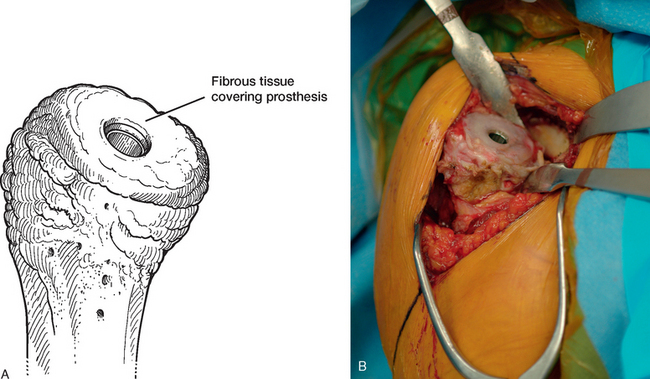
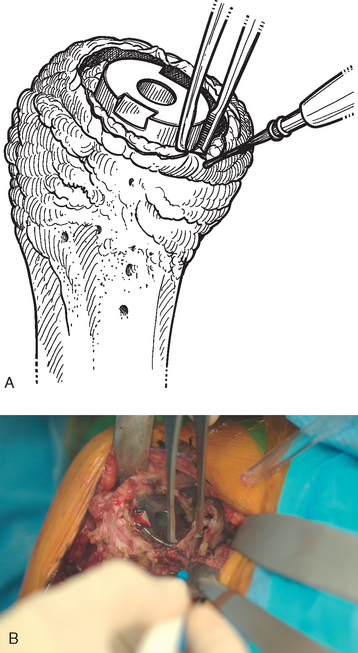
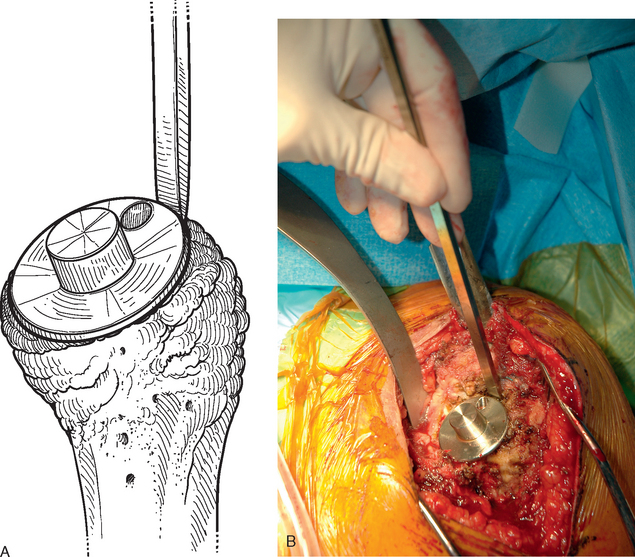
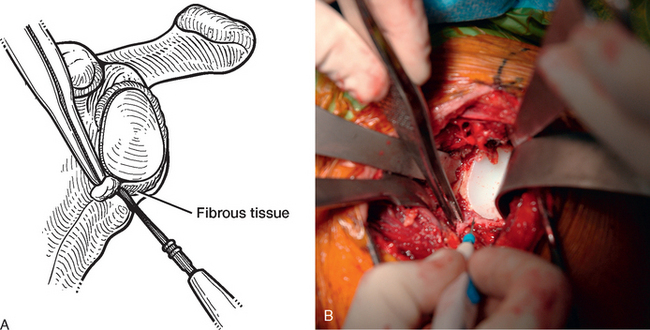
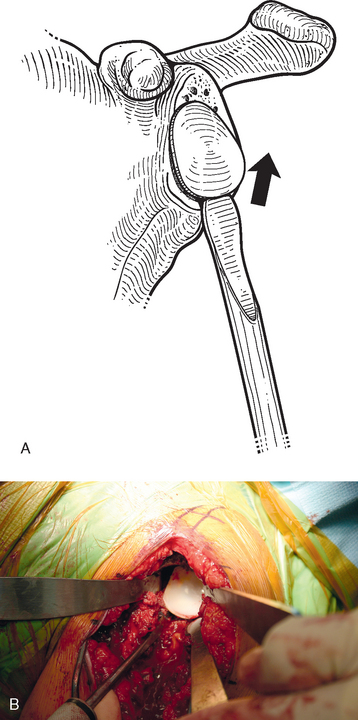
Once the humerus has been dislocated, the humeral head portion of the arthroplasty is circumferentially exposed by removing any fibrous tissue at its margins with the needle tip electrocautery (Fig. 38-6). Nearly all implants currently encountered during revision surgery have a modular head fixed onto a stem via a Morse taper mechanism. It is important, however, for a surgeon unfamiliar with the type of implant being removed to obtain any information available about the implant from the manufacturer. The surgeon must discover whether the implant is modular or mono-block and whether any accessory mechanisms have been used to fix the humeral head to the stem portion of the component (i.e., a threaded screw was used to further secure the Morse taper in some early modular designs; Fig. 38-7). If the humeral component is modular with only Morse taper fixation of the humeral head portion to the stem portion of the component, the humeral head is usually easily removed by disimpacting the humeral head from the stem with a Cobb elevator at the inferior aspect of the humeral head component (Fig. 38-8). Often, fibrous tissue covers the proximal aspect of the stem portion of the component (Fig. 38-9). This fibrous tissue is completely removed with the needle tip electrocautery to delineate the peripheral proximal portion of the stem circumferentially (Fig. 38-10). The condition of the superior and posterior rotator cuff tendons can be evaluated at this point (Fig. 38-11).
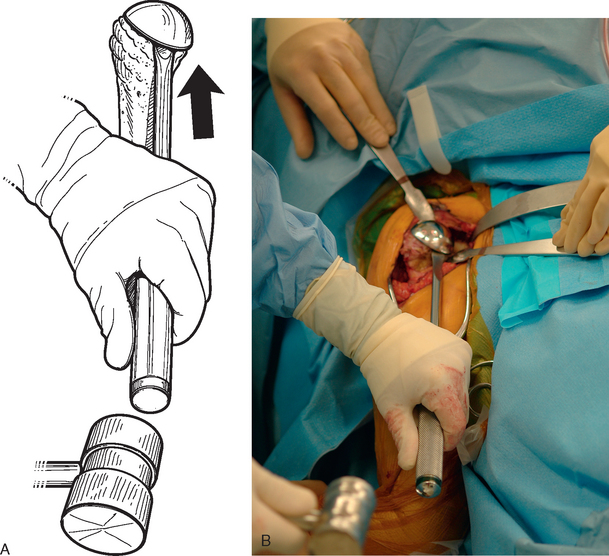
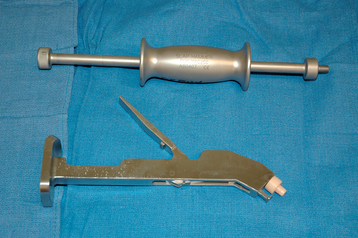
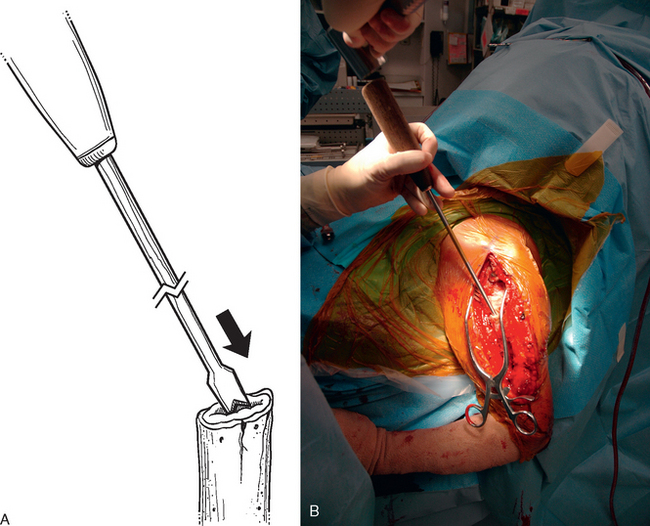
After all soft tissue has been released peripherally from the proximal aspect of the stem portion of the implant, the extraction device specific for the implant, if available, is attached (Fig. 38-12). Attempts are made with the extraction device (generally with an attached slap hammer). If attempts to extract the implant are initially unsuccessful, the extraction device is removed and small, thin osteotomes are used to delicately separate the proximal humerus from the proximal aspect of the humeral implant (Fig. 38-13). The extraction device is reattached and additional attempts are made to remove the humeral component. If these attempts are unsuccessful, a humeral osteotomy is performed for removal of the humeral implant (see later).
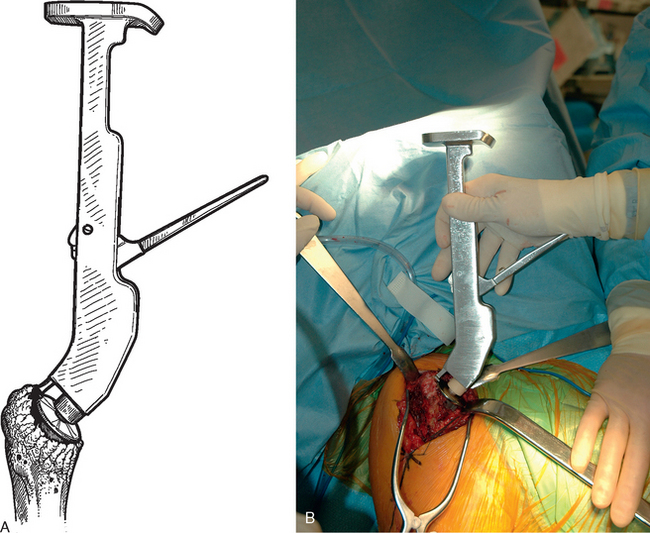
Figure 38-12 A and B, Attachment of an extraction device to the stem portion of the primary humeral stem.
If no extraction device for the type of implant being removed exists, small, thin osteotomes are used to delicately separate the proximal humerus from the proximal aspect of the humeral implant after all soft tissue has been released peripherally from the proximal portion of the stem portion of the implant. A large Cobb elevator is used to disimpact the humeral implant from the proximal humerus by striking it at its medial portion (Fig. 38-14). The Cobb elevator is directed as parallel as possible to the humeral implant stem. If attempts at implant extraction are unsuccessful with this technique, humeral osteotomy should be performed.
Humeral Osteotomy
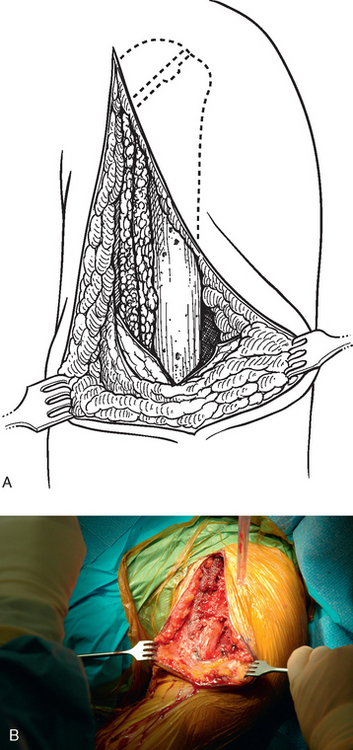
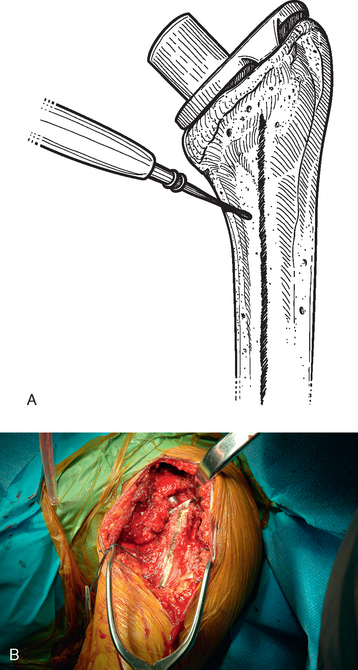
Once the necessity for humeral osteotomy is established, the surgical approach is extended distally, as detailed in Chapter 37. The humerus is exposed from its proximal aspect to the area distal to the pectoralis major insertion (Fig. 38-15). The planned osteotomy site is demarcated with the needle tip electrocautery and extended along the anterior humerus by starting just medial to the bicipital groove and continuing distally between the pectoralis major insertion and the deltoid insertion (Fig. 38-16). The distal extent of the osteotomy is determined by the length of the humeral stem to be removed.
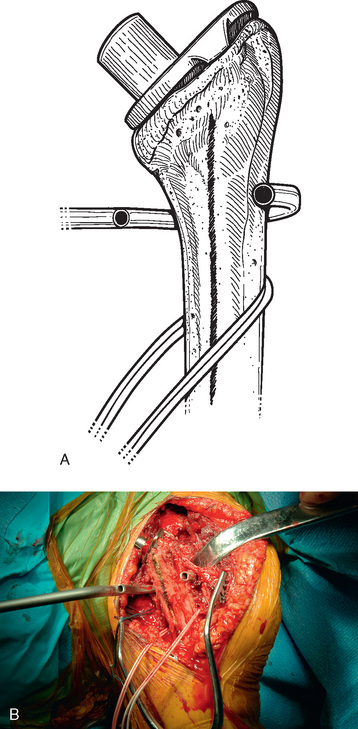
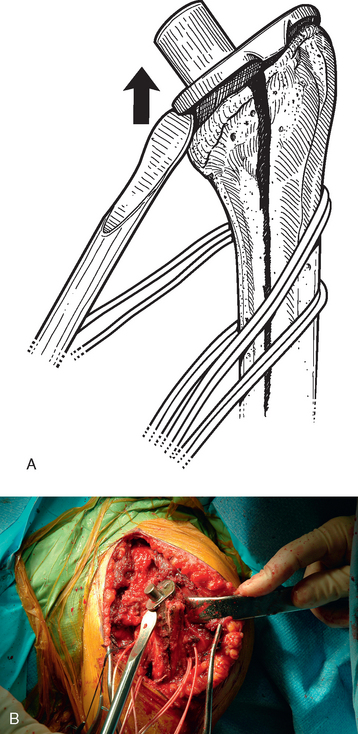
Before performing the osteotomy, cerclage cables are placed for subsequent osteotomy fixation. Depending on the length of the osteotomy, we place two or three cables composed of a nylon monofilament core wrapped in braided ultrahigh-molecular-weight polyethylene (Kinamed Inc., Camarillo, CA). The cables are placed subperiosteally with the cable-passing instrumentation provided (Fig. 38-17). In cases in which the osteotomy extends beyond the junction of the proximal third and middle third of the humeral shaft, the radial nerve must be identified and protected before passing cables posterior to the humerus (see Chapter 37). Once the cables are passed, the free ends of each cable are clamped together with Kocher clamps (Fig. 38-18).
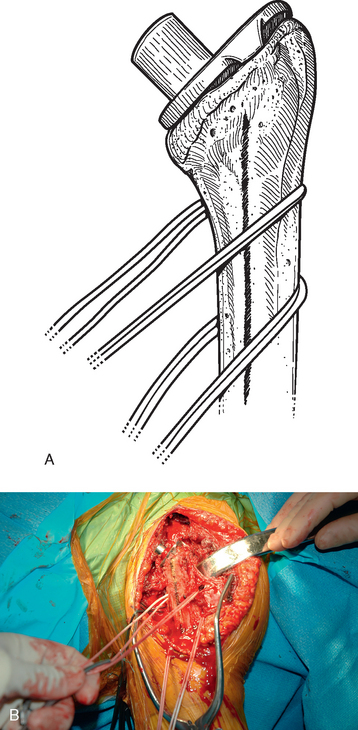
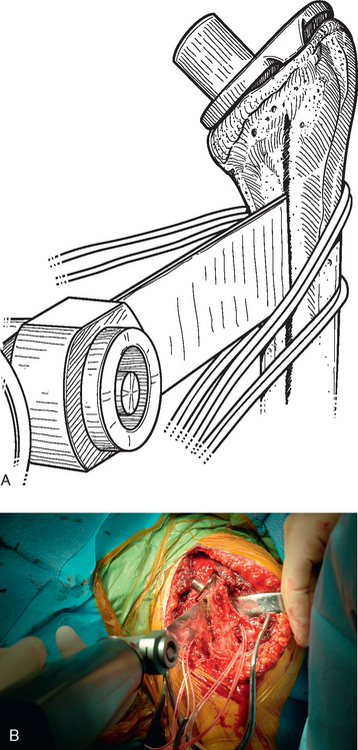
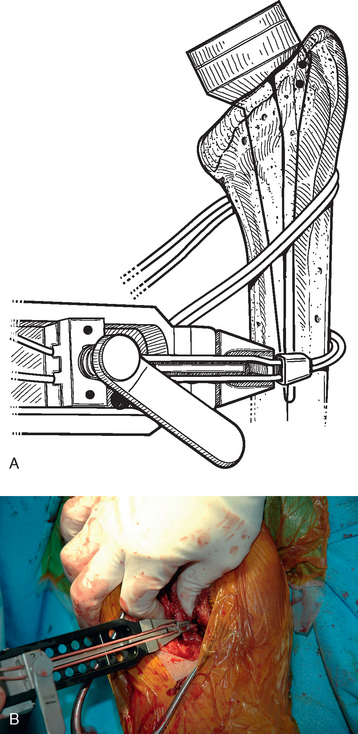
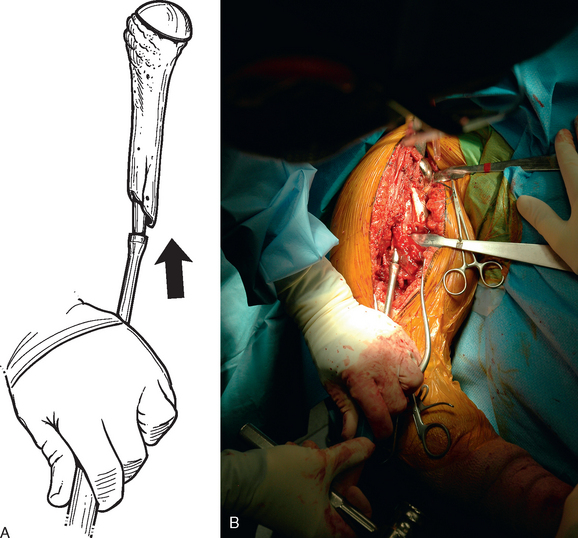
A unicortical humeral osteotomy is performed by penetration of the anterior cortex with a sagittal saw along the humerus at the demarcated osteotomy site down to the humeral implant (Fig. 38-19). A 1½-inch straight osteotome is impacted into the osteotomy site proximally (Fig. 38-20). The osteotome is turned to open the osteotomy by plastically deforming the proximal humerus (Fig. 38-21). The humeral stem can then be removed with the extraction instrumentation provided or by disimpaction with a Cobb elevator, as described earlier (Fig. 38-22).
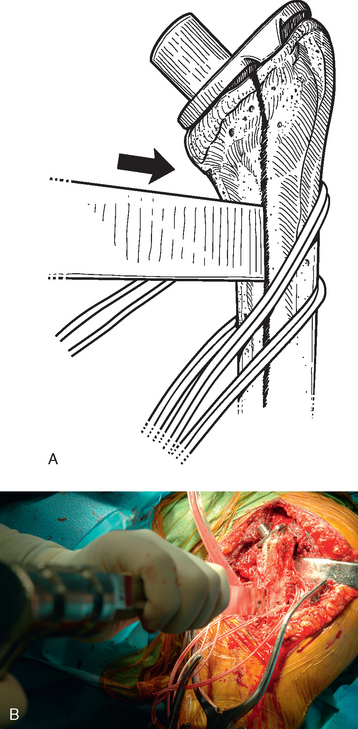

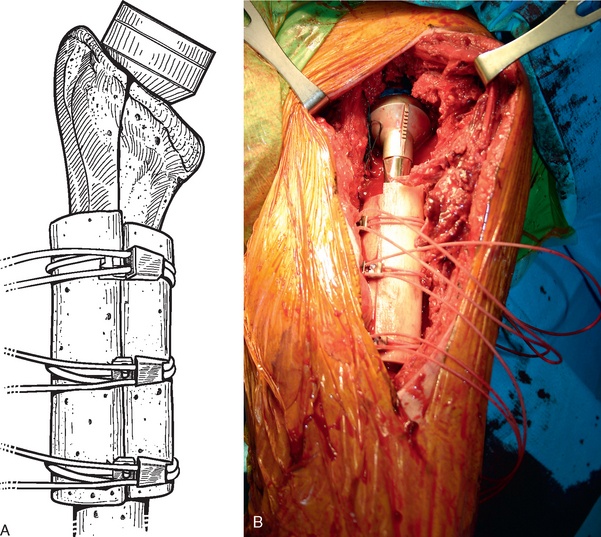
After the humeral stem and any necessary cement (see later) are removed, the osteotomy must be fixated. This is performed by first preparing the proximal humerus for insertion of the revision humeral component with the instrumentation provided. The trial humeral stem is inserted and the cables are tightened with the tensioning device provided (Fig. 38-23). The cables are tightened in a distal-to-proximal direction. In cases in which the native humeral cortex is excessively thin, fresh frozen allograft cortical struts are placed around the native humerus beneath the cables before tightening to provide additional support to the proximal humerus (Fig. 38-24).
Cement Removal
When removing a cemented humeral stem, residual cement is removed for two reasons—if it is loose within the humerus and if it prevents insertion of the revision humeral stem. Any residual cement that is well fixed within the humeral canal and does not interfere with insertion of the revision humeral stem is left in place. The revision humeral stem can be successfully fixated into a stable residual cement mantle.1
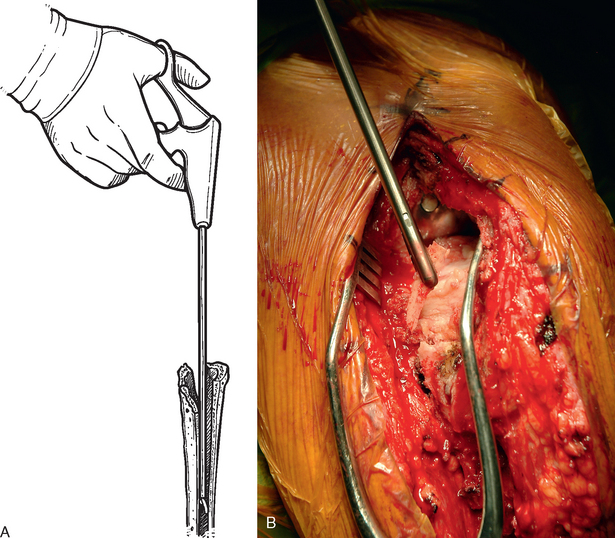
Loose cement within the humeral canal is easily removed with pituitary-type forceps (Fig. 38-25). Removing cement that is well fixed within the humeral canal to make room for the revision humeral component is more challenging. We use a set of specialized cement-removing osteotomes (Moreland osteotomes) that come in a variety of shapes and sizes (Fig. 38-26). A combination of curved and straight Moreland osteotomes is used to remove the proximal cement mantle (Fig. 38-27). Any cement fragments that fall into the humeral canal are removed with pituitary forceps. Only enough cement is removed to permit insertion of the revision humeral stem. The trial stem is inserted intermittently during the cement removal process to evaluate the sufficiency of cement removal.
TECHNIQUE FOR GLENOID EXPOSURE
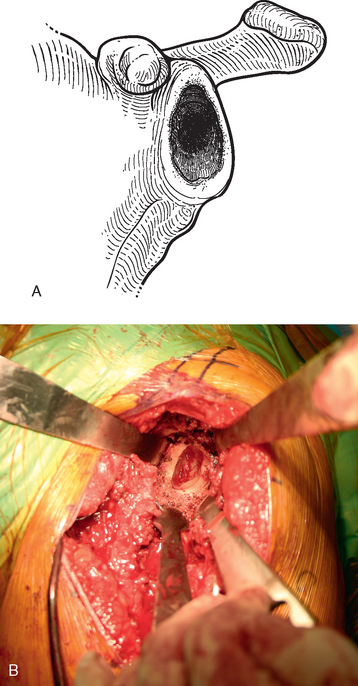
After the humeral component is removed, attention is turned to glenoid exposure. In cases in which no glenoid component has previously been implanted, any remaining labrum is excised from the base of the coracoid process extending inferiorly to the 5 o′clock position in a right shoulder (7 o′clock in a left shoulder) with the needle tip electrocautery. This allows identification of the osseous anterior margin of the glenoid. In nearly all cases, proper exposure of the glenoid requires release of the inferior capsule. The tip of the electrocautery is used to release the inferior capsule directly off the rim of the glenoid bone, just as in primary total shoulder arthroplasty. To help prevent injury to the axillary nerve, the tip of the electrocautery should be kept in contact with glenoid bone. This release is extended sufficiently medially to completely transect the capsule and expose the muscular fibers of the triceps inserting on the inferior osseous glenoid. The amount of posterior subluxation present on preoperative secondary imaging studies (computed tomography, magnetic resonance imaging) determines the posterior extent of release. In shoulders without posterior subluxation, the release continues posteriorly to the 8 o′clock position for right shoulders (4 o′clock position for left shoulders). In shoulders that have preexisting posterior subluxation, either with or without posterior glenoid erosion, the release continues initially to only the 6 o′clock position. These patients often have a distended posterior capsule, so no more release is performed than is absolutely necessary to avoid compromising these posterior structures further. If release to only the 6 o′clock position proves inadequate later in the procedure during glenoid reaming, the release can be extended at that time. A Cobb elevator can be used to check the release for completeness.
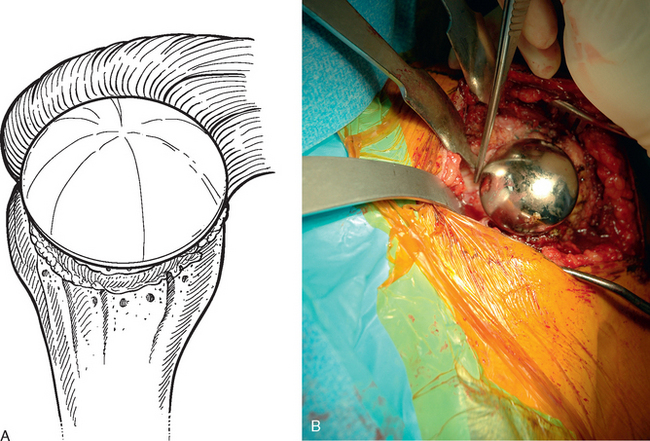
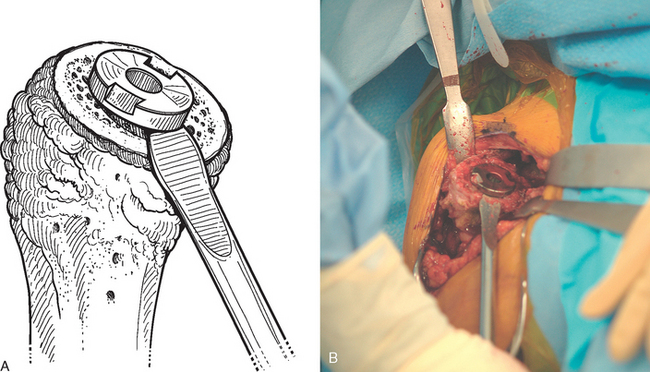
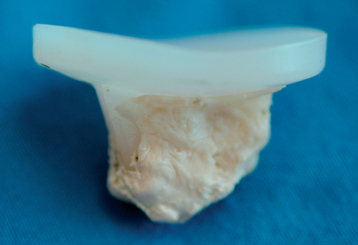
If a glenoid component has previously been placed, removal is usually simple because most of these components are loose in the revision scenario. After the humeral component has been removed, the proximal humerus is retracted posteriorly with a humeral head retractor. Soft tissue is removed circumferentially from around the glenoid component with the needle tip electrocautery (Fig. 38-28). The inferior capsule is released just as in cases in which no glenoid component has previously been placed. Once the periphery of the glenoid component has been cleared of soft tissue, a half-inch curved osteotome is used to lever the glenoid component gently out of the native glenoid (Fig. 38-29). The majority of cemented glenoid components come out with the cement still bonded to the implant (Fig. 38-30). Loose cement fragments and fibrous tissue are removed with forceps and a rongeur. Any residual cement fixed to the native glenoid is removed with a quarter-inch straight osteotome. Only when all residual cement and fibrous tissue have been removed can the osseous defect in the remaining native glenoid be properly evaluated and classified as contained or uncontained (Fig. 38-31).
SPECIAL SITUATIONS
Periprosthetic Fracture
If a periprosthetic fracture is encountered either preoperatively or intraoperatively, the fracture site may be used for removal of the humeral stem. The radial nerve must be identified and protected. Working through the fracture site, the humeral stem may be removed by striking the distal tip of the humeral component with a mallet and bone tamp (Fig. 38-32). This should be performed only after proper exposure plus release of the proximal humerus has been achieved. This technique may eliminate the need for a humeral osteotomy.
Infection
In cases of confirmed or suspected infection (based on the preoperative infection workup; see Chapter 36), no preoperative antibiotics are administered. Once the glenohumeral joint is opened, samples are taken for multiple cultures, including aerobic, anaerobic, fungal, and mycobacterial. We routinely use both swabs and fragments of soft tissue for analysis. Once these samples are taken for culture, standard perioperative antibiotics are administered.
In cases of possible or suspected infection (preoperative aspiration negative, but other indicators of infection present), multiple synovial biopsy samples are submitted for intraoperative frozen section evaluation. While the pathologist is evaluating the tissue, the procedure continues with removal of the primary components. If findings on frozen section are indicative of infection (more than five polymorphonuclear leukocytes per high-power field in five consecutive fields) or in the case of confirmed infection (positive culture on preoperative aspirates), the components are removed and an antibiotic-impregnated polymethylmethacrylate cement spacer shaped like a humeral hemiarthroplasty is inserted as the first stage of a two-stage revision (Fig. 38-33).2 We are more aggressive in cement removal from the proximal humerus in cases of infection and remove as much cement from the primary arthroplasty as possible without severely damaging the proximal humerus. Additionally, in all cases of suspected infection, thorough irrigation is performed with at least 9 L of antibiotic-impregnated sterile saline (50,000 units bacitracin per liter sterile normal saline) introduced with a pulse lavage irrigator. Any necrotic-appearing tissue is sharply débrided.
Occasionally, we treat a patient with a chronically infected shoulder arthroplasty who is not a candidate for staged revision arthroplasty. In this case we treat the patient by removing the prosthetic implants, performing irrigation and débridement, and implanting antibiotic-impregnated absorbable calcium sulfate pellets (Stimulan, Biocomposites, Ltd., Wilmington, NC). A 10-cc package of pellets is mixed with 1 g of vancomycin or with 1.2 g of tobramycin for a vancomycin-allergic patient. Two 10-cc packages are usually sufficient to fill to the defect left by removal of the implant (Fig. 38-34).

1 Walch G, Edwards TB, Boulahia A. Revision of the humeral stem: Technical problems and complications. In: Walch G, Boileau P, Molé D, editors. 2000 Prosthèses d’Epaule … Recul de 2 à 10 Ans. Paris: Sauramps Medical; 2001:443-454.
2 Feldman DS, Lonner JH, Desai P, Zuckerman JD. The role of intraoperative frozen sections in revision total joint arthroplasty. J Bone Joint Surg Am. 1995;77:1807-1813.