CHAPTER 39 Humeral Component
Reconstruction of the proximal humerus can be a very difficult aspect of revision shoulder arthroplasty. During extraction of the previous humeral stem, every effort should be made to preserve as much native proximal humeral bone as possible (see Chapter 38). The overall condition of the proximal humerus and rotator cuff plays a significant role in determining the type of implant to be used in revision surgery (unconstrained versus semiconstrained). In cases in which the rotator cuff is largely functional, preservation of the greater and lesser tuberosities helps dictate which type of revision implant to use during revision surgery. Once the type of revision implant to be used is selected, preparation of the proximal humerus and implantation of the humeral component proceed just as for primary arthroplasty. This chapter details our techniques for reconstruction and preparation of the proximal humerus and implantation of the humeral component in revision shoulder arthroplasty.
TECHNIQUE FOR PREPARATION OF THE PROXIMAL HUMERUS
Unconstrained Humeral Stem
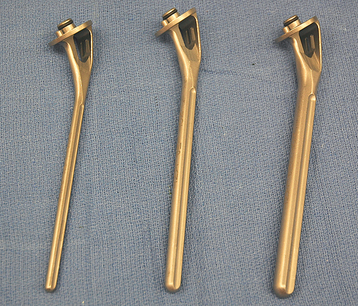
In cases in which we are going to implant an unconstrained proximal humeral stem, we prefer to implant a stem with geometry designed originally for use in proximal humeral fractures. This cemented stem design allows a good fit into the humeral metaphysis and comes in a variety of lengths. This allows the surgeon to treat periprosthetic fractures or bypass the distal aspect of a humeral diaphyseal osteotomy used for extraction of the humeral stem (Fig. 39-1).
For this revision stem, no metaphyseal broaching is necessary. The diaphysis is progressively reamed with the hand reamers provided (Fig. 39-2). Frequently, after removing an uncemented humeral stem, a small pedestal of bone exists in the intramedullary canal at the level just distal to the tip of the original humeral stem (Fig. 39-3). It is easy to tap the smallest diaphyseal reamer through this osseous pedestal. Subsequent reamers pass through this area without difficulty.
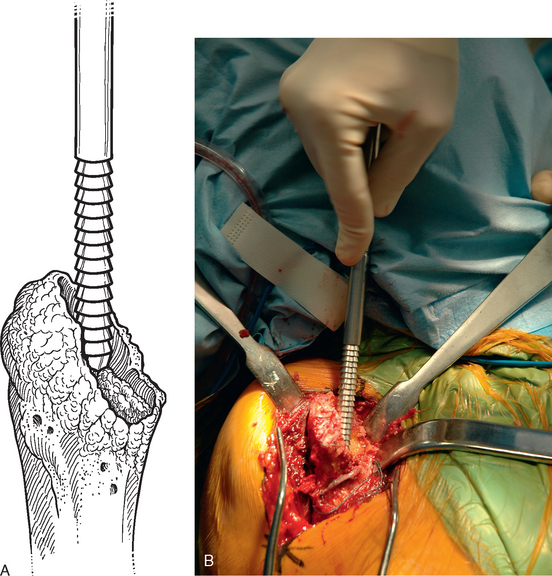
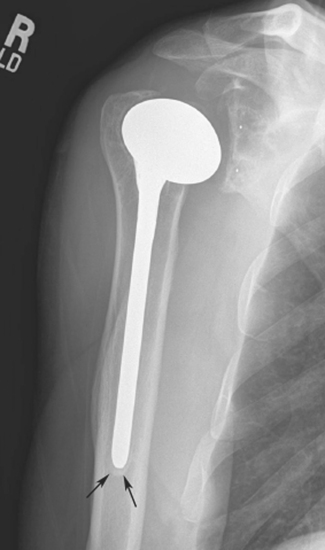
Figure 39-3 Pedestal of intramedullary cortical bone (arrows) distal to the tip of an uncemented humeral stem.
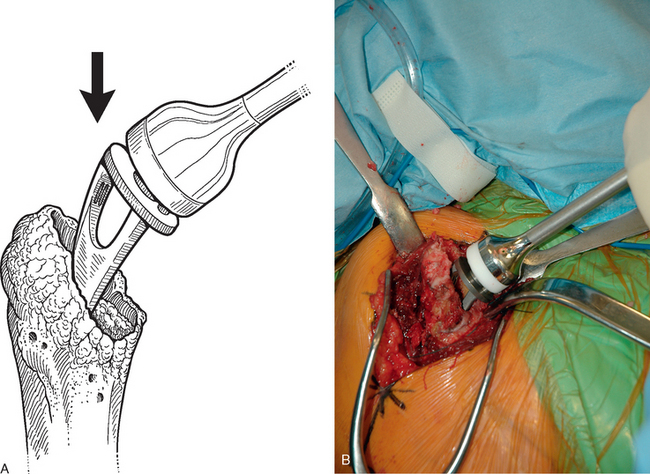
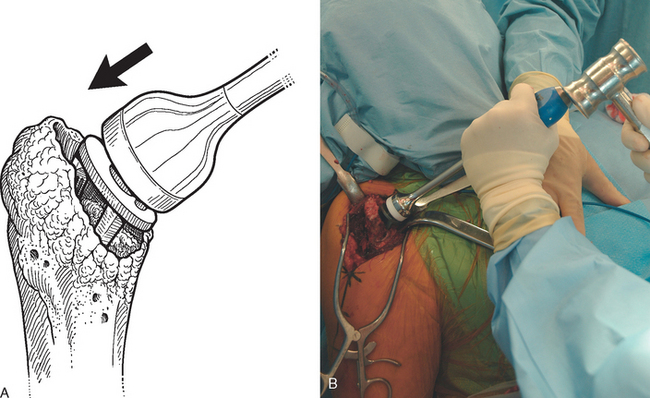
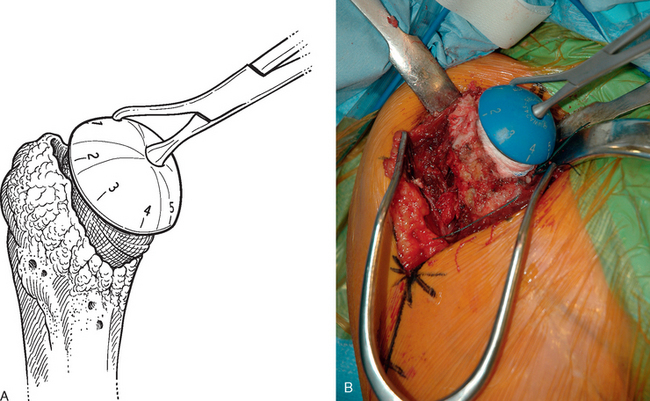
Once a humeral stem diameter of appropriate size is selected, the trial humeral stem is inserted by impacting the stem into the proximal humerus (Fig. 39-4). Effort is made to impact the stem laterally into the tuberosities (Fig. 39-5). It is not necessary to broach the humeral metaphysis because the bone in this area is relatively soft and compresses sufficiently to allow full seating of the implant. On occasion, the metaphyseal bone will be moderately to severely osteopenic, and the trial humeral stem will fall into the medial portion of the metaphysis (Fig. 39-6). This “loose fit” hinders testing of the trial implant. The trial may be stabilized within the proximal humerus in this scenario by wrapping a sterile sponge (or portion of a sterile sponge) around the metaphyseal portion of the trial implant before placing it in the humeral canal (Fig. 39-7).
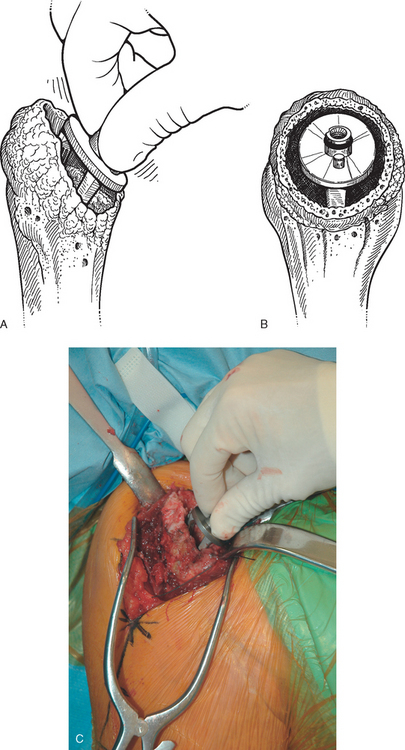
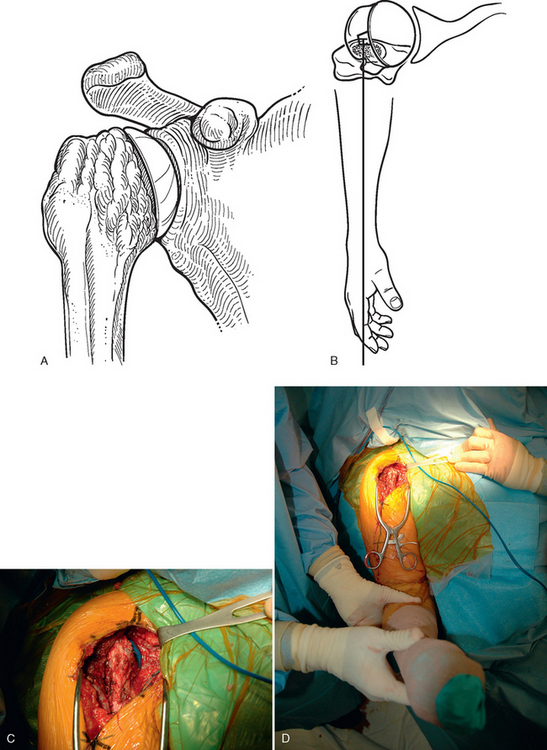
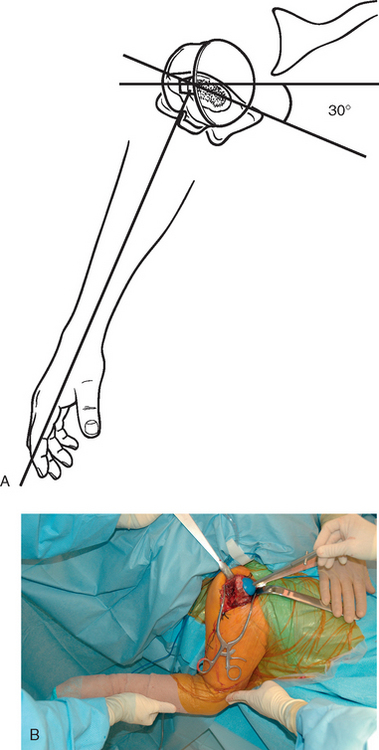
Once the trial humeral stem is securely placed in the proximal humerus, a humeral head implant of appropriate size is selected. The prosthetic head should provide adequate coverage of the proximal humeral metaphysis but not overhang the humerus at any portion. The system that we use allows variable medial-to-lateral and anterior-to-posterior offset. The prosthetic humeral head is placed on the trial humeral stem at the various offset positions to allow selection of the best offset index (Fig. 39-8). Once the proper index has been selected, the glenohumeral joint is reduced and humeral version is judged. With the arm in neutral rotation, the center of the prosthetic humeral head should align with the center of the glenoid, provided that osseous glenoid morphology is intact and does not demonstrate a nonconcentric wear pattern (Fig. 39-9). In cases with nonconcentric glenoid morphology or cases in which the osseous glenoid is compromised, we judge humeral version by placing the prosthesis in approximately 30 degrees of retroversion relative to the long axis of the forearm (Fig. 39-10). If the version of the trial humeral stem is unacceptable, the humeral trial is removed and humeral version changed by revising the original plane of humeral head resection by way of a revision humeral cut to introduce more retroversion or anteversion, as deemed appropriate by the trial glenohumeral reduction. The trial humeral implant is reinserted and the trial reduction repeated to ensure that humeral version has been corrected acceptably.
Reverse-Design Humeral Stem
In cases in which a reverse-design humeral implant is to be used as the revision humeral stem and the osseous proximal humerus is relatively preserved, the epiphysis, metaphysis, and diaphysis are prepared in much the same way as for insertion of a reverse prosthesis as a primary implant. The epiphyseal reamer is first used to create a place for the proximal portion of the humeral implant (Fig. 39-11), after which the metaphyseal hand reamer is used (Fig. 39-12). Progressive diaphyseal reaming is then performed, with penetration of any osseous pedestal present in the humeral canal (Fig. 39-13). The trial humeral stem is assembled by using an implant diameter corresponding to the largest-diameter diaphyseal reamer that was used. The trial humeral implant is placed in approximately 10 degrees of humeral retroversion by using the forearm referencing insertion instrument and is fully impacted (Fig. 39-14). The position of the fin is marked on the proximal humerus with the electrocautery (Fig. 39-15).

Figure 39-11 A and B, Epiphyseal reaming for a reverse prosthesis during revision shoulder arthroplasty.
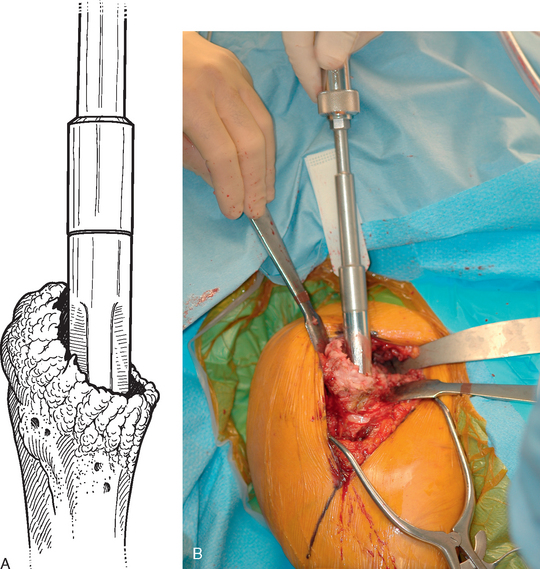
Figure 39-12 A and B, Metaphyseal reaming for a reverse prosthesis during revision shoulder arthroplasty.
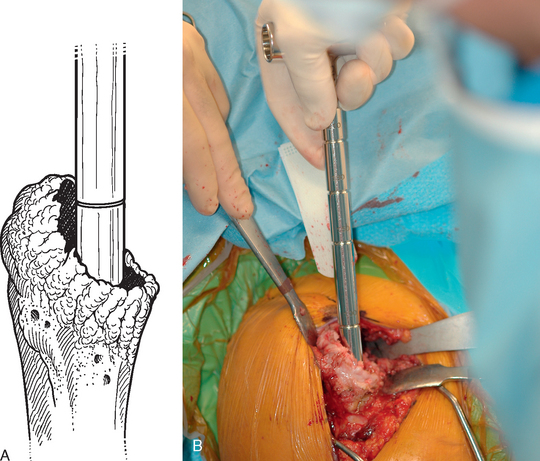
Figure 39-13 A and B, Diaphyseal reaming for a reverse prosthesis during revision shoulder arthroplasty.

Figure 39-14 A and B, Insertion of the trial humeral component during revision shoulder arthroplasty with a reverse prosthesis.

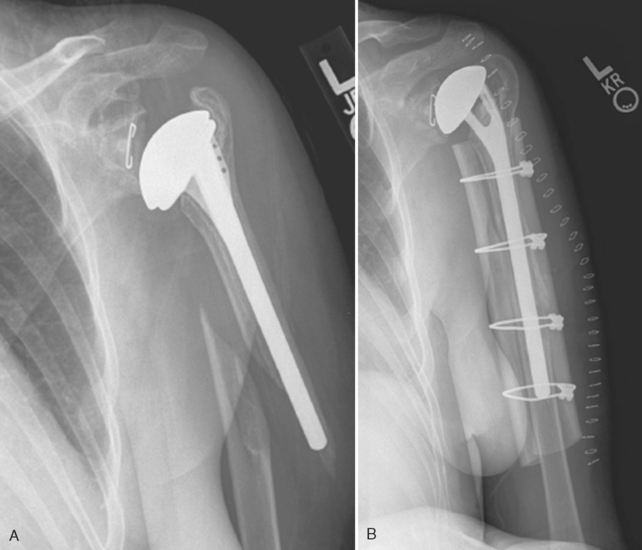
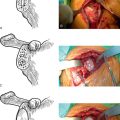
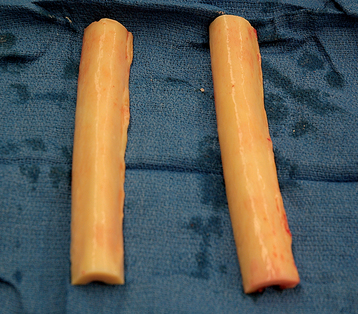
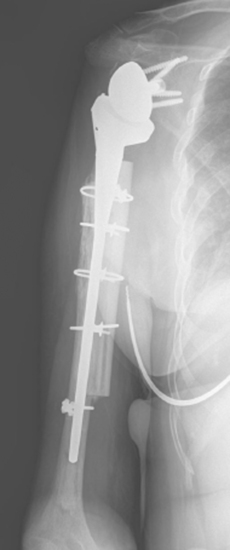
Revision cases with proximal humeral insufficiency may require proximal humeral osseous reconstruction with a bone graft. In general, in any case in which the rotator cuff insertion is compromised and glenoid bone stock allows, we will use a reverse prosthesis for revision arthroplasty. In cases of proximal humeral insufficiency limited to the proximal humeral metaphysis, no bone graft is indicated because the reverse prosthesis can be implanted into the intact humeral diaphysis (Fig. 39-16). In cases in which proximal humeral bone loss extends distally and compromises the proximal humeral diaphysis, bone graft reconstruction of the proximal humeral diaphysis is indicated (Fig. 39-17). In many cases, only a portion of the proximal humeral diaphysis is deficient (anterior or posterior). For this reason we prefer to reconstruct only the portion that is deficient and leave any native bone intact. Fresh frozen cortical strips of allograft tibia are used for the reconstruction (Fig. 39-18). The residual diaphysis is reamed with the hand reamers.


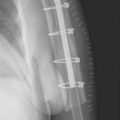
Depending on the length of the humeral defect, we place two or three cables composed of a nylon monofilament core wrapped in a braided ultrahigh-molecular-weight polyethylene (Kinamed, Inc., Camarillo, CA) subperiosteally around the residual native humerus with the cable-passing instrumentation provided (Fig. 39-19). One or two allograft strips are trimmed to fit the diaphyseal defect and placed in the defect. The trial humeral stem is placed in the humeral diaphysis, and the allograft is placed in the diaphyseal defect (Fig. 39-20). The cables are tightened in a distal-to-proximal direction with the tensioning device (Fig. 39-21). The humeral stem is removed while leaving the reconstructed proximal humerus, and attention is turned to the glenoid, if indicated (Fig. 39-22).
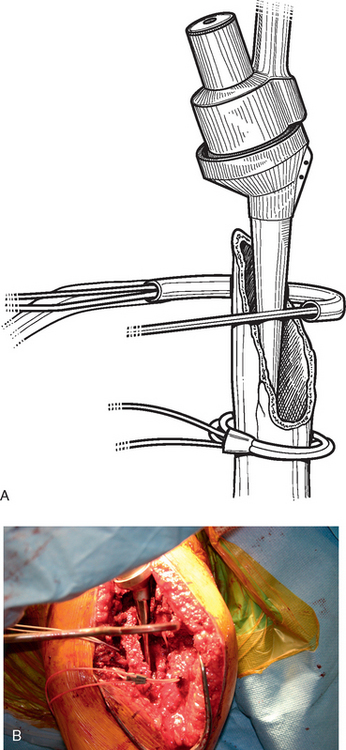
Figure 39-19 A and B, Passage of fixation cables to secure the allograft during proximal humeral reconstruction.
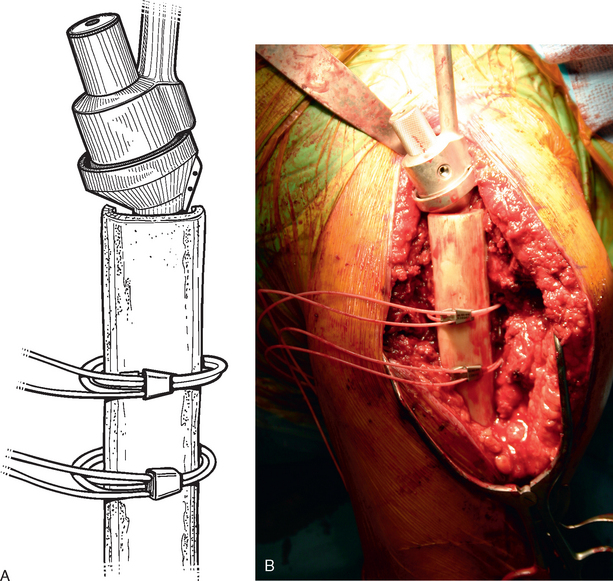
Figure 39-20 A and B, Placement of the allograft strip over the diaphyseal defect during proximal humeral reconstruction.
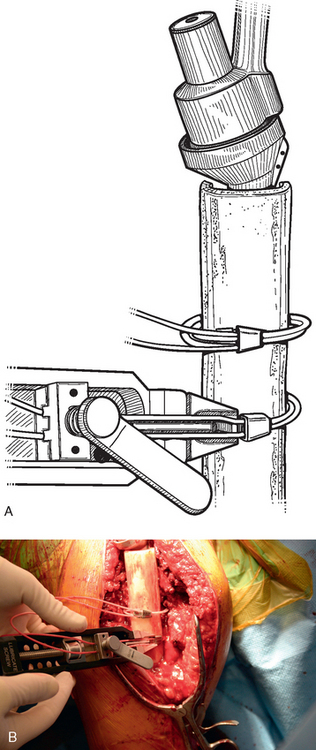
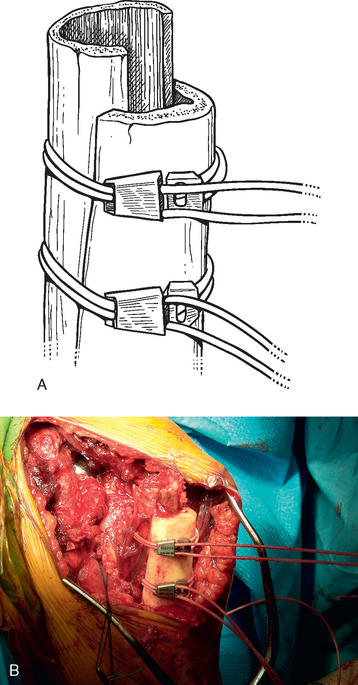
Figure 39-22 A and B, The trial humeral stem is removed while leaving the reconstructed proximal humerus.
In cases in which a proximal humeral osteotomy has been performed for removal of the humeral stem, the cerclage cables are secured before removal of the trial humeral stem (see Chapter 38). In cases in which the native humeral cortex is excessively thin, fresh frozen allograft cortical struts are placed around the native humerus beneath the cables before tightening them to provide additional support for the proximal humerus, as shown in Chapter 38. The trial humeral stem is removed and attention is turned to the glenoid, if indicated.
TECHNIQUE FOR INSERTION OF A REVISION HUMERAL STEM
Once any glenoid pathology has been addressed, the humeral stem may be implanted. We cement the humeral stem in nearly all revision cases. In cases in which an unconstrained shoulder arthroplasty is to be implanted, the trial stem is replaced after any glenoid procedure is completed and glenohumeral stability is evaluated. With the arm externally rotated approximately 30 degrees, force is applied in a posterior direction to the proximal humerus, as with primary unconstrained shoulder arthroplasty. The prosthetic humeral head should subluxate posteriorly approximately 30% to 50% of its diameter and spontaneously reduce on release of the posteriorly directed force. If spontaneous reduction does not occur, posterior capsulorrhaphy may be necessary, as described in Chapter 13. Conversely, if posterior translation of at least 30% of the diameter of the humeral head is not possible, posterior capsular release may be necessary.
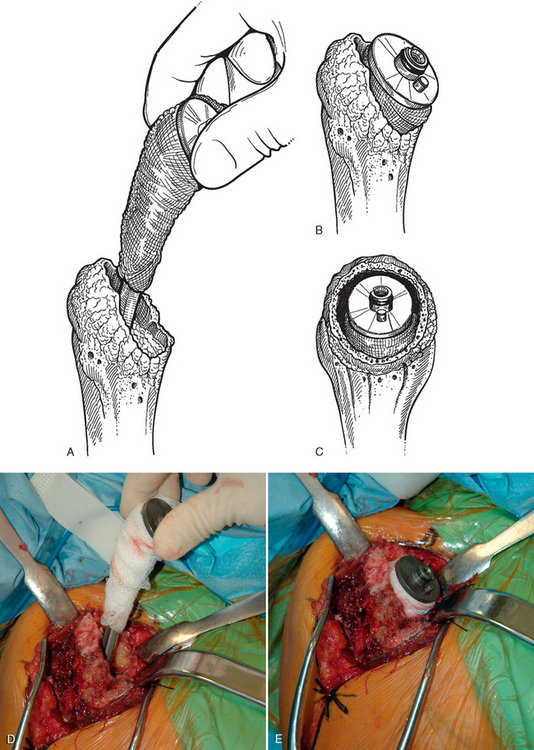
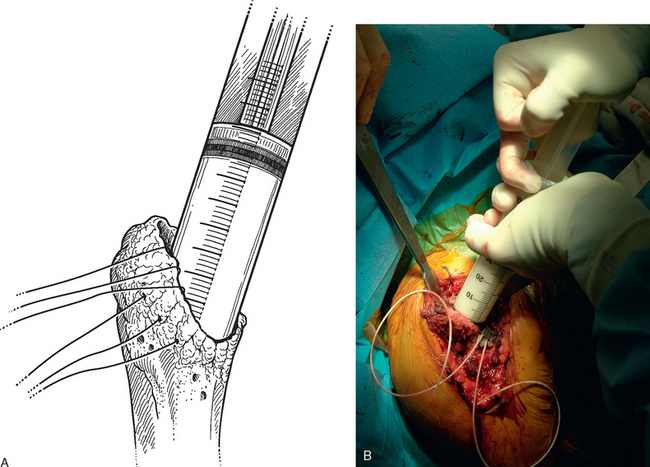
Once the shoulder is properly balanced, the humeral implant is cemented into place. Before insertion of the humeral stem, a cement restrictor is placed 1 cm distal to the distal-most extent of the stem with an insertion device, except in cases in which a long-stem humeral implant that extends distally to the humeral isthmus is used, in which case no cement restrictor is placed (Fig. 39-23). Three no. 2 nonabsorbable braided sutures are placed first through the humeral stump of the subscapularis tendon, into the lesser tuberosity, and out through the intramedullary canal of the humerus for later use in reattachment of the subscapularis, as in cases of primary unconstrained shoulder arthroplasty (Fig. 39-24). These sutures are tagged with three different types of hemostats to identify the sutures as superior, middle, and inferior (we use a curved Kelly hemostat superiorly, a mosquito hemostat on the middle suture, and a regular hemostat inferiorly). The humeral canal is irrigated with sterile saline and dried with suction and gauze sponges. Two packages of bone cement (we prefer to use DePuy 2 bone cement [DePuy, Inc., Warsaw, IN] because of its accelerated curing time of less than 8 minutes) impregnated with 4 g of vancomycin powder (or 4.8 g of tobramycin powder in patients with vancomycin allergy) are introduced with a modified catheter tip syringe (Fig. 39-25). The canal is filled with cement and the assembled humeral stem is seated with an impactor while making sure to lateralize the humeral stem (Fig. 39-26). It is not necessary to pressurize the cement. Excess cement is removed with a Freer elevator. The cement is allowed to cure before reducing the glenohumeral joint. The subscapularis is repaired with the previously placed transosseous sutures, as in cases of primary shoulder arthroplasty.


When implanting a reverse prosthesis during revision shoulder arthroplasty, we reinsert the trial humeral stem with the 6-mm polyethylene insert after completing implantation of the glenoid component and reduce the prosthetic glenohumeral joint. With longitudinal traction placed on the arm, the humeral component is manually telescoped maximally out of the humerus to the glenoid component (Fig. 39-27), and the level of the trial humeral implant with respect to the proximal humerus is marked (Fig. 39-28). The distance between the metaphyseal-diaphyseal prosthetic junction and the mark made with respect to the proximal humerus is compared with the distance templated preoperatively (see Chapter 36) to evaluate restoration of appropriate humeral length. This enables an estimation of the appropriate level at which to cement the humeral component. If the humeral component is cemented too distally within the humerus, adequate tension may not be obtainable. Conversely, if the humeral component is cemented too proximally within the humerus, the prosthetic joint may be irreducible.


Once the desired level at which to cement the humeral implant has been selected, preparation is made to insert the humeral prosthesis. Before insertion of the humeral stem, a cement restrictor is placed 1 cm distal to the distal-most extent of the stem with an insertion device, except in cases in which a long-stem humeral implant that extends distally to the humeral isthmus is used, in which case no cement restrictor is placed. If the subscapularis tendon is present and reparable, three no. 2 nonabsorbable braided sutures are placed first through the humeral stump of the subscapularis tendon, into the lesser tuberosity, and out through the intramedullary canal of the humerus for later use in reattachment of the subscapularis, as in cases of primary and revision unconstrained shoulder arthroplasty, as previously described. The humeral canal is irrigated with sterile saline and dried with suction and gauze sponges.
The final humeral implant is cemented into place with antibiotic-impregnated cement via the technique previously described in this chapter. The cement is allowed to cure before reducing the glenohumeral joint. Once the humeral component has been cemented into place within the humerus (see Chapter 28), trial insertion of the various implants commences, as described in Chapter 30. In revision cases, no pistoning is accepted between the humeral and glenoid components. Additionally, we often use a “shoe horn” instrument to aid in reduction by levering the humerus distally to engage the glenoid (Fig. 39-29). Once appropriate tension has been obtained, the final polyethylene insert is placed, as described in Chapter 30.

SPECIAL SITUATIONS
Periprosthetic Fracture
In cases of periprosthetic fracture, the fracture must be reduced before placement of the revision humeral stem. The fracture and associated structures (i.e., the radial nerve) are exposed as detailed in Chapter 37. The humerus distal to the fracture site is reamed with the diaphyseal reamers introduced at the fracture site (Fig. 39-30). The humerus proximal to the fracture site is prepared with the instrumentation provided for the selected humeral stem. It is often helpful to stabilize the proximal humeral fragment with a bone clamp during preparation of the proximal humerus (Fig. 39-31).
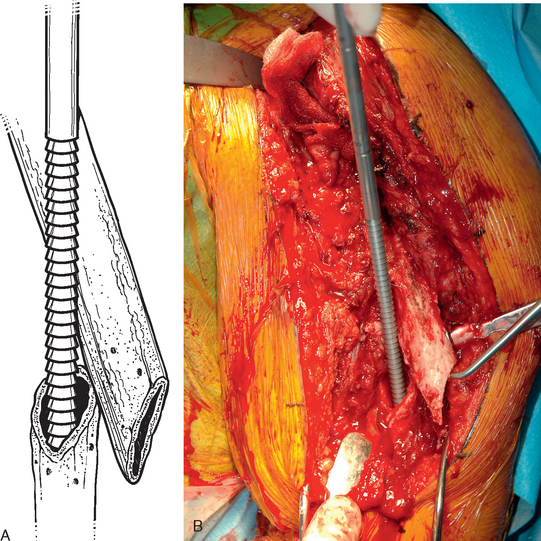
Figure 39-30 A and B, The humerus distal to the fracture site is reamed with diaphyseal reamers introduced at the fracture site.

Once the proximal humerus has been prepared, the fracture is reduced and the trial humeral stem is placed. A humeral stem that bypasses the distal extent of the fracture by a minimum of two cortical diameters is selected (Fig. 39-32).1 The position of the humeral stem within the humerus is noted after trial reduction and stability testing, as previously described. Fresh frozen cortical strips of allograft tibia are used on each side of the humerus and centered at the fracture site. We place two or four cables composed of a nylon monofilament core wrapped in a braided ultrahigh-molecular-weight polyethylene (Kinamed Inc., Camarillo, CA) subperiosteally around the residual native humerus with the cable-passing instrumentation provided while taking care to avoid the radial nerve posteriorly (Fig. 39-33). The cables are tightened with the tensioning device, the humeral stem is removed, and the periprosthetic fracture is left reduced (Fig. 39-34). The humeral canal is irrigated with sterile saline and dried with suction and gauze sponges. The final humeral implant is cemented into place with antibiotic-impregnated cement via the technique previously described in this chapter (Fig. 39-35). The cement is allowed to cure before reducing the glenohumeral joint.