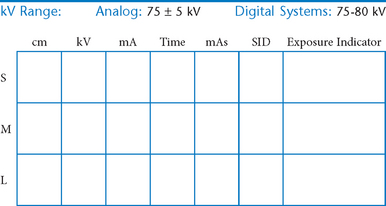
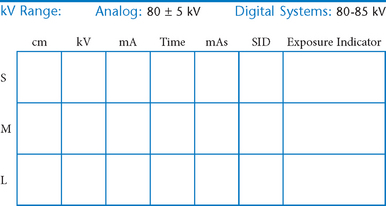
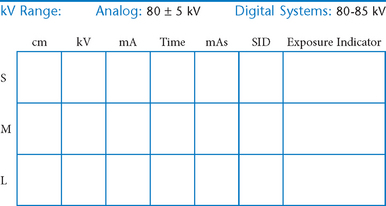
Femur and Pelvic Girdle
 AP (R)
 Lateral (R)
 AP and lateral critique
 Trauma lateral (horizontal beam) (S)
 AP bilateral hips (R)
 AP unilateral hip (R)
 AP unilateral hip critique
 Unilateral “frog-leg” modified Cleaves method (R)
 Bilateral “frog-leg” modified Cleaves method (R)
 AP bilateral “frog-leg” critique
 Axiolateral projection (Danelius-Miller method) (R)
 Axiolateral projection critique
 AP pelvis (R)
 AP pelvis critique
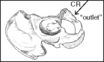
 AP axial “inlet” and “outlet” projections (S)
 AP axial “inlet” and “outlet” critique
 Posterior oblique (Judet method) (S)
 Posterior oblique critique
 PA axial oblique (Teufel method) (S)
 PA axial oblique critique
Femur and Pelvic Girdle
Male:

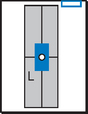
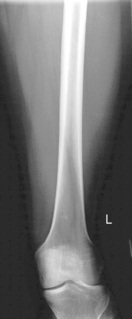
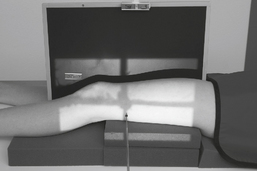
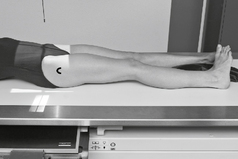
AP Femur*

Position
• Supine, femur centered to midline of table or grid IR
• Rotate entire lower limb internally ≈5° for AP of midfemur and distal femur, and 15° internally for true AP to include hip.
• Lower border of IR ≈5 cm (2″) below knee to include knee joint adequately (see AP Unilateral Hip for proximal femur, p. 156).
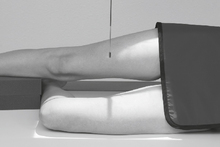
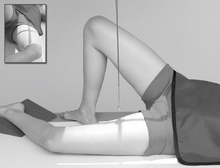


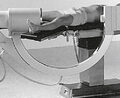
Horizontal Beam Lateral Femur*
(Trauma Midfemur and Distal Femur)
Note: For proximal femur injuries, take axiolateral (Danelius-Miller method) hip.
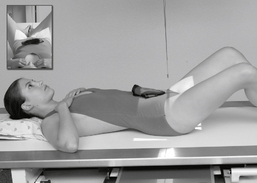
AP Bilateral Hips*
Note: For AP pelvis centering, see p. 291 in text.
Position
• Supine, aligned and centered to CR and IR, both legs extended and equally rotated internally 15°-20° (see warning above)
• Ensure no rotation of pelvis (bilateral ASISs the same distances from tabletop). Support under knees for patient comfort.
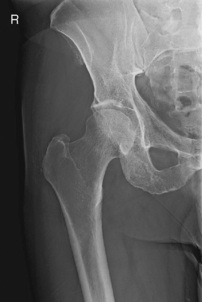
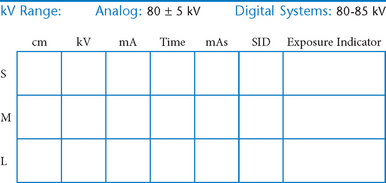
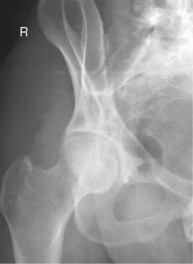
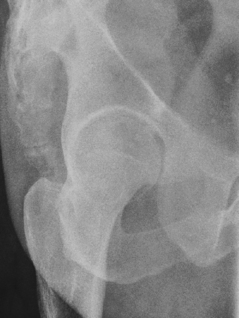
AP Unilateral Hip*


Lateral Hip (Nontrauma)*

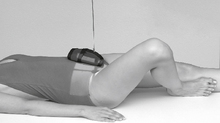
Warning: Do not attempt with possible fracture of hip area.
Position
• For femoral neck, flex affected knee and hip, and abduct femur 45° from vertical (places femoral neck near parallel to IR).
• For femoral head, acetabulum, and proximal femoral shaft, oblique patient 35°–45° toward affected side and abduct leg to tabletop if possible. Center hip and neck area to CR.

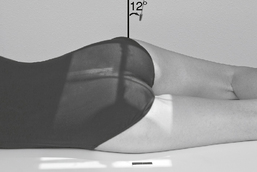
Lateral Hips (Nontrauma)*


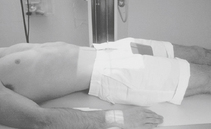
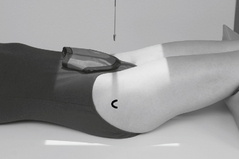
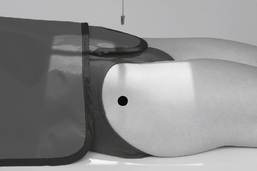
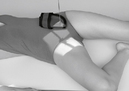
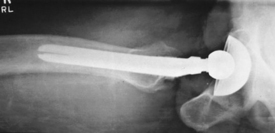
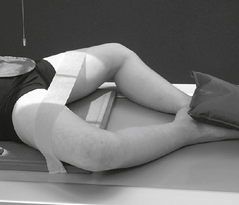
Lateral Hip (Trauma Method)*
(Axiolateral Inferosuperior Projection [Danelius-Miller Method])

Position
• Supine, no rotation of pelvis
• Flex unaffected knee and hip and provide support such as the x-ray tube (use pad or towels for possible hot collimator).
• Rotate affected leg internally 15° unless possible hip fracture.
• Place vertical grid IR against side just superior to iliac crest with plane of IR perpendicular to CR.


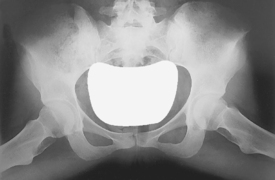
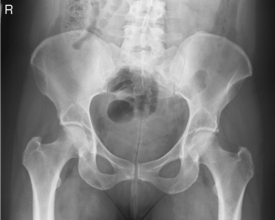
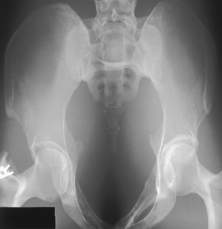
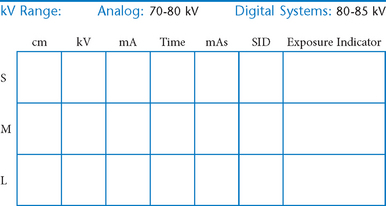
AP Pelvis*
To include proximal femora, pelvic girdle, sacrum, and coccyx
Warning: Do not attempt to rotate legs if fractures involving hips are suspected.
Note: For bilateral hips centering, see p. 291.
Position
• Supine, pelvis centered to centerline, legs extended
• Both feet, knees, and legs equally rotated internally 15° (secure with tape if necessary). Support under knees for comfort.
• Ensure no rotation of pelvis (ASISs equal distance from TT).
• Center IR to CR. (Include entire pelvis.) Shield gonads (if it doesn’t compromise study).
AP Pelvis

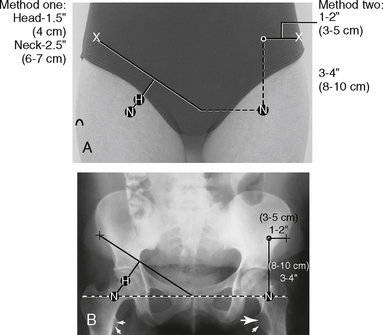
AP Axial Pelvis*


AP Axial Pelvis

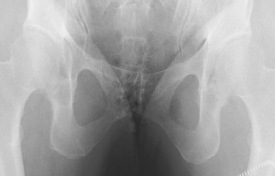

Acetabulum—Posterior Oblique Pelvis*


Note: Both sides generally are taken for comparison, either both for upside or both for downside.
• 24 × 30 cm L.W. (10 × 12″) or 35 × 43 cm C.W. (14 × 17″) if both hips must be seen on each projection.


Acetabulum*


Pediatric AP and Lateral Hips*

Position (AP and Lateral)
• Supine, pelvis centered to CR and to IR; use gonadal shields on both male and female. (Use ovarian shield of appropriate size for female, ensuring that it does not cover hip areas.)
• Immobilize arms and upper body with sandbags, tape, or compression band as needed.

*Bontrager Textbook, 8th ed, p. 274.
*Bontrager Textbook, 8th ed, p. 276.
*Bontrager Textbook, 8th ed, p. 275.
*Bontrager Textbook, 8th ed, p. 277.
*Bontrager Textbook, 8th ed, p. 283.
*Bontrager Textbook, 8th ed, p. 285.
*Bontrager Textbook, 8th ed, p. 278.
*Bontrager Textbook, 8th ed, p. 284.
*Bontrager Textbook, 8th ed, p. 277.
*Bontrager Textbook, 8th ed, pp. 279 and 280.
*Bontrager Textbook, 8th ed, p. 281.