Dilatation and Curettage
Dilatation and curettage (D & C) is one of the most commonly performed operations in the world. The most informative method for performing this procedure is to combine it with a diagnostic hysteroscopy. No data support the contention that hysteroscopy spreads endometrial cancer cells to any extent greater than other diagnostic studies (e.g., D & C, endometrial biopsy). Furthermore, no evidence suggests that the cells will metastasize.
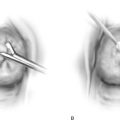
A standard instrument table is set up and includes diagnostic hysteroscopic equipment (Fig. 10–1A–C). Before the D & C is performed, an examination under anesthesia (EUA) is done to demarcate the position and size of the uterus, as well as the presence or absence of adnexal masses. After the vulva and vagina have been prepared, the patient is draped while in the lithotomy position. A Sims retractor or weighted speculum is placed along the posterior wall of the vagina. The anterior lip of the cervix is grasped with a single-toothed tenaculum (Fig. 10–2). The uterus is carefully sounded. The passed sound stops when it encounters resistance to forward movement, which occurs when the tip of the sound comes in contact with the uterine fundus. Next, with the use of tapered dilators (Pratt or Hanks), the cervix is progressively dilated (Fig. 10–3). Dilatation should be limited to the amount required for the widest portion of the curette to pass easily into the uterine cavity (Fig. 10–4). Systematic curettage is carried out by scraping the endometrium from fundus to cervix starting at 12 o’clock on the anterior uterine wall, working around to 3 o’clock, then 6 o’clock on the posterior uterine wall, and via 9 o’clock, making it back to 12 o’clock again (Fig. 10–5A–C). A nonadherent sponge is placed into the posterior vaginal fornix to catch the curettings as they emit from the cervix (Fig. 10–6). When the surgeon judges that the uterine cavity has been completely curetted, the procedure stops.
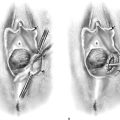
If a diagnosis of endometrial or endocervical cancer is suspected, a fractional curettage should be performed. The appropriate order of this operation is to curette the endocervical canal first; this is followed by curettage of the endometrial cavity (Fig. 10–7A, B). The individual specimens are separately placed into individually labeled bottles.
At the terminus of the case, the uterus can be resounded or directly viewed by hysteroscopy. The purpose of the preceding exercise is to determine whether the uterus has been perforated.
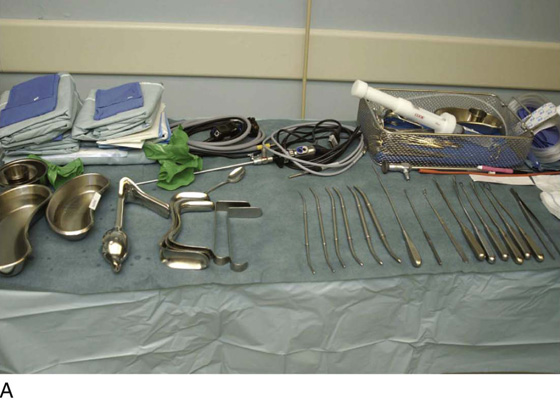

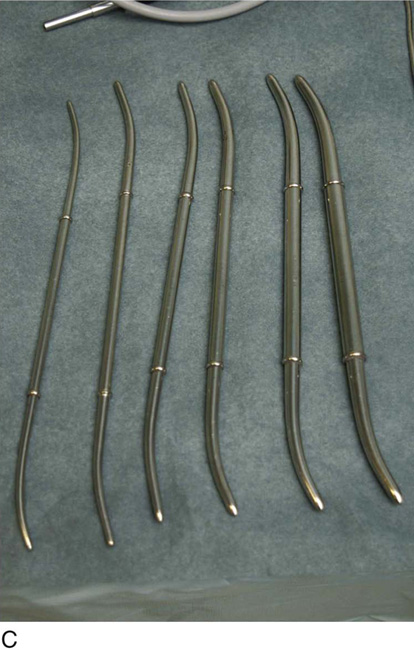
FIGURE 10–1 A. The instruments required for dilatation and curettage are shown here. The equipment in the background is hysteroscopic and includes the Baggish Hyskon hand pump (in the basket) (Cook OB/GYN). B. A variety of sharp curettes are available; however, the serrated curette in the center is the most effective device. To the left of the serrated curette is an endocervical canal curette (Kevorkian). To the left of the Kevorkian curette is a malleable uterine sound. C. Hanks or Pratt dilators are tapered and produce the least trauma in cervical dilatation.
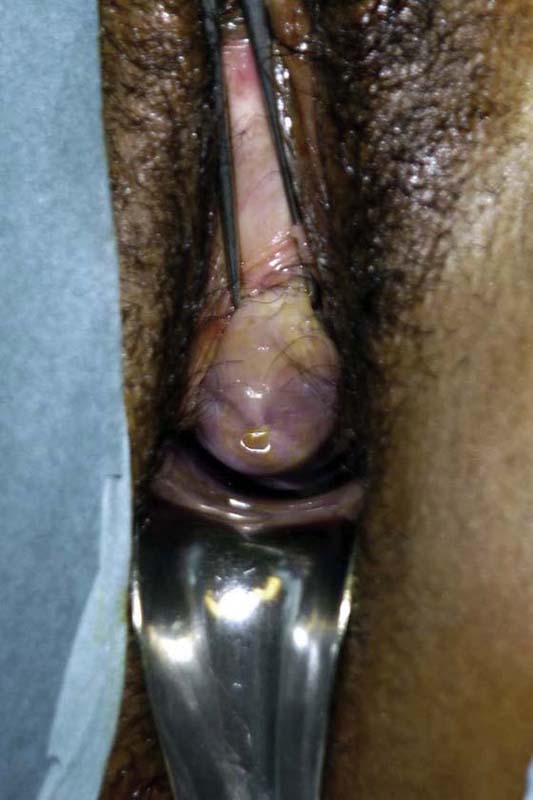
FIGURE 10–2 A Sims retractor is placed along the posterior wall of the vagina. The cervix is held with a single-toothed tenaculum.
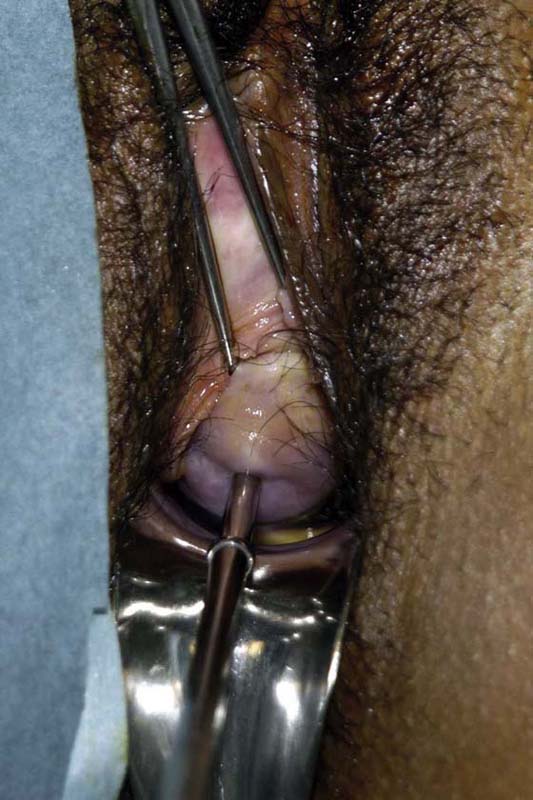
FIGURE 10–3 The cervix is systematically dilated.
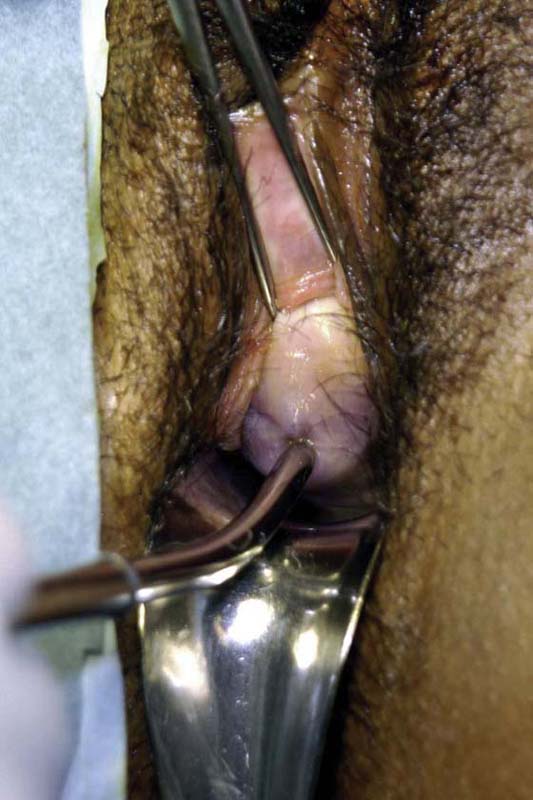
FIGURE 10–4 Dilatation should be continued until the cervical canal has been sufficiently enlarged to accommodate the head of the curette.
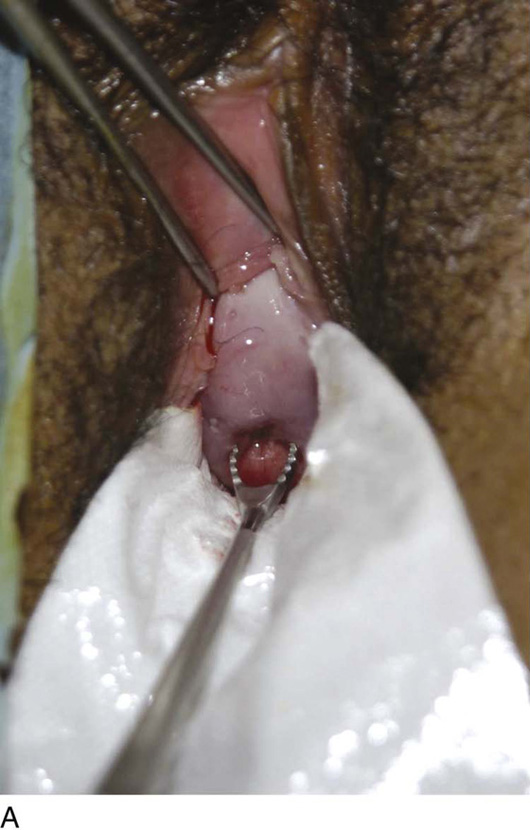
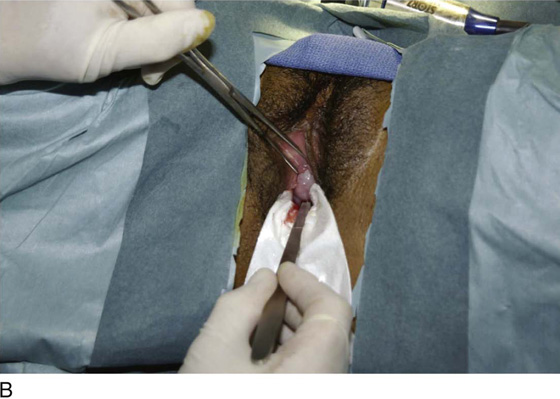

FIGURE 10–5 A. A sponge is placed into the posterior fornix and the sharp curette is introduced into the cervix. B. The curette is gently placed into the uterine cavity to reach sufficient depth so as to encounter fundal resistance. The curette is pulled down to the cervix along the anterior wall, continuing clockwise until the entire cavity is covered. C. Lower, The sharp edge of the curette is placed in contact with the endometrial surface. Upper, As the curette is pulled downward, it cuts a swath through the endometrium, thereby obtaining a strip of tissue for histopathologic evaluation. As the curette is pushed forward and rotated, only light pressure should be applied to the instrument. The hazard of perforation is always present during this in-stroke phase. If perforation is suspected, the procedure should be terminated immediately.
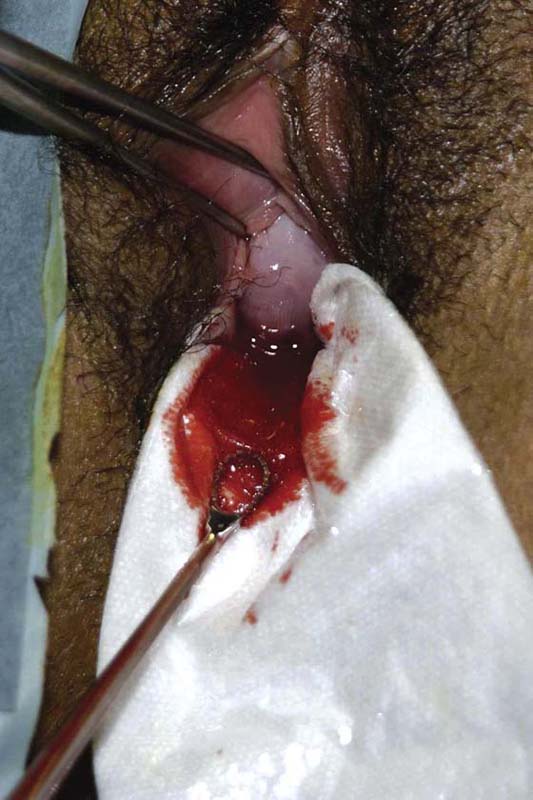
FIGURE 10–6 The curette may be pulled from the endometrial cavity intermittently. The specimen is collected on the nonadherent sponge.
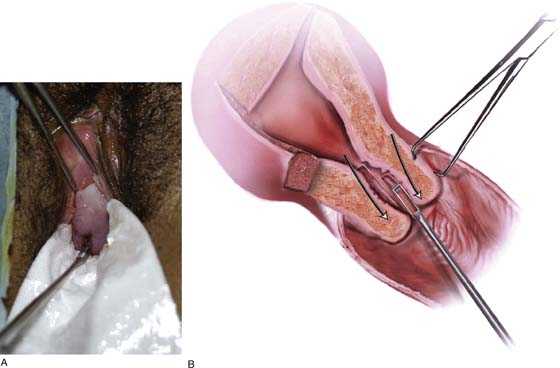
FIGURE 10–7 A. When a fractional curettage is indicated (e.g., suspected carcinoma of the endometrium), the endocervical component should be done first and the curettings collected. The specimen containing endocervical curettings is placed in a separate container and sent to pathology in the company of the jar containing the endometrial curettings. B. Endocervical curettage is performed with a Kevorkian curette. A tenaculum is always applied for countertraction. The curettage is initiated at the level of the internal os, and each stroke is taken in a downward direction, terminating just inside the external os. Mucus and curettings are collected on a sponge. A Kelly clamp may be needed to twirl and remove the mucus-laden specimen from the cervical os.
Suction Curettage
The technique of vacuum or suction curettage is an outgrowth of the other methods for evacuating uterine contents, such as dilatation and sharp curettage (Fig. 10–8). During the late 1950s and early 1960s, suction curettage attained popularity in the Iron Curtain countries of Eastern Europe and the USSR as a rapid method for first-trimester induced abortion. Coupled with its rapidity was the advantage of diminished blood loss. It is unclear whether this technique was first used in Eastern Europe or China. Nevertheless, by 1963 the technique had been transplanted to the United States and was being used for first-trimester terminations of pregnancy. Soon this same technique was also applied to the evacuation of spontaneous incomplete abortion, as well as to missed abortion. Soon vacuum curettage was the instrument of choice in the Far East for the evacuation of hydatidiform mole, regardless of the gestational size of the uterus. Malaysia, Indonesia, China, Hong Kong, and Singapore were regions where trophoblastic disease, a relative rarity in Western countries, was a common disorder and in fact a public health problem.
Local or general anesthesia is required for this operation. A pelvic examination is a prerequisite to determine the size and the position of the uterus. Next, a careful sounding of the uterus is carried out. A concentrated oxytocin solution is infused continuously. Fluid volume must be carefully monitored, particularly in cases of hydatidiform mole in which overzealous fluid infusion can easily trigger pulmonary edema. The technique of suction or vacuum curettage requires the uterine cervix to be dilated to accommodate the suction curette, and obviously the degree of dilatation depends on the anticipated diameter of the curette, which ranges from 8 mm to 16 mm, with the average device measuring 10 mm (Fig. 10–9). The cervix is stabilized with a single-toothed tenaculum attached to the anterior lip of the cervix. Following cervical dilatation, for example, a 30-French (10-mm) suction curette is placed into the uterine cavity. The purpose of overdilatation is to permit unimpeded free sliding of the curette into and out of the uterine corpus. This technical point is crucial because a tight fit between cannula and cervix can produce “grabbing” on the in-stroke, which in turn can increase the risk of perforation.
The suction machine is turned on after one end of the hose is attached to the curette and the opposite end to the intake port of the specimen collection jar (container). Similarly, a cotton mesh collection bag is applied to the inner aspect of the collection container and is secured in place with a rubber O ring. The suction curette (cannula) is inserted into the uterus and gently advanced to the point where the operator feels the fundus of the uterus. No suction is applied yet. Next, a finger is placed over the hole at the base of the suction cannula (curette), thereby creating suction. The curette is drawn down toward the cervix with a twisting motion to the curette in its downward course (Fig. 10–10). The activated curette is not pulled through the cervix because the force of the suction could strip away the endocervical epithelium. Thus, at the location of the internal cervical os, the operator’s finger is lifted from the hole in the curette, which immediately relieves the created suction (Fig. 10–11A, B). The device is pulled from the cervix and is completely cleared of tissue. The process is repeated several times while the cannula (curette) is turned in different directions to encompass the entire uterine cavity. Suction is never activated during the in-thrust phase. It is applied only when the curette is moving in a downward or outward direction. When no further tissue is seen within the tubing, the procedure is stopped. The uterus is carefully resounded to ensure that no perforation has occurred. Optionally, sharp curettage may be done to check for any retained tissue.
The collection bag is detached, placed in formalin, and sent to the pathology laboratory for microscopic diagnosis (Fig. 10–12). A 0.2-mg dose of methylergonovine (Methergine) is administered to the patient, who is given an order for pad counts and 24 hours of oral Methergine (0.2 mg every 4–6 hours for 24 hours only). If the procedure is performed to evacuate a septic abortion, then antibiotics should be administered after cultures have been obtained.
The greatest risks of this procedure are uterine perforation and blood loss. Perforation with the suction applied is very dangerous and can lead to bowel or major vessel injury, either of which requires prompt diagnosis and emergency intervention. If the uterus is not contracting (i.e., by infusion of oxytocin), then it serves as a sponge filled continuously with blood. Applying a suction cannula to this “sponge” is akin to squeezing the sponge dry; however, this sponge quickly refills from its reservoir of body blood. A noncontracted uterus can therefore be the model for massive blood loss sucked up and collected in the suction bottle.
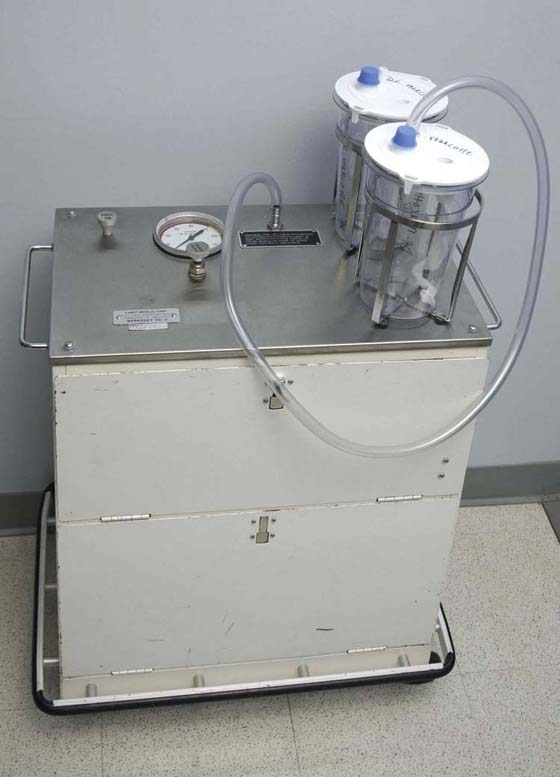
FIGURE 10–8 A suction curettage vacuum pump requires a high flow rate to move sufficient air volume to create enough negative pressure to suck up intrauterine contents rapidly.
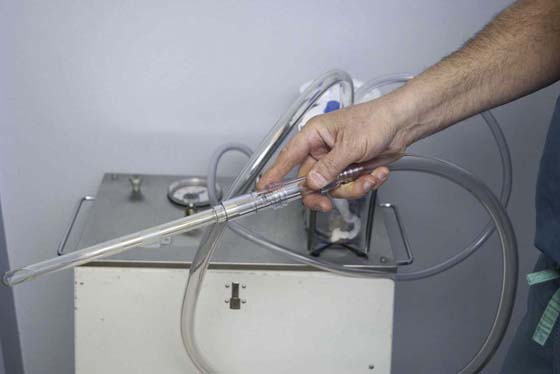
FIGURE 10–9 Thick-walled plastic suction tubing of 2 to 2.5 cm diameter is attached to a vacuum jar with a specimen collection trap. The other end of the hose is fitted with a handle to which a plastic cannula plugs in. As noted, several sizes of cannulas (vacuum curettes) are available, ranging from 8 to 16 mm.
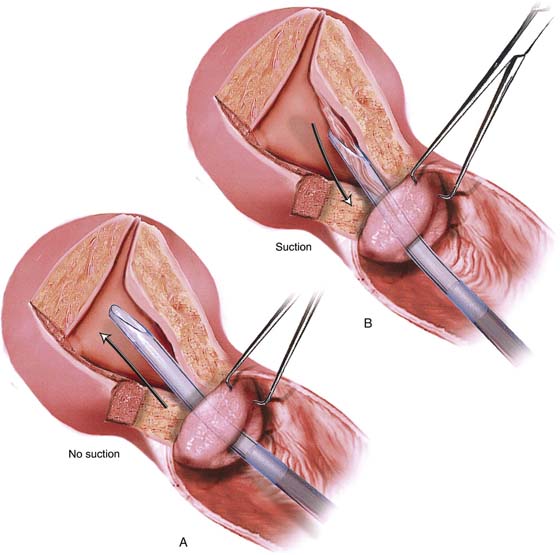
FIGURE 10–10 A. The vacuum (suction) cannula is gently placed into the uterus until fundal resistance is felt. No suction is applied until the curette has been properly positioned. B. As the curette is pulled back, suction is applied. The endometrium is sucked into the cannula and thence into the connecting tubing. Suction is relieved at the level of the internal cervical os.
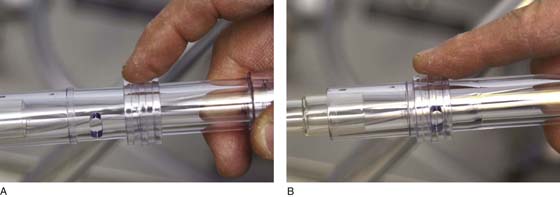
FIGURE 10–11 A. A sliding ring on the vacuum handle controls the suction. The ring is in the open position, and no suction is created. B. The ring has been pushed forward to close off the opening in the handle of the apparatus, thereby creating a substantial suction.
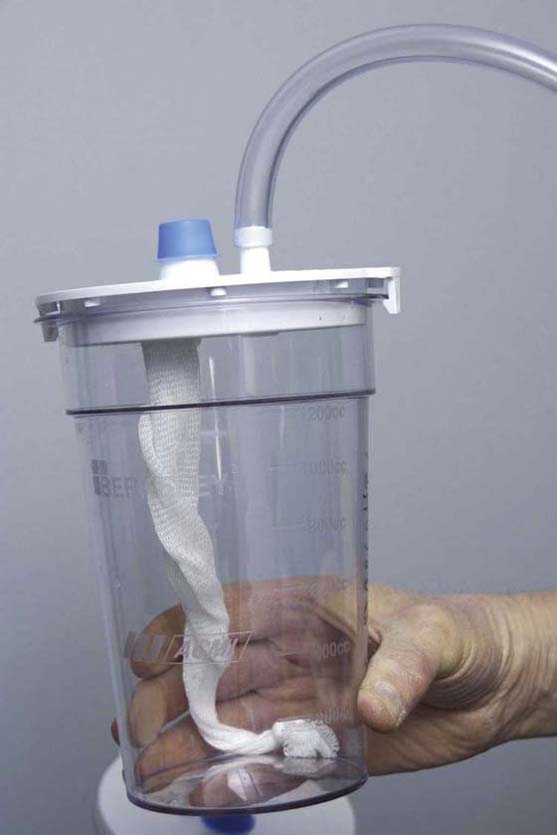
FIGURE 10–12 The specimen is caught in the gauze bag attached to the vacuum input port (blue cap) by a rubber O ring. Blood and fluid flow through the bag and are collected in the jar. For large evacuations (e.g., hydatidiform mole), the two jars should be connected by plastic tubing in series to avoid entry of fluid into the pump mechanism (see Fig. 10–8).