CHAPTER 19 Complex Ankle, Subtalar, and Triple Fusions
Arthroscopic ankle arthrodesis can be extended to include cases with some bone deformity or extensive osteophyte formation if the surgeon is patient and experienced with simpler cases.1 These cases should be performed after the surgeon has achieved proficiency with arthroscopic ankle and subtalar fusion. When the soft tissue envelope is compromised, the additional time required for the more complex operation may be justified by the prevention of soft tissue complications.
NORMAL AND PATHOLOGIC ANATOMY
Anatomic considerations are addressed in Chapter 17. Talonavicular arthritis with deformity or subtalar arthritis is a clear indication for triple arthrodesis. Isolated talonavicular arthritis may be amenable to isolated talonavicular fusion. However, an isolated talonavicular fusion is more likely to progress to a nonunion because there may be motion across the joint despite two screws being used for fixation. Because no significant gain in motion is achieved with an isolated talonavicular fusion compared with a full triple arthrodesis, a triple arthrodesis may be preferable because a larger fusion mass is obtained and better stabilization performed.
PATIENT EVALUATION
History and Physical Examination
Degree of Disability
Patients should be assessed for their degree of disability. Their walking tolerance and standing tolerance are good indicators of disability. They might have had to stop work because of the hindfoot pain. Sports might have been permanently discontinued or restricted due to pain or instability. Before treatment, the degree of disability should be outlined to determine success of intervention.
TREATMENT
Complex Arthroscopic Ankle Fusion
Bone Deformity
When there is erosion of the medial or lateral side of the joint, a standard arthroscopic fusion can be performed and augmented by correction of the deformity by sculpting of the prominent side of the joint with a burr to allow correction of the varus or valgus plane deformity. Removal of some of the tip of the medial or lateral malleolus may be required to allow joint compression. The edge of the bone deformity often is located within the joint and can indicate where to start applying the burr to reduce the deformity. The degree of bone removal can be estimated using intraoperative fluoroscopy.
Extensive Osteophyte Formation
Osteophytes can be identified for removal by fluoroscopy before arthroscopy (Fig. 19-1). The osteophytes can be removed through the standard anteromedial and anterolateral arthroscopic portals using a small metatarsal osteotome. The bone fragments must be removed with care so as not to damage the deep branch of the peroneal nerve or its superficial branches. Alternatively, a 3.5- to 4.0-mm, round burr may be used from the medial and lateral approaches to remove the bone spurs under direct visualization. It may be useful to decrease the joint distraction and to dorsiflex the ankle, which allows the anterior joint capsule to relax during removal of anterior tibial and talar neck osteophytes.
The Tight Joint
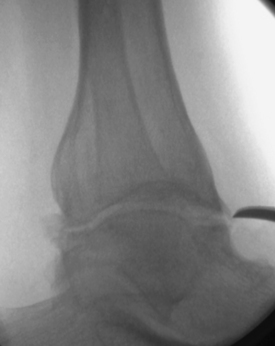
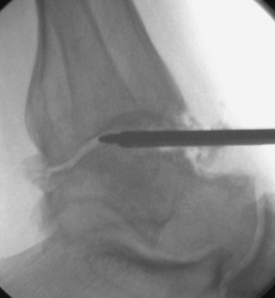
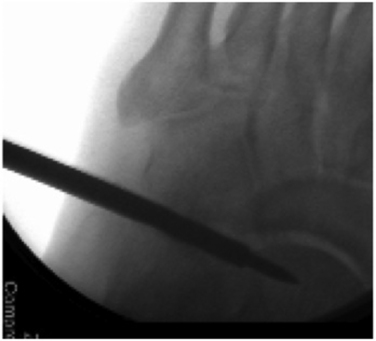
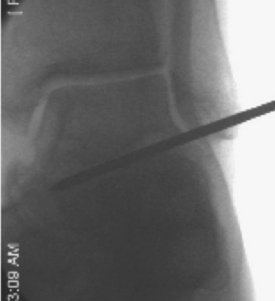
In some cases, the tight ankle cannot be easily accessed for an arthroscopic fusion. After release of the osteophytes as described earlier, the joint may have to be instrumented with the assistance of fluoroscopy. The joint line can be hard to find, and gradual opening of the joint is required until the arthroscope can be inserted (Fig. 19-2).
Combined Arthroscopic Ankle and Subtalar Fusion
Technique
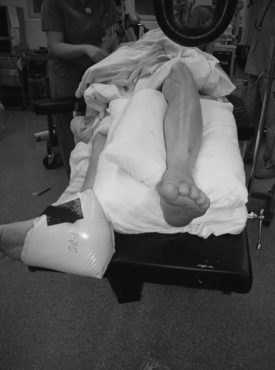
The patient is positioned on the operating table with the hip on the surgical side elevated to allow access to the lateral ankle and subtalar joint (Fig. 19-3).3 Distraction can be performed using an external distraction device to improve access to the joint. Alternatively, distraction can be performed for the ankle fusion using an Ace Wrap around the surgeon’s waist.
The ankle joint is approached first. The anteromedial and anterolateral portals are used to débride the anterior ankle joint. Posterior débridement requires a posterior portal. I use a portal just behind the medial malleolus. Anatomic dissections have documented that this portal passes posterior to the tibialis posterior tendon and usually passes anterior to the flexor digitorum longus. Alternatively, a standard posterior lateral portal can be used. This approach requires working around the fibula. However, care should be taken not to damage the tibial nerve during the use of both posterior portals. The posterior joint is difficult to débride without using a posterior portal in all but the most lax ankle joints.
Retrograde Rod Technique
An incision is made on the plantar aspect of the foot directly in line with the long axis of the tibia with the foot in the corrected position. The starting point can be confirmed on anteroposterior and lateral image views before the incision is made. The starting point usually is 1 to 2 cm behind the calcaneocuboid joint and on the medial slope of the calcaneus (Fig. 19-4). Care should be taken when exposing this part of the calcaneus from the plantar side to ensure that the tibial nerve is not damaged. The nerve lies on the medial side of the approach. Deep dissection should be performed bluntly and the medial soft tissues retracted.

Arthroscopic Triple Arthrodesis
Instrumentation
The 1.9-mm-diameter arthroscope is best for the triple fusion because the joint capsules are tight. However, the fluid flow is inadequate for using the smaller arthroscope and canula for the débridement for this type of fusion, and a separate portal for inflow may be required.
The 3.5-mm or smaller shavers can be used. May colleagues and I used a small joint distractor in some of the earlier cases but have preferred no distraction for the more recent cases, because this allows easier motion around the joints, as recommended by Lui.2
Technique
The patient is positioned with the operative hip internally rotated on a beanbag or elevated on a bump. The leg is prepared and draped free.2
Talonavicular Fusion.
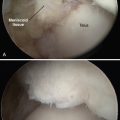
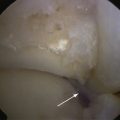
The talonavicular joint is best approached from a dorsal medial, plantar medial, and dorsal lateral portal. A trans-calcaneocuboid joint portal can assist in visualization of the plantar lateral aspect of the joint (Figs. 19-5 and 19-6).
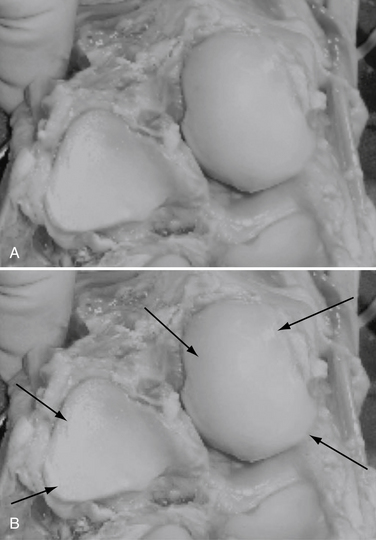
FIGURE 19-5 A cadaver view of the calcaneocuboid and talonavicular joints shows the position of the portals (arrows).
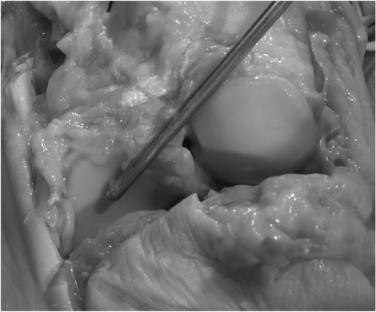
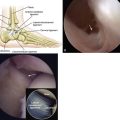
Care should be taken not to damage the deep branch of the peroneal nerve that is closely apposed to the dorsal capsule of the joint. Palpation of the dorsalis pedis artery before inflation of the tourniquet should assist the surgeon in its correct localization. Confirmation of the position of the cannula by intraoperative fluoroscopy is required, particularly in patients with softer bone (Fig. 19-7).
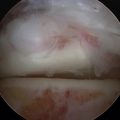
The arthritic and mobile rheumatoid joint is quite easily instrumented and often requires minimal débridement. When the joint is hard to distract, cautious release of the capsule with a meniscectomy knife may be required. If the joint is stiff, it may be hard to identify. Fluoroscopic confirmation of correct positioning of the cannula is wise, because inadvertent insertion of the cannula into an osteopenic navicular in an arthritic patient can occur. If required, the portal can be expanded to 1 cm, and skin hooks can be used to retract while the joint capsule is released under direct visualization. Alternatively, after the joint is initially visualized, the joint capsule can be released using a meniscectomy blade or small osteotome under direct visualization.
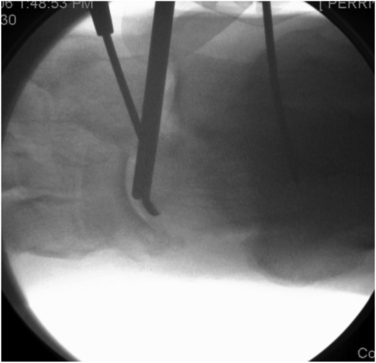
An alternative technique uses a cannulated drill placed across the arthritic joint. The 5-mm drill from the cannulated hip screw set has a diameter to fit the 2.9-mm scope and canula. After the guidewire is placed under fluoroscopic control, the drill is placed across the joint under direct fluoroscopy (Fig. 19-8). Oblique drill placement is used. One drill hole can then be used for the scope and the other for the instruments. However, working outside these drill holes can be problematic for completing cartilage removal. Similarly, tight subtalar and calcaneocuboid joints can be drilled with a cannulated drill to facilitate exposure (Fig. 19-9).
Fixation
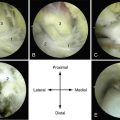
Fixation of the arthroscopic triple arthrodesis follows the same screw placement as for the open procedure. Cannulated or solid screws can be used, depending on surgeon’s preference (Fig. 19-10).
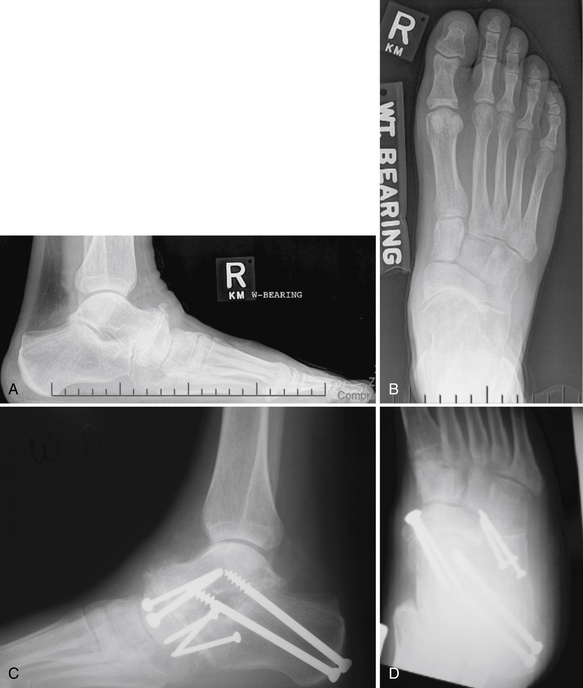
FIGURE 19-10 Preoperative (A and B) and postoperative views (C and D) of an arthroscopic triple arthrodesis.
Fixation of the talonavicular joint can be performed percutaneously. Small fragment screws are used in all but the largest patients. A cannulated equivalent can also be used. The screws can be inserted from the tuberosity of the navicular, which is easy to palpate. The screws also can be inserted from the dorsomedial and dorsolateral side. Care should be taken to avoid the direct dorsal approach because the deep branch of the peroneal nerve may be injured. The screws must be placed parallel to the plantar surface of the foot to ensure that they engage the talus. Two or three screws should be used on the talonavicular joint.
PEARLS& PITFALLS
Postoperative Care
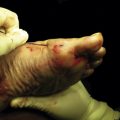
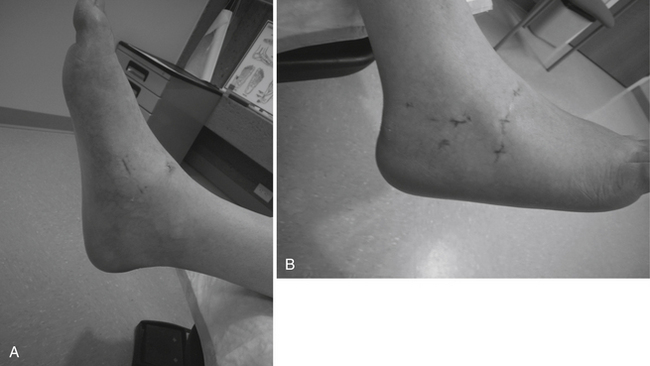
Patients are immobilized in a plaster slab or walker boot at the time of surgery. At the 2-week review, the sutures are removed and range of motion initiated. For ankle or ankle and subtalar fusions combined, the patient is placed in a fiberglass cast for 6 weeks and not allowed to bear weight for 8 weeks. The arthroscopic technique reduces postoperative wound complications and swelling, assisting in recovery (Fig. 19-11). For an arthroscopic triple arthrodesis, the patient not permitted to bear weight for 6 weeks after surgery and can begin range-of-motion exercises at 2 weeks.
1. Gougoulias NE, Agathangelidis FG, Parsons SW. Arthroscopic ankle arthrodesis. Foot Ankle Int. 2007;28:695-706.
2. Lui TH. New technique of arthroscopic triple arthrodesis. Arthroscopy. 2006;22:e461-e465. 464
3. Sekiya H, Horii T, Kariya Y, Hoshino Y. Arthroscopic-assisted tibiotalocalcaneal arthrodesis using an intramedullary nail with fins. a case report, J Foot Ankle Surg. 452006 266-270.