Cervical Polypectomy
Cervical polyps are usually benign but should always be removed and sent to pathology for microscopic examination. Polyps range greatly in size from small to large (Fig. 47–1). Large polyps may spill into the vagina (Fig. 47–2). In either circumstance, the presence of a polyp is commonly associated with contact bleeding and increased vaginal discharge. For small polyps, a Kelly clamp is placed across the pedicle and is twisted clockwise or counterclockwise until the polyp separates (Fig. 47–3). A swab soaked with Monsel’s solution is placed onto the residual base pedicle for hemostasis.
Large polyps with thick, vascular pedicles must be clamped and suture-ligated or simply ligated then cut off (Fig. 47–4). If the base of the pedicle cannot be easily exposed, then the posterior wall of the cervix should be split to allow visualization. This is done by injecting 10 to 15 mL of 1 : 100 vasopressin into the posterior cervical lip. Then, by utilizing a carbon dioxide (CO2) laser or a needle electrode, the cervix is cut vertically in the midline to a point 1 cm below the internal os (Fig. 47–5A, B). The cervix is closed with 3-0 Vicryl interrupted sutures (Figs. 47–6A through D and 47–7).
Alternatively, for a high polyp (i.e., attached at the level of the internal os), insertion of a hysteroscope and a needle electrode may provide the easiest access to the pedicle. In fact, a diagnostic hysteroscopy should be done for polyps attached by a high pedicle to differentiate a cervical polyp from a prolapsing endometrial polyp.
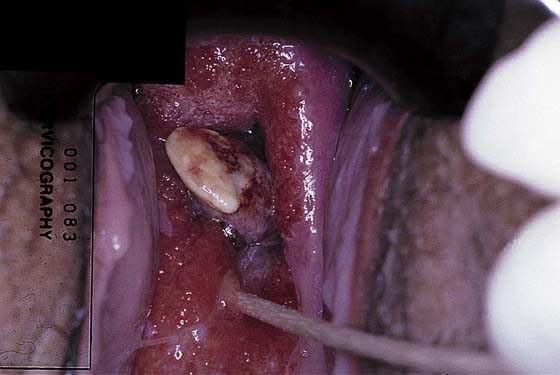
FIGURE 47–1 A rather small endocervical polyp is exposed with the aid of a cotton-tipped applicator depressing the wall of the cervical canal.
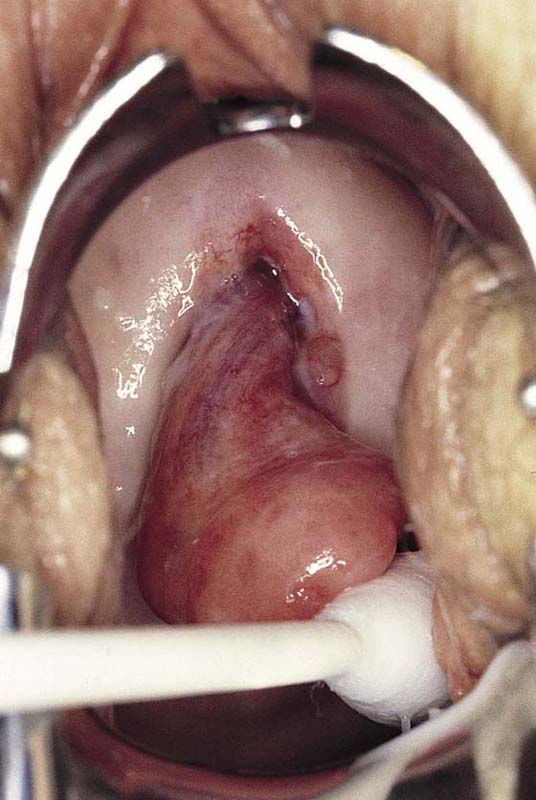
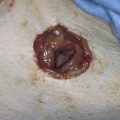
FIGURE 47–2 A large cervical polyp protrudes into the vagina.
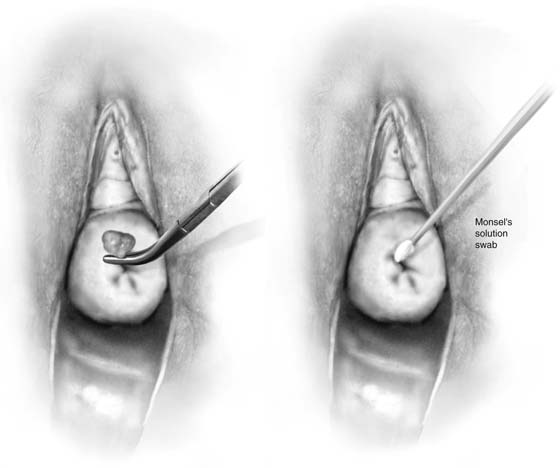
FIGURE 47–3 A Kelly clamp is placed onto the pedicle of the polyp and twisted. The polyp separates from the endocervical canal and is sent to pathology. Monsel’s solution is applied to the stump for hemostasis.
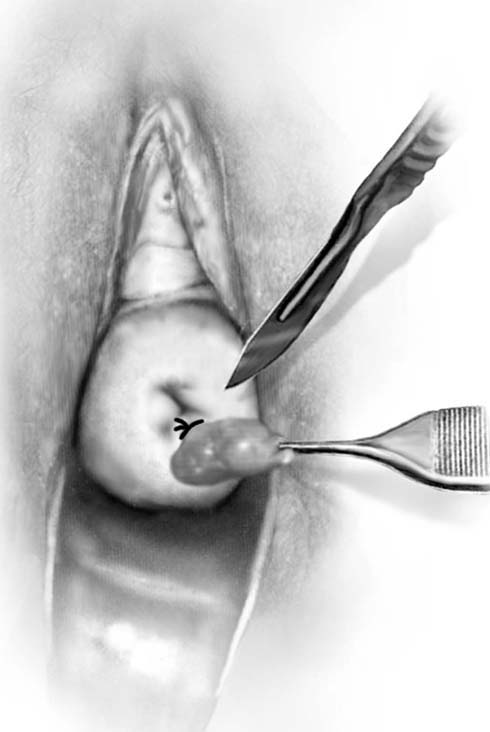
FIGURE 47–4 A larger polyp’s pedicle is clamped and suture-ligated, then cut.
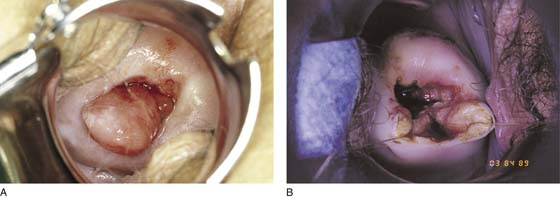
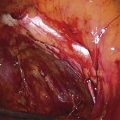
FIGURE 47–5 A. This large polyp’s pedicle cannot be seen. B. An incision was made in the posterior lip of the cervix to expose the polyp’s pedicle.
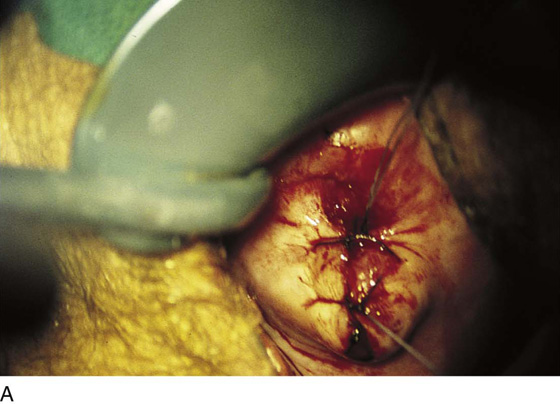
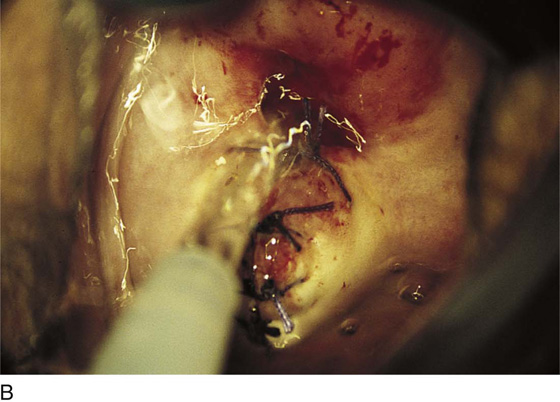
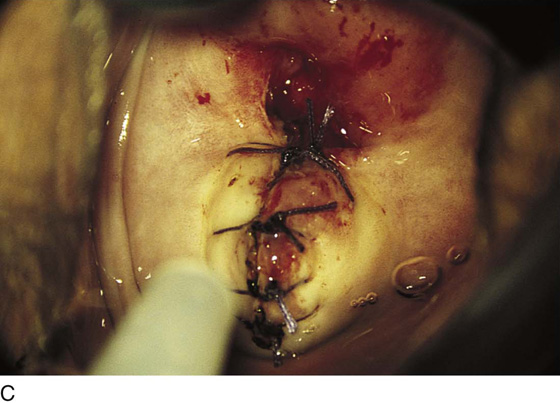
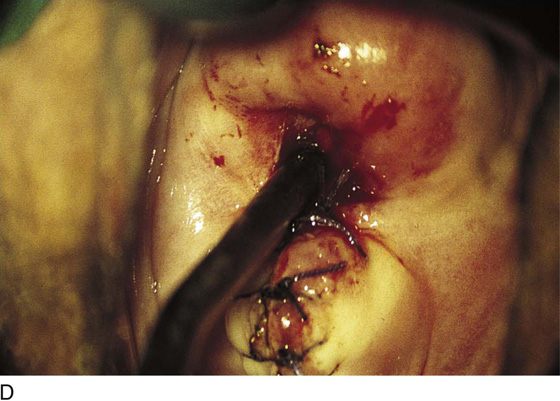
FIGURE 47–6 A. The ligature at the base of the polyp can be seen in the endocervical canal. Two stitches of 0 Vicryl have been placed into the previously opened posterior cervical lip. B. The wound is thoroughly irrigated with normal saline after the suture-ligature has been cut. C. A total of four sutures are placed into the posterior cervical lip. D. The cervical canal is sounded to ensure that no narrowing has occurred.
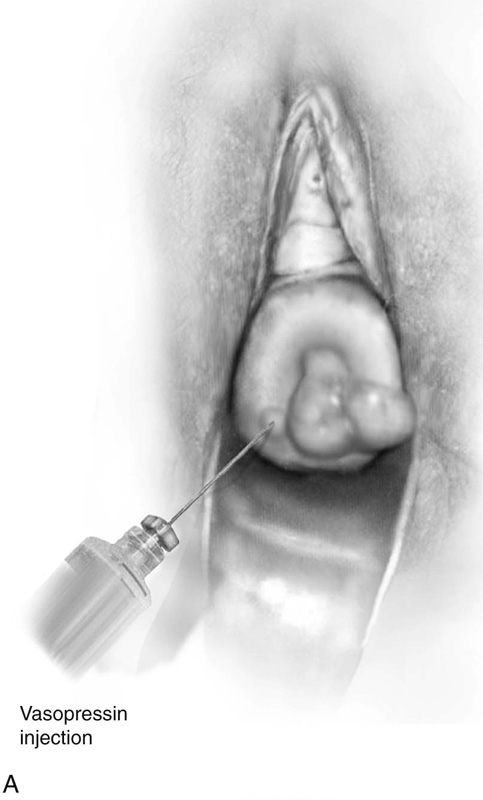
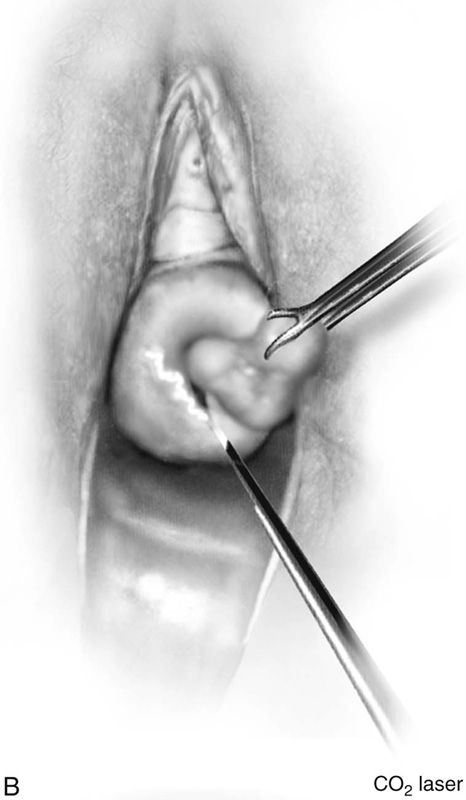
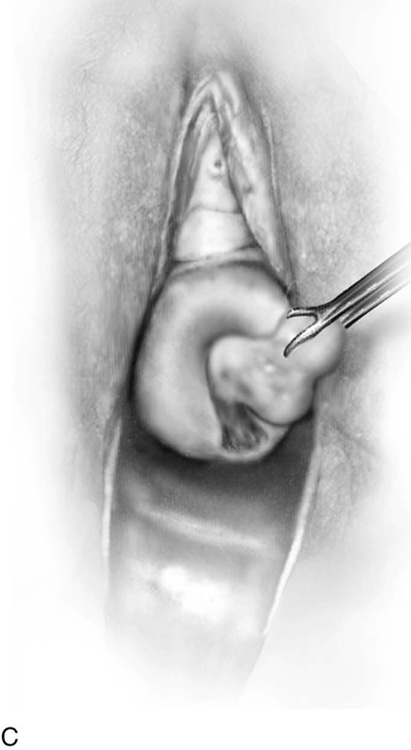
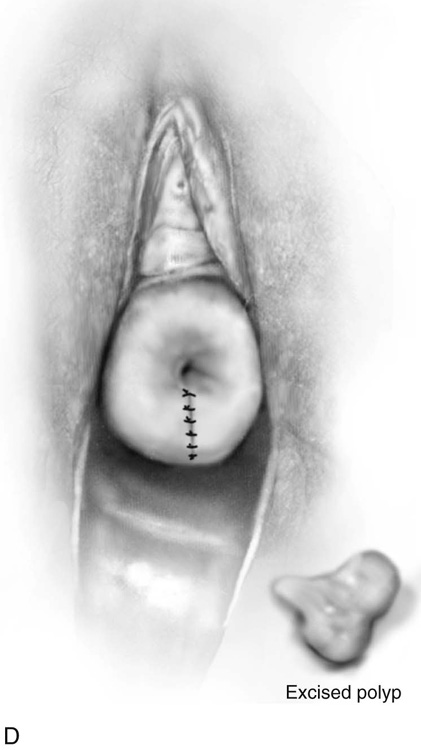
FIGURE 47–7 A. Vasopressin is injected into the posterior portion of the cervix. B. The laser beam cuts the posterior lip of the cervix. C. The polyp base is ligated as the polyp is mobilized preparatory to cutting it off the cervix. D. The excised polyp and the repaired posterior cervical lip.