Cervical Biopsy, Endocervical Curettage, and Cervical Biopsy During Pregnancy
Cervical Biopsy
All cervical biopsies should be colposcopically directed. There is no reasonable excuse for not performing a directed biopsy in the 21st century. The abnormal transformation zone is identified by applying acetic acid 3% to 4% to the cervix with a cotton swab and then observing the whitish color that develops in the atypical area with or without vascular abnormalities (Fig. 45–1A, B). The areas selected for biopsy are based on the severity observed colposcopically. Analgesia usually is not required if the biopsy is performed in a timely fashion and if the biopsy forceps are suitably sharp. For patients anxious about the biopsy, 1% lidocaine may be injected directly into the cervix using a 1½-inch 25- to 27-gauge needle. Most patients experience a pinching or light cramping sensation at the moment of biopsy.
The biopsy forceps are manipulated to the operative site by utilizing the magnification of the colposcope to guide it to the appropriate location (Fig. 45–2A, B). The large teeth of the forceps stabilize the cervix so that its rounded surface will not slip away from the clamp (Fig. 45–3). The jaws are closed, and with a click a piece of tissue is cut away from the cervix and is held within the jaws of the biopsy clamp (Fig. 45–4). The specimen is handed off, and a cotton-tipped applicator soaked with Monsel’s solution (ferric subsulfate) is thrust into the crater at the biopsy site, held in place, and then slowly rolled to left and right until all bleeding stops (Fig. 45–5A, B).
If bleeding does not stop following the application of Monsel’s solution, or if pulsatile bleeding is observed, a 3-0 Vicryl figure-of-8 suture should be placed while the magnification of the colposcope is used to accurately locate the stitch. A long, straight needle holder or a Haney needle holder should be used for this procedure (Fig. 45–6).
Alternatively, a biopsy may be performed with a large loop electrode (Fig. 45–7A, B).
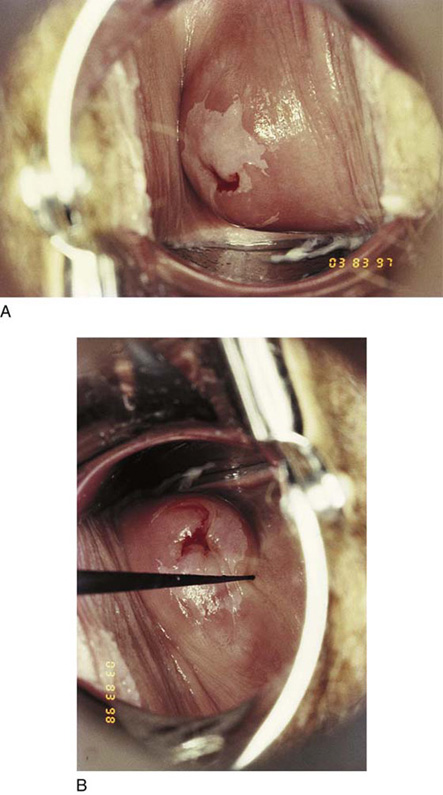
FIGURE 45–1 A. Colpophotograph of the cervix shows an atypical transformation zone involving predominantly the anterior lip of the cervix but also the posterior lip. B. A titanium hook is utilized to determine the ectocervical extent of the lesion.
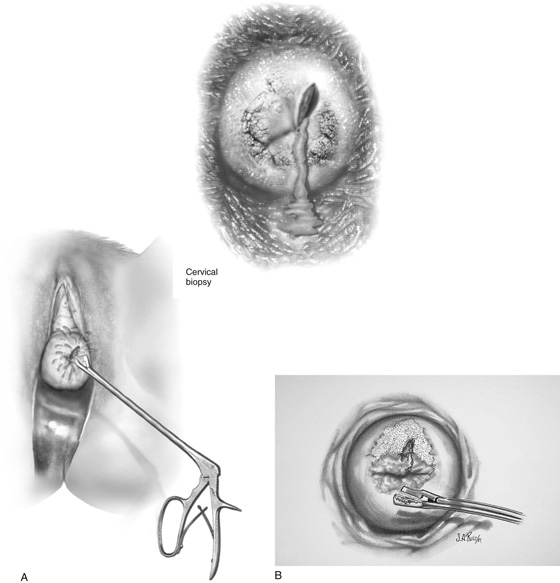
FIGURE 45–2 A. A directed biopsy of the cervix is performed. The inset demonstrates schematically the colposcopic view obtained. B. An adequate sample will fill the cup of the biopsy forceps and will be sharply cut away from the surrounding cervical tissue.
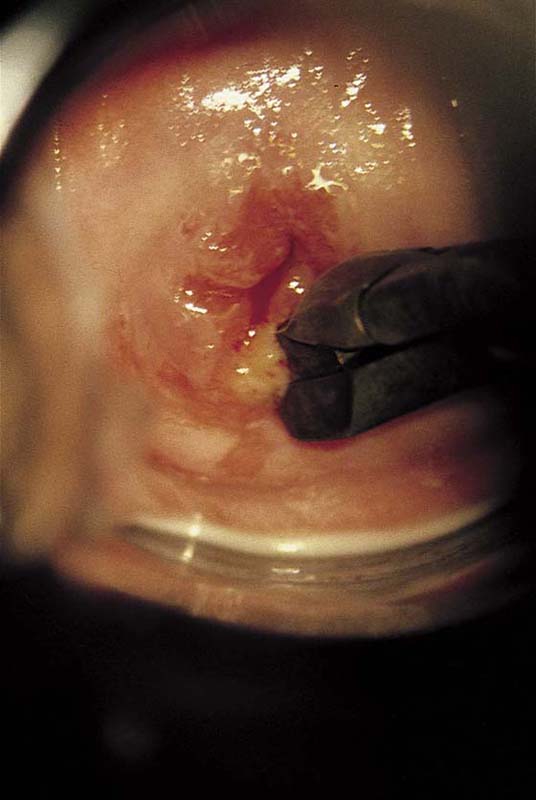
FIGURE 45–3 This view through the colposcope shows the biopsy forceps closing down on a piece of tissue at the squamocolumnar junction.
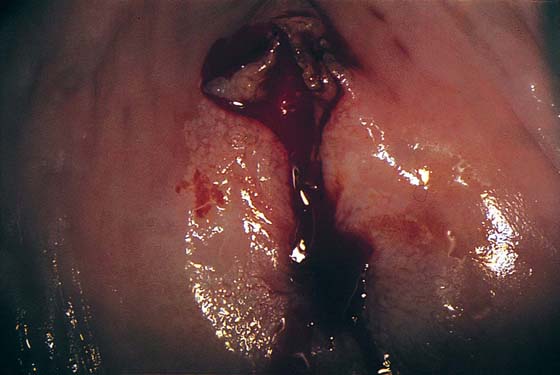
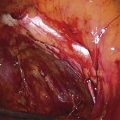
FIGURE 45–4 This demonstrates an appropriately directed biopsy. Note that the borders of the specimen are sharp and that it extends completely through the atypical transformation zone. Further, this demonstrates that all biopsy specimens bleed.
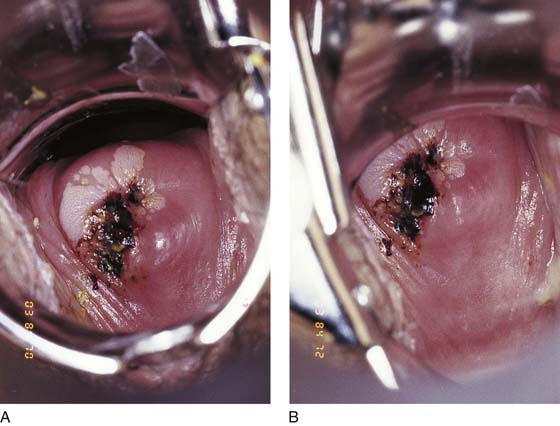
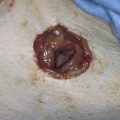
FIGURE 45–5 A. Monsel’s solution (ferric subsulfate) has been applied to the biopsy site, creating a dark brown coloration to the tissue. B. Magnified view of the biopsy site after Monsel’s solution has been applied. Note the excellent hemostasis.
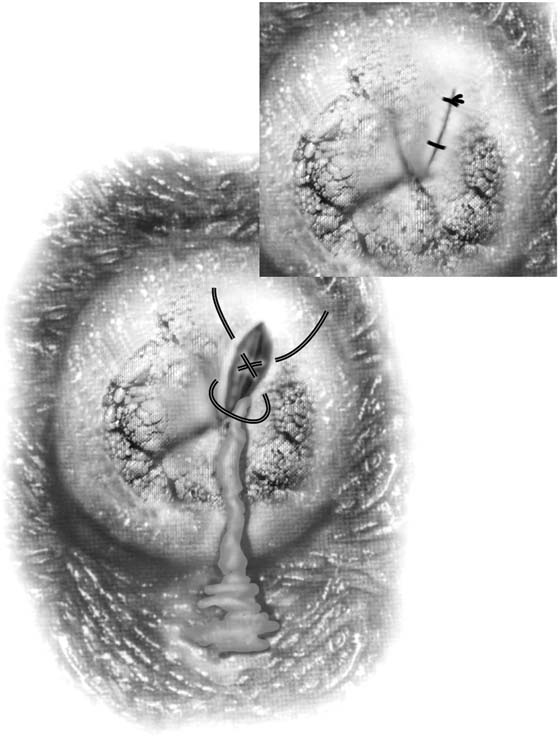
FIGURE 45–6 If bleeding continues after Monsel’s solution has been applied, the site must be sutured. This is performed by utilizing a long needle holder and closing the biopsy defect with a 3-0 Vicryl figure-of-8 suture.
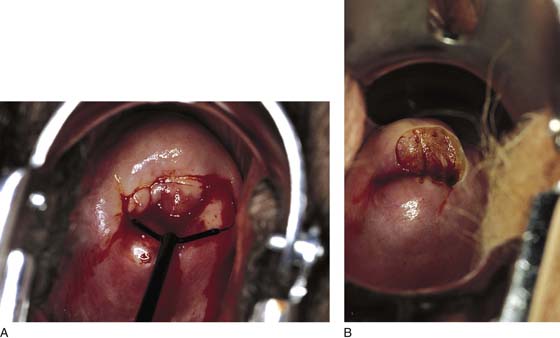
FIGURE 45–7 A. A large loop electrode coupled to a monopolar cutting current is an alternative technique for obtaining a relatively “bloodless” biopsy specimen. B. The disclike sample is not deeply taken but is very easy for the pathologist to orient.
Endocervical Curettage
To properly perform an endocervical curettage, the cervix must be stabilized. This is done by applying a single-tooth tenaculum to the anterior lip of the cervix. Next, a Telfa pad is placed below the posterior aspect of the cervix (i.e., into the posterior fornix of the vagina). A Kevorkian curette is engaged into the external os and is pushed along the axis of the cervical canal for a distance of 2.5 to 3 cm (Fig. 45–8). The sharp edge of the curette basket is aimed at the 12 o’clock position. The canal is vigorously curetted downward. Each subsequent stroke is rotated clockwise through 3, 6, and 9 o’clock positions until the device returns again to the 12 o’clock position (Fig. 45–9). Typically, the curettings are suspended in cervical mucus (Fig. 45–10). The specimen is retrieved from the Telfa pad by means of a long curved Kelly clamp, which twists the mucus sample as one would twist spaghetti on a fork. The specimen is deposited on a square of ordinary paper towel, and together these are placed immediately into a jar of fixative. Enhanced accuracy may be anticipated by directing the endocervical curettage to a targeted area for sampling. This is best accomplished by doing an endoscopic examination of the endocervix before curetting the canal (Fig. 45–11A through C).
Cervical Biopsy During Pregnancy
Occasionally, a biopsy of the cervix during pregnancy is required to determine whether invasive cancer is present. It is inadvisable to perform an endocervical curettage during pregnancy. The pregnant cervix is blue because of its tremendous vascular supply. Obtaining even a small biopsy specimen can lead to significant blood loss (Fig. 45–12). Therefore, 3-0 Vicryl and appropriate long instruments should be at hand in the event that suture placement is needed. Following colposcopic examination and identification of the location at the biopsy site, the biopsy forceps are positioned on the cervix. The operator’s free hand holds a cotton-tipped applicator to which Monsel’s solution has been applied. As the jaws of the biopsy forceps close on the tissue, Monsel’s swab is brought close to the cervix (i.e., just to the side of the forceps) (Fig. 45–13A). As the specimen is removed, Monsel’s swab is stuffed into the wound crater and is gently rolled from one margin to the other while light pressure is maintained (Fig. 45–13B). The swab is kept in contact with the wound for a full 20 to 30 seconds, then is gently removed.
FIGURE 45–8 A Kevorkian curette is most suitable for endocervical curettage because of its narrow profile and sharp edges.
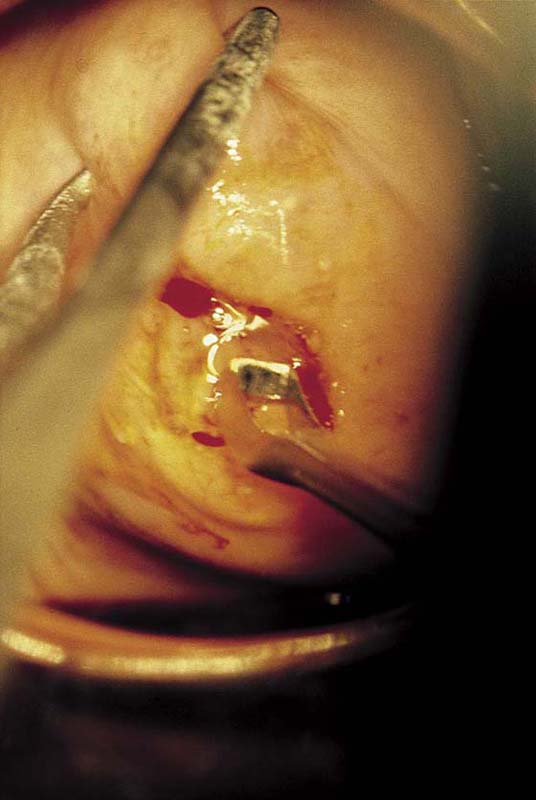
FIGURE 45–9 The cervix is grasped with a single-tooth tenaculum (12 o’clock position) for stability. The curette can be seen just before the cervical canal is entered.
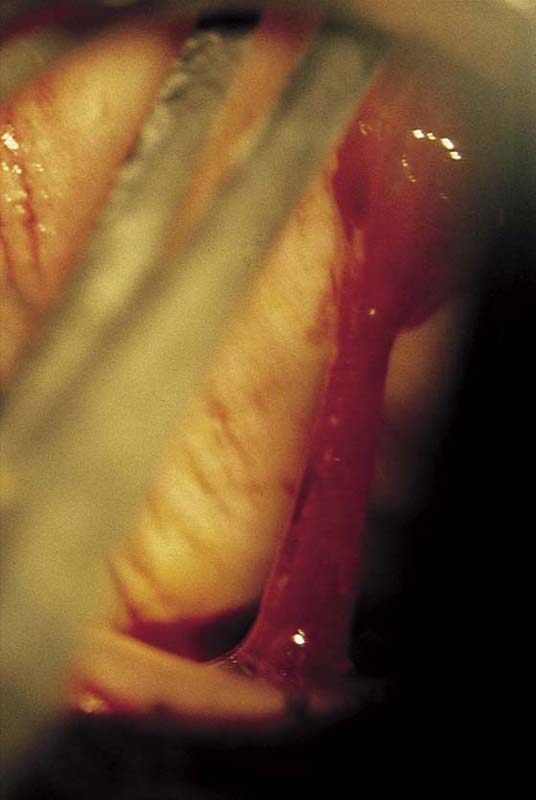
FIGURE 45–10 The curettage has been completed. Note the string of mucus containing fragments of endocervical mucosa.
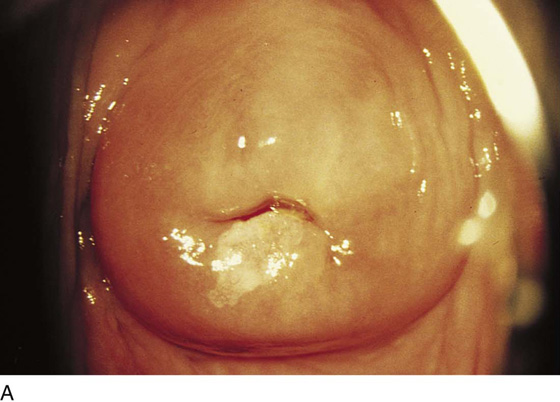
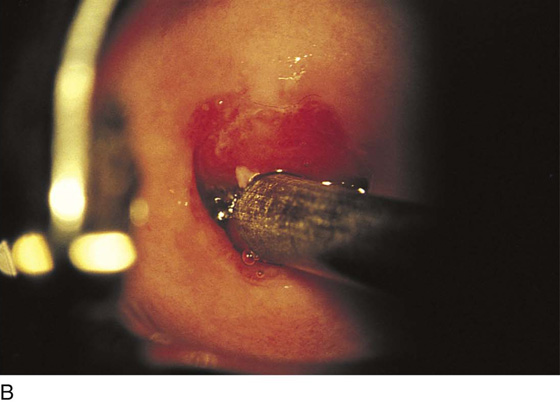
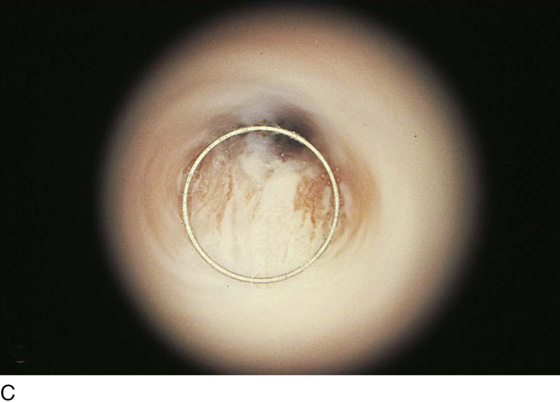
FIGURE 45–11 A. The abnormal transformation zone at 6 o’clock is extending into the endocervical canal. B. The barrel of the hysteroscope is engaged at the external os in preparation for an endoscopic examination of the cervical canal. C. Hysteroscopic view clearly shows how far and where in the canal the abnormal epithelium extends.

FIGURE 45–12 The pregnant cervix is cyanotic with extensive ectopy. An extensive abnormal transformation zone is visible in this colposcopic photograph.
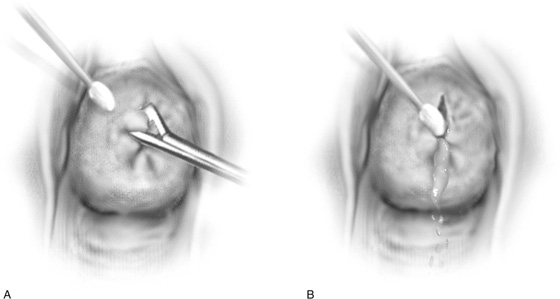
FIGURE 45–13 A. The jaws of the biopsy clamp are closed on the tissue sample in this pregnant patient. Simultaneously, a cotton-tipped applicator soaked with Monsel’s solution is positioned next to the biopsy forceps. B. As the biopsy forceps containing the tissue sample is removed, Monsel’s swab is thrust into the defect and is gently rolled from side to side while light pressure is applied.