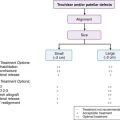
Chapter 4B Bone Marrow Stimulating Techniques
Carbon Fiber Resurfacing
Introduction
The rationale behind using carbon fiber as a biomaterial is as follows:
In 1987,1 Minns et al. published a preliminary clinical experience in a new concept of biological resurfacing using carbon fiber implants in the form of pads or rods placed in defects within the knee that elicit a dense organized matrix of fibrous tissue that forms a new biological and functioning articular surface. No evidence of implant fragmentation has been seen since implantation in the 145 knees studied.1
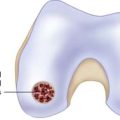
Carbon fiber arthroplasty appears to be appropriate in the surgical management of ICRS Grades 3 and 4 articular cartilage lesions in the painful knee.2,3,4,5
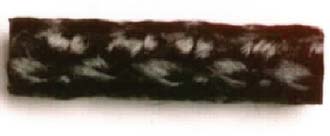
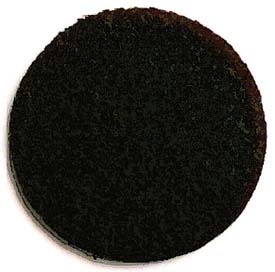
FIGURE 4B-2 Carbon pad, approximately 4 mm thick in discs up to 22 mm in diameter. Porosity is about 85%.
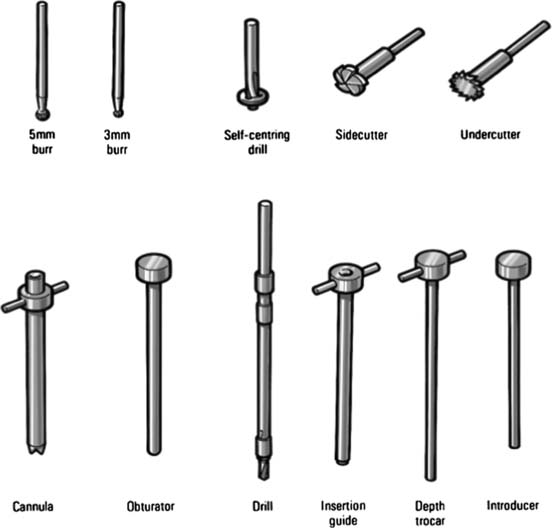
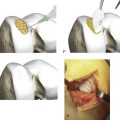
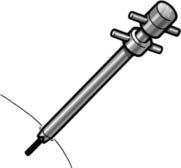
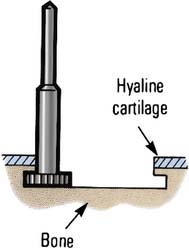
The cannula is positioned in the defect, on the bony surface (Fig. 4B-4).
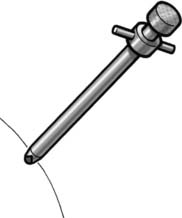
The obturator is removed. Through the cannula, a 3.2-mm drill bit is put and a hole is drilled until depth- stop (Fig. 4B-5).
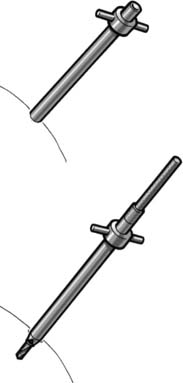
The drill is withdrawn and an insertion guide is put into the cannula. The guide should fit to the level of the stop (Fig. 4B-6)
The depth is controlled with a special thin obturator. The obturator should fit to the level of the stop, and there should be no difficulty in the insertion (Fig. 4B-7)
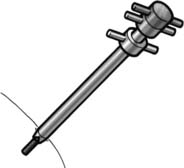
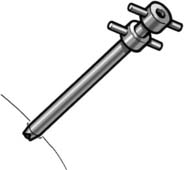
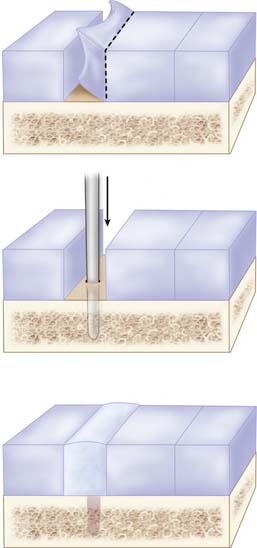
Finally, a rod is implanted through the insertion guide. The rod should slide in without any resistance (Fig. 4B-8). The top of the rod should be flush with the bony surface or slightly below. By no means should the top protrude above the bony surface.
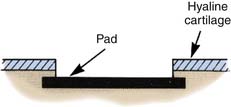
Carbon Pads (Needs Open Surgery)
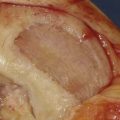
The pads are mainly used for concave surfaces such as destroyed patellar surfaces.
The hard subchondral bone is opened by using a self-centering drill incorporating a 3-mm depth stop. Multiple holes are drilled (Fig. 4B-9).
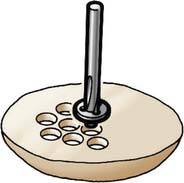
The bony bridges are broken down using a side cutter (Fig. 4B-10)
The subchondral bone is undercut using an under cutter (Fig. 4B-11).
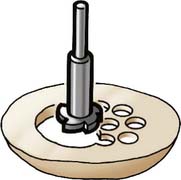
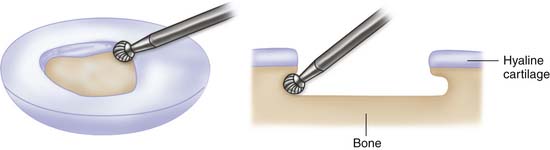
A caliper is used and placed into the defect with its tips in the undercut. The required size is read off the gauge (Fig. 4B-12).

FIGURE 4B-12 The required size of the pad is read off the caliper gauge when pushing its tips under the bony rim.
The pad should be soaked in saline, and the edges of the pad are eased carefully under the bony rim of the defect (Fig. 4B-13). No extra fixation is needed.
If the self-centering drill, side cutter, and under cutter are not available, the different stages can also be done using a 5-mm and a 3-mm burr. First the subchondral bone is removed to a depth of 3 mm with the 5-mm burr. The following undercut is made using the 3-mm burr into a depth of 2 mm (Fig. 4B-14).
Hybrid Repair
When a cartilage repair is partially insufficient at the borders to adjacent cartilage, one may use a carbon rod to induce a strong interpositional ingrowth of repair tissue. The author is using a carbon rod when autologous chondrocyte implantation (ACI), ACI repair tissue, or other induced repair tissue is showing insufficient repair with partial loosening of the grafted area. The loose area is then excised, and the bare area is debrided and treated by implantation of one or two rods. The strong induced fibrocartilaginous repair tissue will bridge the adjacent cartilage to the ACI repair tissue. (Fig. 4B-15).
Carbon Rod Revision
Leave those spots even but excise the carbon only if it sprouts out, and use a small ladle to clean the drill holes from carbon debris.
Pearls and Pitfalls
It is important that the carbon fibers are to be used implanted flush with the bony surface or preferably 1 mm below the bony surface, especially when treating kissing lesions and bipolar defects.
The biological response of carbon fiber in the knee was reported by Muckle and Minns,4 in which minimal synovitis was observed except in knees that also displayed an associated instability.
1. Minns R.J., Betts J.A., Muckle D.S., Frank P.L., Walker D.I., Strover A., Hardinge K. Carbon fibre arthroplasty of the knee. Preliminary clinical experience in a new concept of biological resurfacing. In: Noble J., Galasko C.B.D., editors. Recent developments in orthopaedic surgery. Manchester: Manchester University Press; 1987:1-8.
2. Minns R.J., Muckle D.S., Donkin J.E. The repair of osteochondral defects in osteoarthritic rabbit knees by the use of carbon fibre. Biomaterials. 1982 Apr;3(2):81-86.
3. Minns R.J., Muckle D.S. Mechanical and histological response of carbon fibre pads implanted in the rabbit patella. Biomaterials. 1989 May;10(4):273-276.
4. Muckle D.S., Minns R.J. Biological response to woven carbon fibre pads in the knee. A clinical and experimental study. J Bone Joint Surg Br. 1990 Jan;72(1):60-62.
5. Brittberg M., Faxén E., Peterson L., Carbon fiber scaffolds in the treatment of early knee osteoarthritis. A prospective 4-year followup of 37 patients, Clin Orthop Relat Res, 307, Oct, 155-164, 1994.