Chapter 12 Basics of Splinting and Casting
Basic principles
First, Do No Harm
1. Make sure that the potential complications of applying and maintaining a cast or splint are less severe and less likely than the complications of an untreated injury.
2. A poorly made splint/cast can result in pressure sores, compression neuropathies, joint stiffness, and complex regional pain syndrome.
3. Never place a circumferential rigid dressing (cast) over an increasingly edematous limb because compartment syndrome can result.
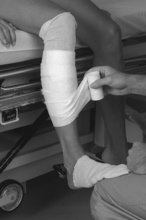
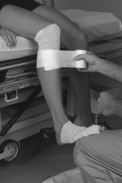
4. Elastic bandages such as an all cotton elastic (ACE) bandage should be applied loosely so that the elasticity can accommodate any future swelling.
5. Elbows, forearms, and the lower leg and foot have the highest risk of compartment syndrome after cast application. Use caution when applying a cast in the acute setting.
What to Immobilize
1. For intraarticular or periarticular fractures, the bone proximal and distal to the joint involved should be included (one above and one below).
3. Immobilizing more joints than is necessary can result in permanent iatrogenic loss of joint motion.
4. Immobilization of fewer joints than is necessary can result in fracture displacement, neurovascular injury, and unnecessary pain and suffering.
5. Examples of correct immobilization:
a. Wrist fracture (distal radius):


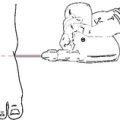
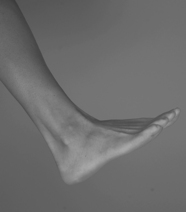
What Position to Immobilize
1. Unless a pressing reason exists to do otherwise, each joint should be immobilized in the optimal position to retain joint mobility after the cast/splint is removed.


Bivalving
1. If a cast is placed in the acute setting and edema is a concern, the cast can be split longitudinally along two sides (bivalving).
Wedging
1. If the fracture reduction is acceptable in translation but not in angulation, the cast can be cut transversely on the acute angle of the malreduction and a wedge inserted to change the angle of the cast (Figure 12-11).
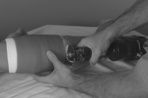


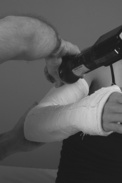
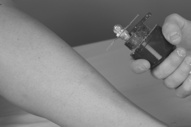
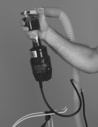
Cast Removal
1. Overview
a. A cast saw is an oscillating saw designed to cut hard cast material while minimizing trauma to soft material, such as cotton padding and skin.
c. Plaster casts can be unraveled after they are soaked in water for several minutes; however, finding the leading end of the plaster strip can be difficult.
d. Do not attempt to place any cast if a cast saw is not available, because emergent removal or trimming of the cast may be necessary.
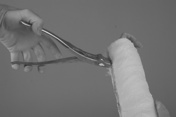
e. A cast spreader can be very helpful in separating the two halves of a cast after they have been split (Figure 12-18).
Materials
Stockinette

Cast Padding
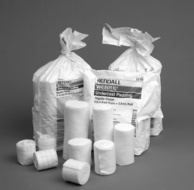
1. Cast padding is available in cotton, synthetic, and waterproof varieties and in sizes ranging from 1 to 6 inches (Figure 12-23).
2. We prefer the cotton variety of cast padding because it expands more evenly, is more comfortable, and is easier to work with compared with other varieties.
4. Avoid placing a seam of cast padding or too much padding material on the flexion side of a joint, because pressure ulcers can result (Figure 12-24).
Plaster
3. We prefer Gypsona because it has a high plaster content, makes a nice, smooth finish on the outside, and feels silky to apply.
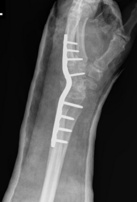
5. Plaster holds a mold better than fiberglass does and is the material of choice when a reduction is required.
9. Avoid air pockets or bubbles in the plaster, which form a stress riser inside the cast and lead to structural failure.

Fiberglass
1. Fiberglass is available in a variety of sizes and colors ranging from 1 to 6 inches and from hot pink to army green (Figure 12-27).
2. Fiberglass takes just a few minutes to reach near full structural integrity and is more resistant to deformation than is plaster. Because of these qualities, molding with fiberglass is much more difficult than molding with plaster.
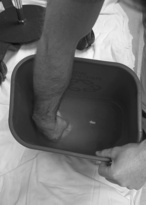
3. Water does not compromise a fiberglass cast, and waterproof cast padding can be used if a patient intends to go in the water or if it is suspected he or she will do so.
6. Be sure to wring out any excess moisture from the fiberglass after activating it in water to prevent maceration of the cast padding.
7. Do not use a fiberglass cast in the acute setting unless the patient will be under close observation in the hospital, and never use it in the acute setting on an obtunded patient.

Elastic Cast Material
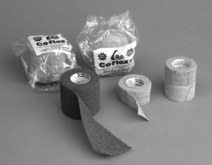
3. Elastic cast material can be used for young children who do not require rigid immobilization and are unlikely to tolerate cast removal with a saw.

Elastic Bandage
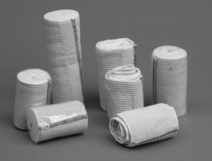
1. Elastic bandages are available in a variety of sizes and colors ranging from 2 to 6 inches and from hot pink to army green (Figure 12-29).
Splint production basics
Padding

Types of Splints
2. Plaster prepadded splint (Figure 12-39):

Plaster Onlay Splint
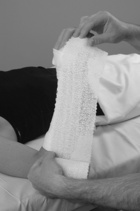
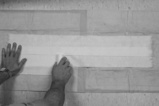
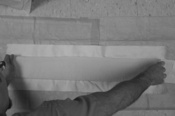
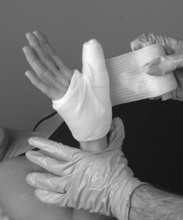
1. Place two layers of cast padding to allow a 1- to 2-cm cuff of padding proximal and distal to the plaster (Figure 12-40).
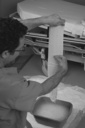
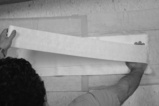
2. Measure out the correct length of splinting material (Figure 12-41). Keep in mind that plaster will shrink in water by approximately 5%.
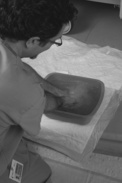
3. Prepare 10 to 12 layers of splinting material of the measured length and adequate width (Figure 12-42).


Plaster Prepadded Splint
1. Measure out the correct length of splinting material (Figure 12-51). Keep in mind that plaster will shrink in water by approximately 5%.
2. Prepare 10 to 12 layers of splinting material of the measured length and adequate width (Figure 12-52).
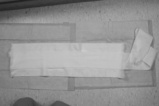
3. Roll out four layers of cast padding on a flat surface a few centimeters longer than and twice as wide as the slab of plaster (Figure 12-53).
4. Place a strip of cast padding twice the length of the plaster slab in the center of the cast padding (12-54 and 12-55).


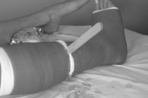
Cast production basics
Types of Casts
1. Plaster cast:
a. The strength of the cast depends on the removal of any air pockets from between each sheet of plaster.
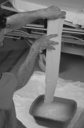
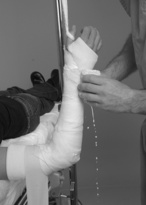
(2) Always roll the plaster on the cast. Do not lift the roll of plaster away from the cast (Figure 12-61); a “wall” of liquid plaster will form between the roll and the cast and help fill in air spaces.
(3) Be sure to laminate (i.e., smooth plaster into any remaining air pockets) as you roll each layer of the cast (Figures 12-62, 12-63, and 12-64).
2. Fiberglass cast:
Plaster Cast
3. Place two layers of cast padding to allow a 1- to 2-cm cuff of padding proximal and distal to the plaster (Figure 12-69).
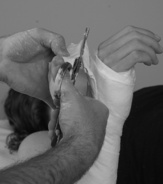
9. If the plaster encroaches on the cuff of the cast padding or is in contact with the skin, wait until it has cured (5 to 10 minutes) and then trim it with a cast saw.
10. Tips and tricks:
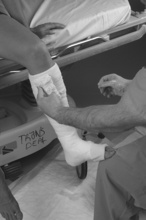
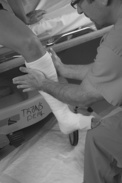
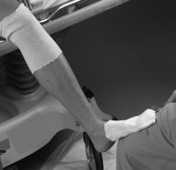
a. Around elbows, knees, and ankles, apply a four-layer plaster slab to the convex side of the joint to minimize bulk on the concave side.
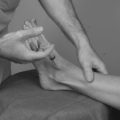
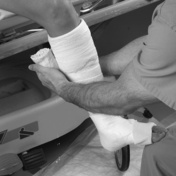
c. To laminate the cast as you go, smooth out the plaster with the hand not holding the plaster roll.
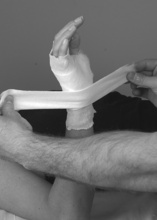
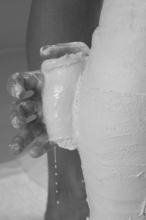
d. To get around the thumb-index web space, either twist the roll 360 degrees or pinch the sheet of plaster (Figures 12-75 and 12-76).


Fiberglass/Elastic Cast
3. Place two layers of cast padding to allow a 1- to 2-cm cuff of padding proximal and distal to the cast material.
8. If the casting material encroaches on the cuff of the cast padding or is in contact with the skin, wait until it has cured (5 to 10 minutes) and then trim it with a cast saw.

Common errors
2. Activating plaster in hot water:
4. Failure to allow the splint or cast to fully harden:
7. The cast or splint is not laminated:
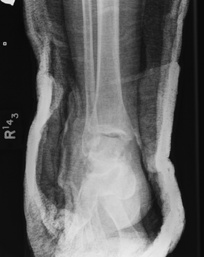
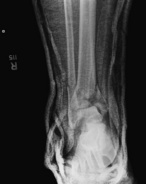
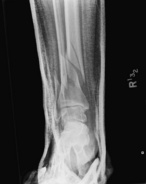
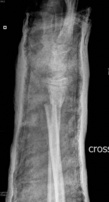
b. Lack of lamination is most commonly detected on postapplication radiographs as an onion-skinning appearance (Figure 12-88). The plaster should be one solid line (Figure 12-89).
8. The wrong joints are immobilized or the joints are immobilized in the wrong position:
a. Immobilizing more joints than is necessary can result in permanent iatrogenic loss of joint motion.