Chapter 9D Autologous Chondrocyte Implantation
Transarthroscopic Implantation of Hyalograft (Hyaff 11) with Autologous Chondrocytes
Introduction
It has been demonstrated to be an optimal physical support to allow cell-cell contacts, cluster formation, and extracellular matrix deposition and to deliver differentiated chondrocytes.1,2
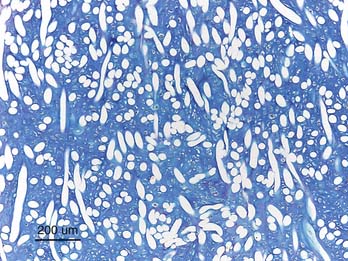
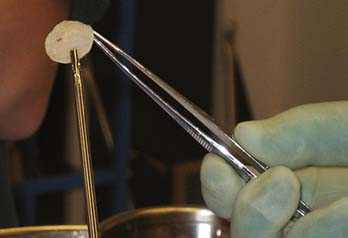
The cells harvested from the patient are expanded and then seeded onto the scaffold where the cells are able to redifferentiate and retain a chondrocytic phenotype even after a long period of in vitro expansion in monolayer culture1,2 (Fig. 9D-1). The Hyalograft with cultured chondrocytes may be implanted by press fitting directly into the lesion as described by Kon et al.3 The scaffold has self-adhesive properties, but most often additional fibrin glue is needed for a secure positioning. In this chapter, the authors describe a modified implantation technique: the “folded blanket” technique for the knee and for the ankle.
Technical Overview
Cartilage is harvested as described in Chapter 9C. The cell culture takes a longer time to grow compared to when cells are transplanted as suspension. After 4 to 5 weeks, the scaffold is delivered as 2 × 2 cm large patches (Fig. 9D-2). Depending on the quality of the cultured cells, the seeded scaffolds have different strength.
Operative Technique for the Knee
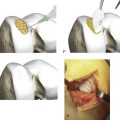
A half pipe introducer may be used to introduce the scaffold into the joint.
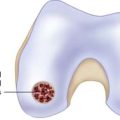
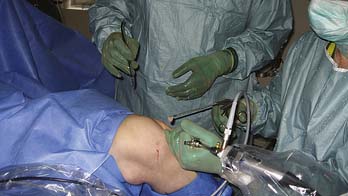
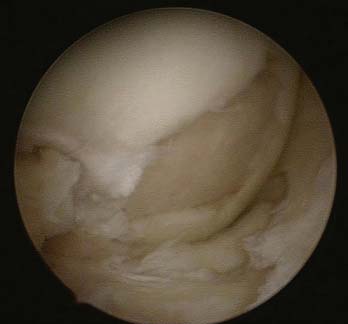
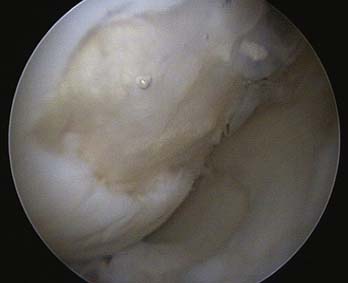
The defect has already been debrided as described in Chapter 3. The central part of the defect is treated by a microfracture awl to get a fixation point (mushroom fixation) (Fig. 9D-3).

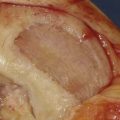
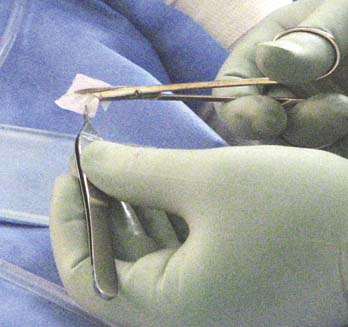
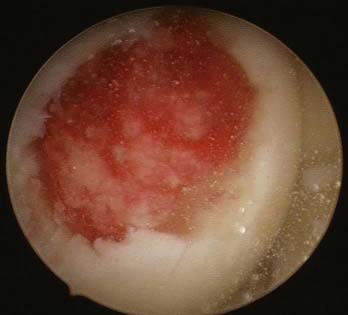
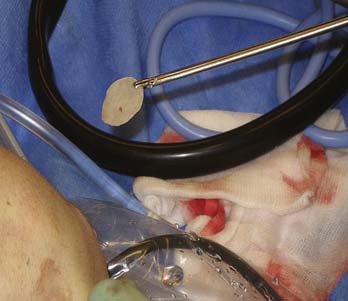
The chondrocyte-seeded matrix is then cut with a scissor or scalpel to the approximate size of the defect (Fig. 9D-4).
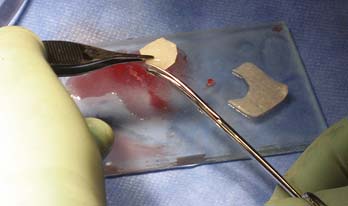
FIGURE 9D-4 The chondrocyte-seeded matrix is cut with a scissor or scalpel to the approximate size of the defect.
The scaffold is covered with a thin fibrin glue layer (Fig. 9D-5), grasped with an arthroscopic grasp instrument with plain surfaces (Fig. 9D-6), and introduced into the joint along the half pipe intruder to reach the defect (Fig. 9D-7).
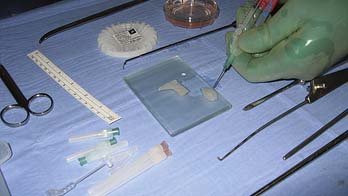
FIGURE 9D-5 The scaffold is covered with a thin layer of fibrin glue and becomes saturated and easier to handle.
Some extra fibrin glue is injected over the implanted scaffold, and the scaffold is compressed toward the defect bottom with a curved smooth tonsil elevator. If the scaffold is oversized, the edges may be folded like a blanket into the defect to fill it up entirely (Fig. 9D-8).

FIGURE 9D-8 If the scaffold is oversized, the edges may be folded like a blanket into the defect to fill it up entirely.
If too small, additional pieces of the scaffold are implanted to fill the defect like a patchwork quilt. Several layers of Hyalograft may be needed to fill the defect up to surrounding cartilage (mille feuille technique) (Fig. 9D-9).

Graft adherence and integration are controlled by moving the knee joint with flexion and extension movements. The scaffold should either be in level with surrounding cartilage or slightly below (Fig. 9D-10).
The Tibial Plateau
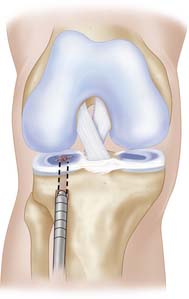
In a defect that is situated on the tibial plateau and often depressed, the repair can be done in a retrograde direction. With a vector guide, a channel is drilled from the proximal tibia to the defect area (Fig. 9D-11). A Hyalograft scaffold is pushed through the channel to the cartilage defect surface followed by a bone graft filling of the channel (Fig. 9D-12). From the inside, a pusher or a curved tonsil elevator keeps the implant in place, while from the channel the bone paste is compressed against the implant with counter press (Fig. 9D-12).

Hyalograft with Seeded Chondrocytes and Bone Grafting for Osteochondral Defects
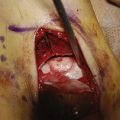
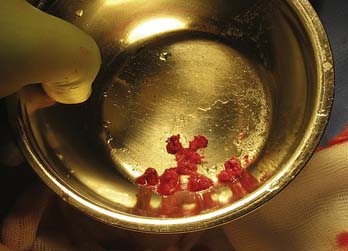
When a bone grafting is needed for deep and large osteochondral defects such as osteonecrosis and osteochondritis dissecans (OCD), the seeded scaffold may be used directly in conjunction with bone grafts. The bone grafts may be harvested from the crista iliaca anterior superior region or from the proximal tibia (Fig. 9D-13).
The bone grafts are mixed with fibrin glue to a putty-like consistency, forming bone paste (Fig. 9D-14). The bone grafts are put into a 2-ml syringe where the top of syringe has been cut off leaving a round opening (Fig. 9D-15). The bone grafts may be mixed with an artificial bone substitute if needed.
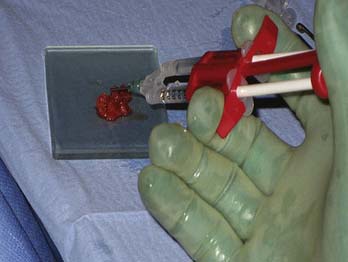
FIGURE 9D-14 The bone grafts are mixed with fibrin glue to form a putty-like consistency, a bone paste.
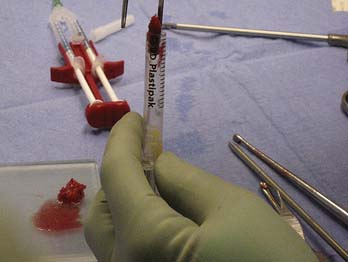
FIGURE 9D-15 The bone grafts are put into the 2-ml syringe where the top of syringe has been cut off leaving a round opening.
Finally, the bone paste is implanted via the syringe into the osteochondral defect (Fig. 9D-16). The bone paste is compressed to fill the osseous part of the defect (Figs. 9D-17 and 9D-18).
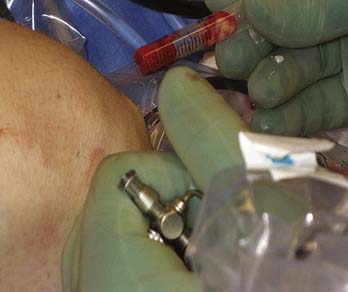
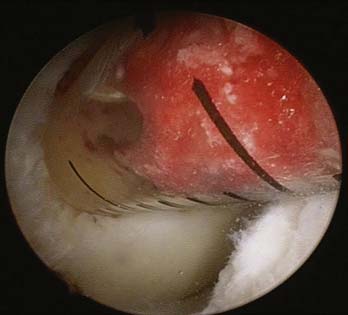
FIGURE 9D-17 The bone paste is pushed into the defect to fill up the osseous part to the level of the surrounding cartilage layer.
The cell seeded scaffold is implanted and put over the top of the bone grafts, saturated with fibrin glue (Fig. 9D-19). Extension-flexion motions are used to test the stability of the dual graft (Fig. 9D-20).
Postoperative Rehabilitation for an Implanted Knee Joint
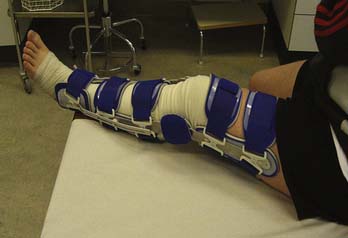
The extremity is immobilized in a brace locked in extension for 2 weeks (Fig. 9D-21). Full weight bearing is allowed in the brace up to a level that pain allows. After 2 weeks, the brace is used outdoors, unlocked, for another 4 weeks.
A large defect may be protected by an unloader brace for a longer period. Or one may even consider performing a concomitant permanent unloading with osteotomy (see also Chapter 12).
The osteotomy can be performed as an arthroscopy plus an osteotomy. The defect is debrided first, followed by the osteotomy, and finally the Hyalograft is implanted transarthroscopically. Rehabilitation is the same as it is without an osteotomy.
Preoperative antibiotics such as cloxacillin 1g × 3 times during 24 hours postoperatively are recommended. Antithrombotic treatment with low-fragment heparin once per day is recommended for 2 weeks.
Hyalograft-C Treatment for Talar Lesions of the Ankle
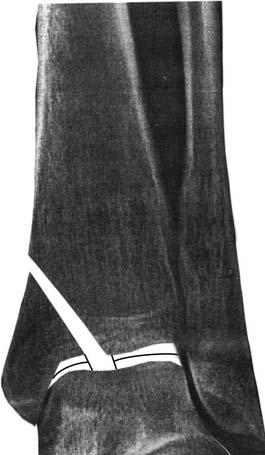
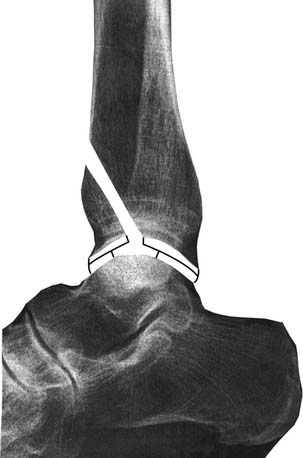
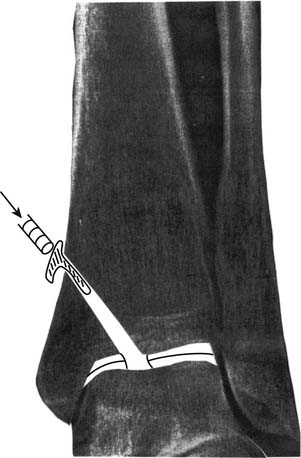
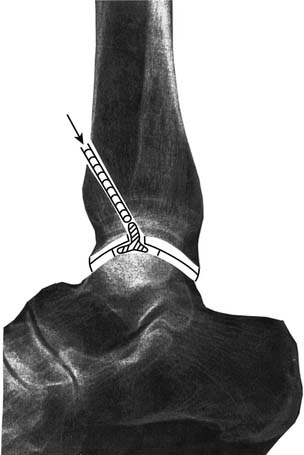
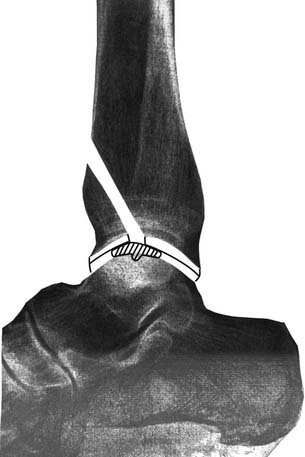
Using a vector guide and an arthroscopic examination through lateral and medial portals, the lesion is reached and debrided. With the vector guide positioned in the lesion, a 3.2-mm drill is used to drill a channel through the malleolus to reach the lesion area (Figs. 9D-22 and 9D-23). The sized graft is pushed through the channel like a handkerchief through a hole, the pusher in the center of the graft and the surrounding parts folded against the channel walls (Fig. 9D-24). When the graft has reached the lesion area, a curved tonsil elevator is inserted via a portal and used to spread out the graft in the lesion (Figs. 9D-25 and 9D-26). If needed, bone grafts can be used to fill a deep osteochondral defect before implantation of the cell graft.
Postoperative Rehabilitation
The ankle is put in a brace locked in 90 degrees for 2 weeks. Weight bearing is allowed with the brace. After 2 weeks, successive increased motions of the ankle are encouraged.
1. Kon E., Gobbi A., Filardo G., Delcogliano M., Zaffagnini S., Marcacci M. Arthroscopic second-generation autologous chondrocyte implantation compared with microfracture for chondral lesions of the knee: prospective non randomised study at 5 years. Am J Sports Med. 2009 Jan;37(1):33-41. Epub 2008 Dec 4
2. Nehrer S., Chiari C., Domayer S., Barkay H., Yayon A. Results of chondrocyte implantation with a fibrin-hyaluronan matrix: a preliminary study. Clin Orthop Relat Res. 2008 Aug;466(8):1849-1855.
3. Kon E., Gobbi A., Filardo G., Delcogliano M., Zaffagnini S., Marcacci M. Arthroscopic second-generation autologous chondrocyte implantation compared with microfracture for chondral lesions of the knee: prospective nonrandomized study at 5 years. Am J Sports Med. 2009 Jan;37(1):33-41.