CHAPTER 4 Anesthesia, Patient Positioning, and Patient Preparation
This chapter reviews the anesthesia used for shoulder replacement surgery. Additionally, proper patient positioning and surgical preparation and draping are described.
ANESTHESIA *
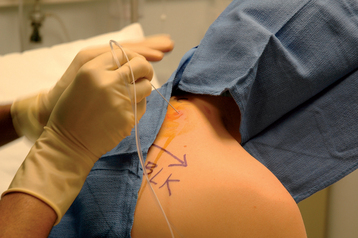
Provided that no contraindication exists, all of our shoulder arthroplasty patients undergo a preoperative interscalene block administered in the preoperative holding area by an anesthesiologist. The interscalene block serves two purposes. First, use of the block minimizes the amount of general anesthetic needed during surgery, and second, it aids in postoperative pain management. Our anesthesiologists use a posterior approach and insert an indwelling brachial plexus catheter that is maintained for up to 48 hours after surgery (Fig. 4-1).1 General anesthesia, as well as neuromuscular paralytic agents, is then administered to all patients. Neuromuscular paralysis greatly facilitates exposure during glenoid resurfacing and can be discontinued after implantation of the glenoid component.
PATIENT POSITIONING
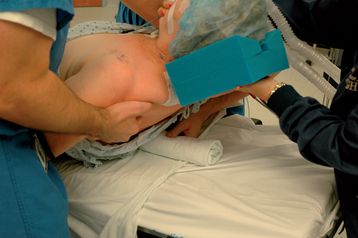
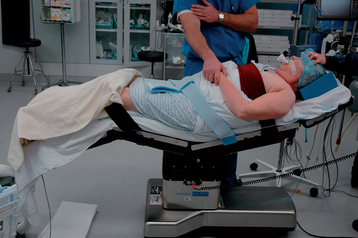
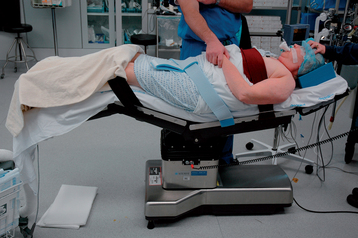
Proper patient positioning is crucial during shoulder arthroplasty. We use a standard operating table with the patient positioned sufficiently to the operative side to allow extension of the arm (Fig. 4-2). A rolled sheet is placed between the scapulae to slightly elevate the shoulder off the operating table and allow proper surgical preparation of the posterior aspect of the shoulder (Fig. 4-3). The use of certain types of operating tables developed for shoulder arthroscopy, in which the portion of the table posterior to the scapula is removed, is discouraged because these tables inhibit control of the scapula and thus make glenoid exposure difficult.
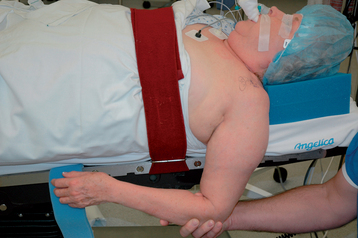
Figure 4-2 The patient is positioned sufficiently laterally on the operating table to allow full arm extension.
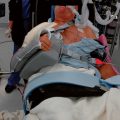
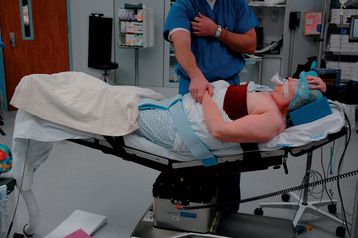
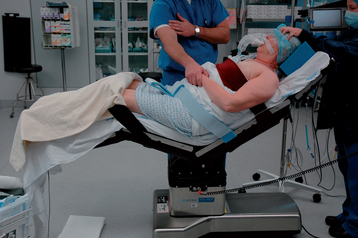
The patient is placed in the modified beach chair position. To obtain the proper position, the operating table is first reflexed (Fig. 4-4) and the patient’s knees are flexed (Fig. 4-5). The patient is then placed in a slight Trendelenburg position to prevent sliding inferiorly on the operating table (Fig. 4-6). Finally, the back of the operating table is elevated approximately 45 to 60 degrees relative to the floor (Fig. 4-7). The position of the patient’s head and neck is checked to ensure neutral alignment. Occasionally, it is necessary to slightly flex the head portion of the operating table to eliminate cervical extension. Once cervical alignment and the head position are acceptable, the forehead and chin are secured with 1-inch silk adhesive tape as shown in Figure 4-8. In patients with fragile skin, a dry gauze pad is used to minimize tape contact and prevent skin tears. Care should be taken to pad and protect bony prominences and sites of subcutaneous vulnerable nerves near the elbow (ulnar) and knee (peroneal). Figure 4-9 shows the final position of the patient before skin preparation.

SURGICAL PREPARATION AND DRAPING
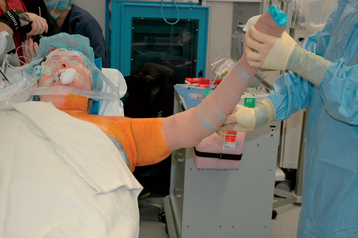
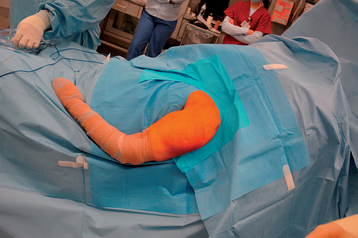
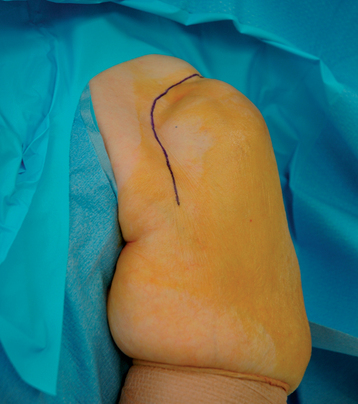
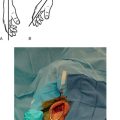
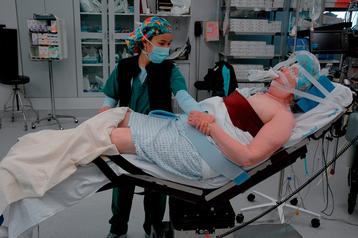
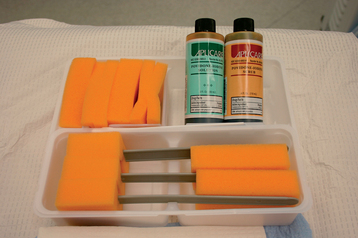
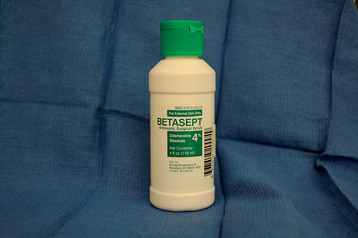
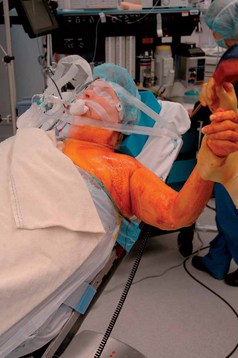
Skin preparation begins the day before surgery. We advise the patient to shave the affected shoulder girdle and axilla; it is not necessary to shave the arm below the elbow. Shaving the surgical area a day in advance allows any skin irritation caused by shaving to subside. Patients are also advised to bathe with an antibacterial soap the morning of surgery before coming to the hospital. Once in the operating room, the skin of the affected upper extremity and shoulder girdle is cleaned with isopropyl alcohol. A povidone-iodine (Betadine) scrub is then performed. The surgical area is dried with towels and painted with a Betadine solution (Fig. 4-10). In patients with allergy or hypersensitivity to Betadine, a scrub with 4% chlorhexidine gluconate solution (Betasept) is performed (Fig. 4-11). The scrub solution is removed with sterile water and an isopropyl alcohol preparation is applied. The area included in the surgical preparation extends medially to the midline, distally to the level of the nipple, and proximally to the level of the mandible and encompasses the entire upper extremity, including the hand (Fig. 4-12).
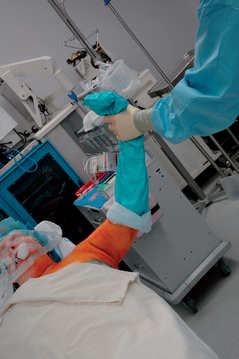
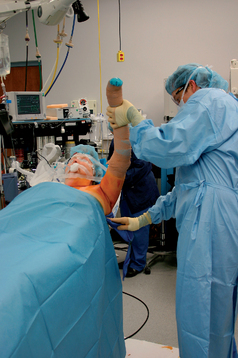
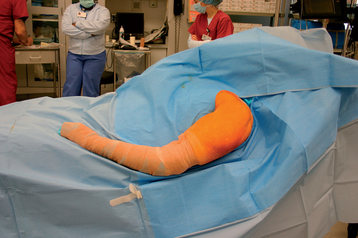
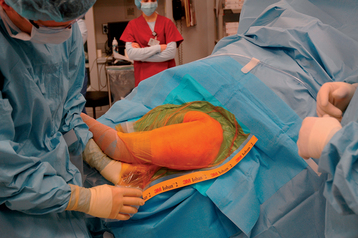
Draping is initiated by the assistant’s draping the patient’s hand with an impermeable stockinet (Fig. 4-13). A reinforced disposable paper drape is placed from the inferior aspect of the surgical field and extended over the torso and lower extremities to prevent contamination of the operative team during the remainder of the draping. The stockinet is rolled proximally, past the elbow in most cases, and is covered and secured with disposable elastic wrap (Fig. 4-14). In cases in which direct palpation of the humeral epicondyles is necessary, such as hemiarthroplasty with a fracture jig, the stockinet covers only the hand and forearm. A towel is used to dry an area circumferentially around the shoulder to allow the ensuing “U” drapes to adhere to the skin (Fig. 4-15). A disposable impermeable “U” drape is placed inferiorly to superiorly, with the two limbs of the drape meeting superiorly (Fig. 4-16). A large disposable reinforced paper “U” drape is applied inferiorly to superiorly (Fig. 4-17). A smaller disposable paper “U” drape is placed superiorly to inferiorly (Fig. 4-18). The remaining exposed skin in the surgical field, including the axillary skin, is dried with a towel. In patients with previous surgical incisions, skin scars are marked with a skin-marking pen (Fig. 4-19). An occlusive adhesive drape is applied to the shoulder to effectively remove the axilla from the surgical field. We prefer the occlusive drape to be impregnated with Betadine; however, in patients with Betadine allergy or hypersensitivity, we use a non–Betadine-impregnated version of the same drape. The occlusive drape is applied by first securing the drape to the posterior aspect of the shoulder. The arm is then abducted and externally rotated as the occlusive drape is placed anteriorly initially and then around the arm to cover the axilla (Fig. 4-20). Final patient positioning and draping are shown in Figure 4-21.