Procedure 67 Arthroscopic Triangular Fibrocartilage Complex Repair
 See Video 49: Arthroscopic TFCC Repair

Examination/Imaging
Clinical Examination


Surgical Anatomy
 The TFCC is a complex soft tissue support system that stabilizes the ulnar side of the wrist and also serves to extend the articular surface of the radius to support the proximal carpal row. As described by Palmer, it is composed of the fibrocartilage articular disk, the volar and dorsal radioulnar ligaments, the meniscus homolog, and the floor of the ECU tendon sheath.


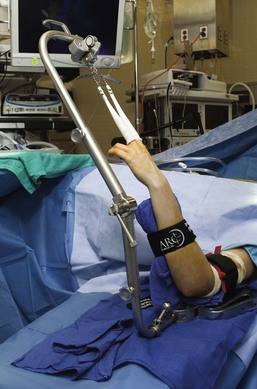
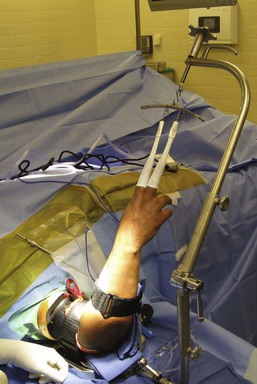
Positioning


Exposures


Pearls
When incising the ECU tendon sheath for the outside-in technique, it is important to use sharp dissection through the sheath so that there will be a good layer to close to avoid instability to the ECU tendon.
Initial arthroscopic evaluation may not reveal a peripheral tear. It is important to palpate the articular disk with a probe to assess tension of the disk. If there is loss of normal tension, a peripheral tear is highly suspected.
Frequently, synovitis will cover up the peripheral tear. It is important to shave away the synovitis to evaluate for separation of the articular disk from the capsule.
Pitfalls
When exposing the ECU tendon sheath, it is important to use blunt dissection to identify the transarticular branch of the dorsal sensory branch of the ulnar nerve. Frequently, this small nerve branch runs across the surgical field and should be retracted to avoid a potentially painful neuroma in this area.
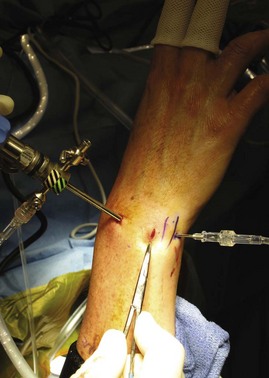
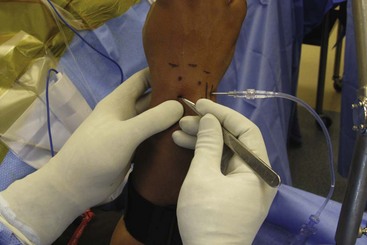
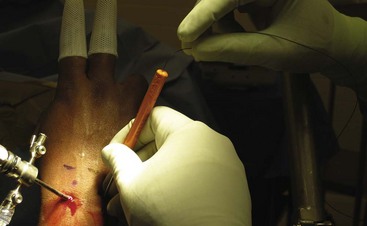
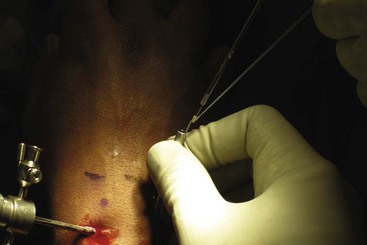
It is important when making arthroscopy portals to incise the skin only by pulling the skin with the thumb against the tip of a no. 11 blade (Fig. 67-3). Blunt dissection is carried out with a hemostat to the joint capsule. The arthroscope is introduced with a blunt trocar in the 3-4 portal. In this manner, injury to the superficial cutaneous nerves and the articular cartilage can be avoided.
Procedure
Step 1
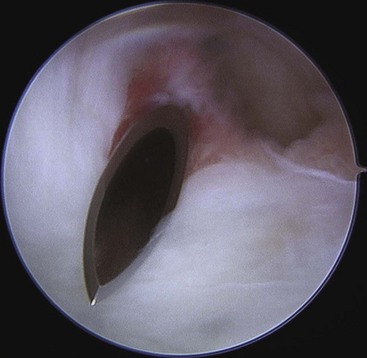
 Palmer type IB peripheral ulnar tears are amenable to arthroscopic repair. The tear usually presents on the dorsal ulnar aspect of the articular disk just ulnar to the 6R portal. The arthroscope is in the traditional 3-4 viewing portal, and a 6R portal is made just radial to the ECU tendon. Synovitis about the periphery of the articular disk is débrided to visualize the tear.
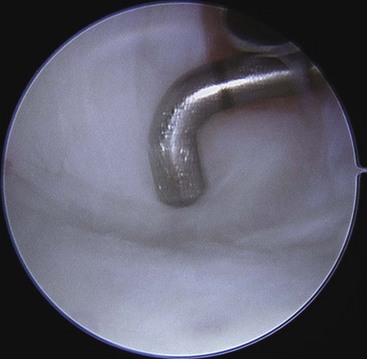
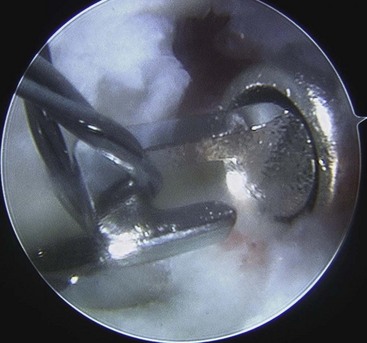
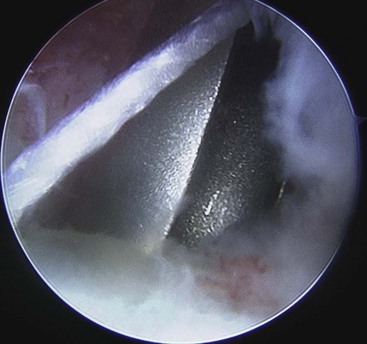
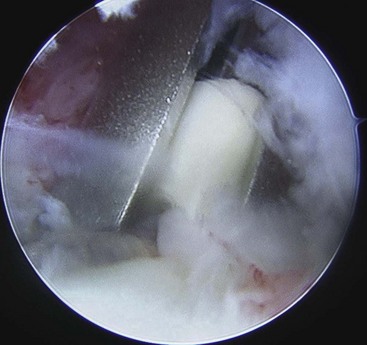
 The articular disk is palpated with a probe to verify loss of tension to the articular disk (Fig. 67-4).
Step 1 Pearls
It is important to assess the entire wrist from both the radiocarpal and midcarpal portals. A portion of the greater injury to the ulnar side of the wrist involves the lunotriquetral interosseous ligament. The lunotriquetral interosseous ligament cannot be well visualized with the arthroscope in the 3-4 portal and needs to be visualized with the arthroscope in the 6R portal.
In addition, the midcarpal space should be further evaluated for midcarpal instability.
Subluxation of the ECU tendon is usually associated with a peripheral tear to the articular disk. If subluxation is suspected, the wrist is arthroscopically evaluated for a peripheral ulnar tear to the articular disk.
Step 1 Pitfalls
Step 2
 The 6R portal is elongated to about 0.5 cm.


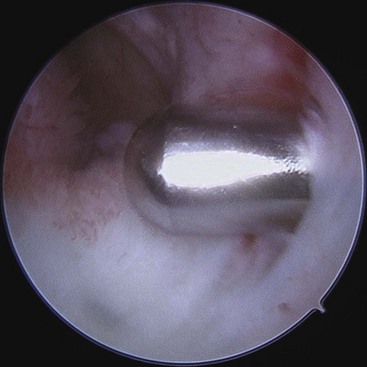
 The floor of the tendon sheath of the ECU is quite thick. This makes very good tissue for repair of the articular disk back to the tendon sheath of the ECU (Fig. 67-6).
Step 3
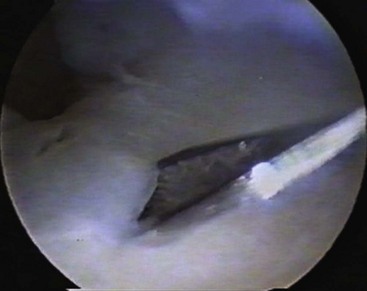
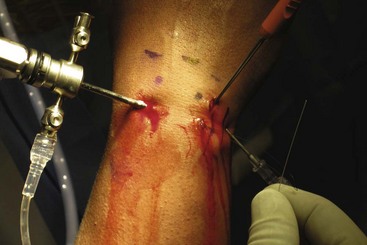
 An 18-gauge needle is inserted through the floor of the sheath of the ECU and through the peripheral tear as identified arthroscopically (Fig. 67-7).
 After the needle is identified through the peripheral tear, it is retracted and then inserted through the articular disk (Fig. 67-8).
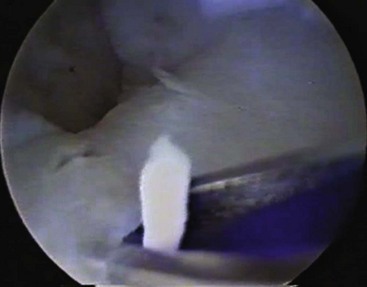
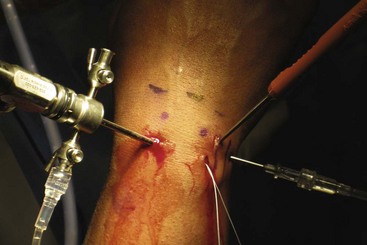
 A 2-0 PDS suture is inserted through the needle into the joint as viewed arthroscopically (Fig. 67-9).
 Distal to the disk, a suture retriever is inserted into the joint to retrieve the suture.

Step 3 Pitfalls
It is important to insert the needle as vertically as possible through the articular disk. The needle is as parallel to the ulna as possible.
In this manner, the needle and eventual suture will get good purchase onto the articular disk of the fibrocartilage complex.
If the needle is inserted too horizontally, it tends to shred through the articular disk with poor purchase, and the suture will pull through as it is tied.
Step 4
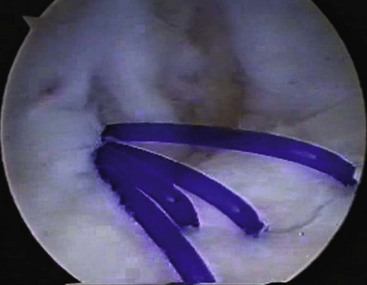
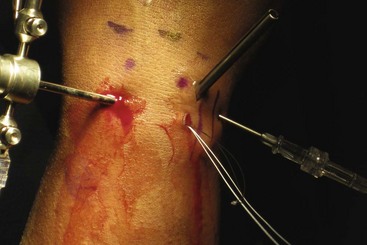
 Three vertical simple sutures are placed using this technique (Fig. 67-10).

 With the wrist in supination, the sutures are tied on the floor of the tendon sheath of the ECU.
 The ECU tendon sheath is then closed to prevent subluxation to the tendon of the ECU.
Step 4 Pearls
It is difficult to achieve good tension on the suture knot when tying the knot through a small incision.
An arthroscopic-type sliding knot may be used, which makes it easier to tie the knot with good tension and to secure the articular disk back to the floor of the ECU tendon.
If an ulna-shortening osteotomy needs to be performed at the same sitting, the sutures are initially placed, and then the ulna is shortened. After the ulna is shortened, the sutures are tied.
Step 5: Arthroscopic Knotless Technique
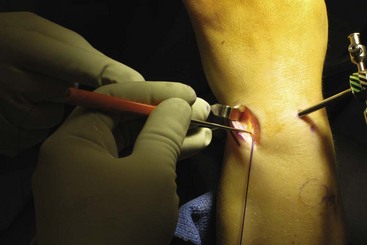
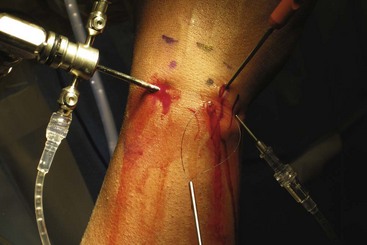
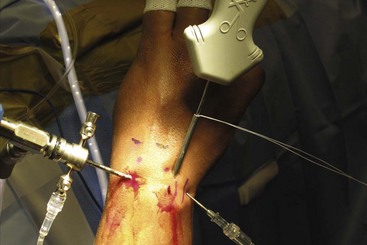
 In the all-arthroscopic knotless techniques, the arthroscope is in the 3-4 portal. A 6R working portal is made, and an accessory 6R portal is made about 1.5 cm distal to the 6R portal (Fig. 67-11).

 The synovitis is débrided as described earlier to expose the peripheral tear.

Step 5 Pearls
It is important to make the 6R portal in an ideal location for passage of a suture lasso. The accessory 6R portal is distal in line with the standard 6R portal.
The wrist should be slightly flexed in a traction tower. This makes identification of the accessory 6R portal easier for palpating the base of the ulna (Fig. 67-12).
Step 5 Pitfalls
The tendency is to make the accessory 6R portal too volar.
If this happens, the suture anchor will not achieve good purchase into the ulna, and the articular disk will not be anatomically repaired back to its insertion onto the fovea of the ulna.
The arthroscopic knotless technique allows for anatomic repair of the deep layer of the articular disk back to the bone of the fovea of the ulna. This procedure may be indicated if greater instability of the distal radial ulnar joint is appreciated.
Step 6
 The suture lasso is inserted through the accessory 6R portal and then through the tear into the articular disk (Fig. 67-13).
 A suture retriever is inserted through the lasso, and the suture is pulled with a suture grasper out of the 6R portal (Figs. 67-14 and 67-15).
 A 2-0 fiber wire is then inserted through the suture retriever and pulled through the lasso in a proximal to distal direction, exiting the suture lasso distally (Fig. 67-16).

 A suture grasper is then inserted through the 6R portal, and the suture limb is pulled out of the 6R portal. In this manner, both suture limbs exit the 6R portal (Fig. 67-17).
Step 6 Pearls
It is important to have a generous incision for the accessory 6R portal. This allows for easier passage of the suture lasso into the joint.
An alternative to passing a suture retriever through the suture lasso initially to pull the 2-0 fiber wire through the lasso is passing a 2-0 fiber wire stick (which is a stiffer suture) through the bend of the suture lasso.
Step 7
 An arthroscopic cannula is introduced into the accessory 6R portal in the radiocarpal space.
 The suture passer is then used to retrieve the suture limbs from the 6R portal out through the cannula in the accessory 6R portal (Fig. 67-18).
 The cannula is held firmly against the fovea of the ulna (Fig. 67-19).
 The ulna is then drilled with a cannulated drill.
 A guidewire is placed down the cannula.

 The ulna is then drilled with a cannulated drill.
 While the cannula is held firmly onto the ulna to avoid losing location of the drill hole, the suture limbs are inserted into the anchor, and the anchor is impacted into the ulna, securing the articular disk back down to bone (Figs. 67-20 through 67-22).

Postoperative Care and Expected Outcomes
 The wrist is placed in a sugar-tong splint in about 45 degrees of supination.
 The wrist is immobilized in an above-elbow splint for 4 weeks.
 After 4 weeks, the patient is then placed in a removable cock-up wrist brace for 3 weeks.

Corso SJ, Savoie FH, Geissler WB, et al. Arthroscopic repair of peripheral avulsion of the triangular fibrocartilage complex of the wrist: a multicenter study. Arthroscopy. 1997;13:78-84.
Trumble TE, Gilbert M, Vedder N. Isolated tears of the triangular fibrocartilage: management by early arthroscopic repair. J Hand Surg [Am]. 1997;22:57-65.