Procedure 48 Open Reduction and Internal Fixation of Phalangeal Unicondylar Fractures
 See Video 38: ORIF of Middle Phalanx Volar Avulsion Fracture
Indications
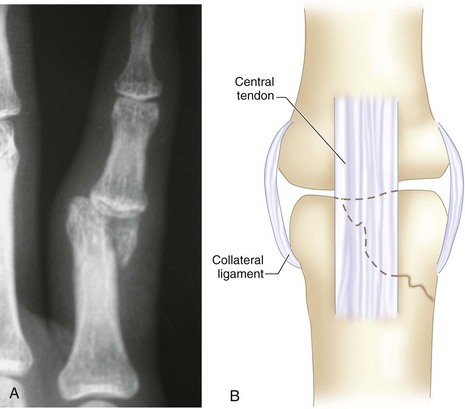
 Fractures of phalangeal condyles are classified by Weiss and Hastings into various subtypes. The most common is the displaced unicondylar fracture. The obliquity of the fracture line makes it highly unstable and liable to displacement. Nonoperative treatment is often unsuccessful in maintaining the reduction of the fracture. The condylar fragment also bears the origin of the important collateral ligament. The displacement of the fractured condyle therefore results in disruption of articular congruity, joint instability, angular deformity, and loss of joint motion. A displaced condylar fracture is an indication for open reduction and internal fixation.


Surgical Anatomy
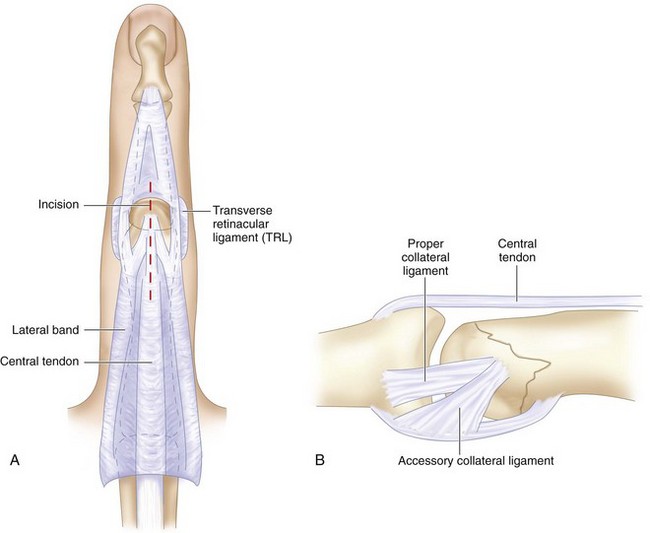
 Midline central tendon splitting approach gives good exposure of the proximal interphalangeal joint. Flexion of the joint and retraction on the tendon allow the extensor tendon to slip around both condyles, giving excellent visualization of nearly the whole dorsal and distal extent of the condyles (Fig. 48-2A).
 To avoid avascular necrosis, blood supply to the fractured condyle should be carefully preserved. The fractured condyle should not be detached from the palmar soft tissue attachment and collateral ligament (Fig. 48-2B).


Exposures
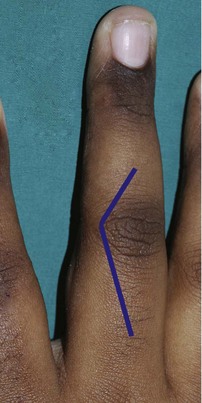
 A gentle curved incision is made over the proximal interphalangeal (PIP) joint. The proximal limb of the incision extends obliquely over the proximal phalanx. The distal extension over the middle phalanx is much shorter. Figure 48-3 shows marking for the incision, with the proximal extension being longer.
 The extensor tendon is split in the midline and retracted from the midline.
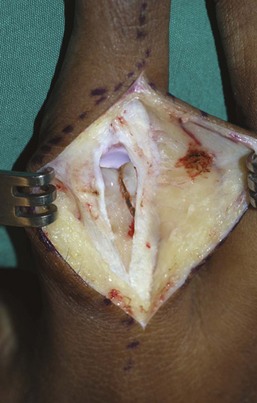
 The loose connective tissue between the extensor tendon and the periosteum allows a plane between them to be developed easily (Fig. 48-4). The periosteum is left undisturbed. Figure 48-4 shows exposure of the joint through a midline incision on the extensor tendon and elevation of the tendon off the periosteum.
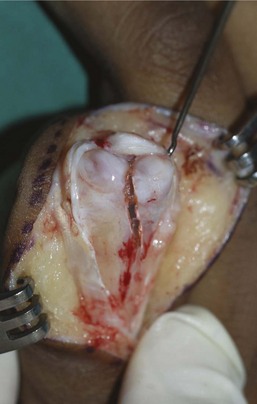
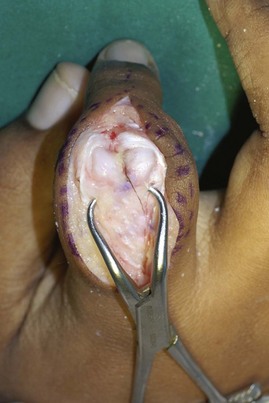
 Acutely flexing the joint exposes the articular surface of the proximal phalanx and the fractures widely (Fig. 48-5). Figure 48-5 shows acute flexion of the PIP joint, which allows the split extensor tendon to slip around the condyles, exposing the articular surface and the fracture.

 Any organized clots and debris are gently removed from the fracture site.
Pearls
Approach to the PIP joint through central splitting of the extensor tendon allows both parts of the tendon to easily slip over the condyles and provide excellent exposure.
Further flexion of the joint gives access to the palmar side of the condyle and provides good visualization of the fracture reduction.
Procedure
Step 1
 Reduction of the fracture is by gentle nudging with a periosteal elevator and bringing the fracture fragment into position with a pair of artery forceps. The reduction should be done in steps, and fine adjustments should be repeated until a perfect congruity of the cartilage surface is achieved.
 A small pointed reduction clamp is then used to hold the reduced fragment in place (Fig. 48-6). For large fragments, two reduction clamps may be used.
Step 2
 The fracture is fixed with interfragmentary (lag screw) fixation technique. The screw is inserted from the fracture fragment to the main bone. The direction of the screw fixation is between perpendicular to the bone surface and perpendicular to the fracture line. The screw size for a proximal phalangeal condyle is usually 1.5 mm in diameter. For smaller bone fragments, 1.3-mm screws are used; for larger fragments, 2.0-mm screws. Ideally, two screws should be used. However, in smaller bone fragments, there may be room for only one screw.
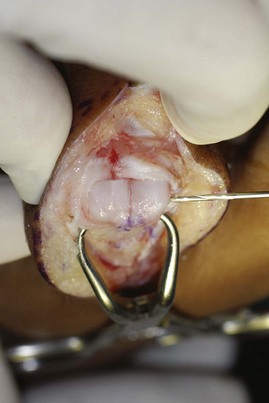
 With the correctly sized drill bit, a drill hole is made in the predetermined entry site and direction. It is a through-and-through drill hole from the fracture fragment to the opposite cortex (Fig. 48-7).
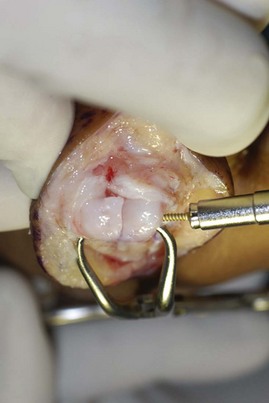
 The near cortex is then overdrilled with a drill bit equal in size to the core diameter of the screw. The correct-length screw is then inserted (Fig. 48-8). With a self-tapping screw, no pretapping is necessary.
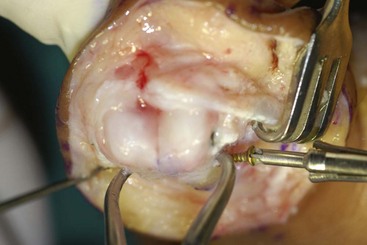
 A second screw is then similarly inserted. Figure 48-9 shows insertion of the second interfragmentary screw. Care is taken to avoid the collateral ligament attachment.
 Check with fluoroscopy to ensure correct length of the screws.

Step 2 Pearls
Plan for insertion of two screws, and place them a good distance apart. For fixation to be effective, the bone surface dimension should be at least three times the diameter of the screw.
Keep the reduction clamp in place until both screws are inserted. If the clamp is in the way of the second screw insertion, reposition the clamp.
The bone on this condylar region is relatively soft, and countersinking of the drill hole is not necessary.
Step 3
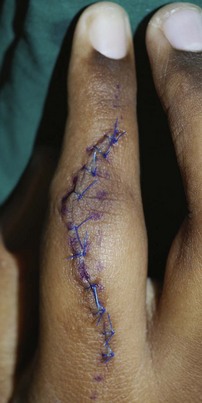
 The extensor tendon is repaired with continuous 4-0 or 5-0 absorbable synthetic sutures. The skin is closed with interrupted nonabsorbable sutures (Fig. 48-10).
 Supplementary regional nerve block of the appropriate nerve territory is done.
 The hand is wrapped in a bulky supportive dressing to include all the fingers for comfort.
Postoperative Care and Expected Outcomes
 Change to a light dressing the next day, and start active range-of-motion exercise four to five times a day. Keep the finger fully extended on a palmar trough splint between exercise sessions for the next 4 weeks.

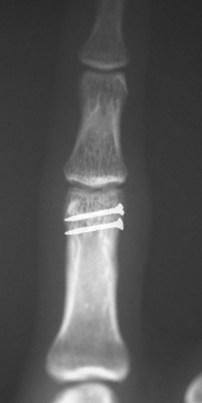
 The fracture unites quickly in 6 weeks, and the joint usually regains near-full range of motion. Figure 48-11 shows uneventful healing of the condylar fracture with good anatomic restoration.