Procedure 11 Endoscopic Carpal Tunnel Release
Indications
 Failure of conservative treatment for idiopathic carpal tunnel syndrome (CTS).
 Patient prefers the endoscopic procedure.
 The authors’ preferred technique is the limited incision open carpal tunnel release (LOCTR) (see Procedure 12). Studies have not demonstrated significant differences in outcomes between endoscopic carpal tunnel release (ECTR) and LOCTR. ECTR has a steep learning curve, needs a sizeable initial capital investment in video equipment, and incurs the recurring cost of the single-use disposable blade. Although the time taken to perform ECTR is less than for LOCTR, the time expended to set up the equipment mitigates this advantage.


Surgical Anatomy
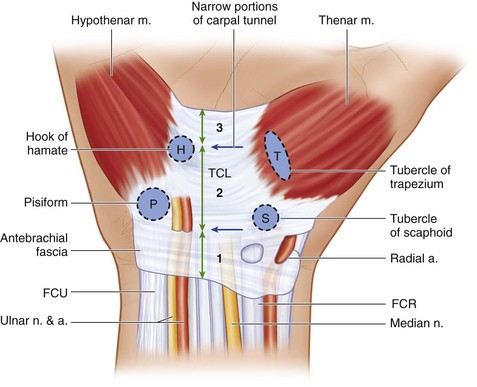
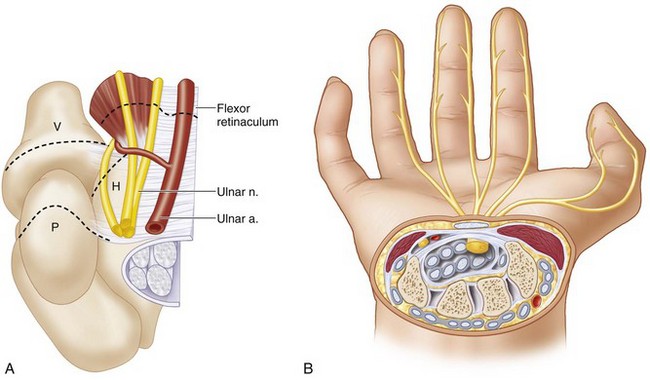
 The carpal tunnel is a fibro-osseous tunnel that contains the median nerve and the nine flexor tendons to the thumb and the fingers. The roof of the carpal tunnel is formed by the flexor retinaculum, which extends between four bony prominences (proximally: pisiform and tubercle of scaphoid, distally: hook of the hamate and tubercle of trapezium) (Fig. 11-1).
 The flexor retinaculum can be divided into three components (see Fig. 11-1).
 Some authors consider the flexor retinaculum and the TCL to be synonymous.
 The carpal tunnel is narrowest in both palmar-dorsal and ulnar-radial planes at the level of the hook of the hamate. The other narrow portion of the carpal tunnel is at the proximal edge of the TCL (see Fig. 11-1).
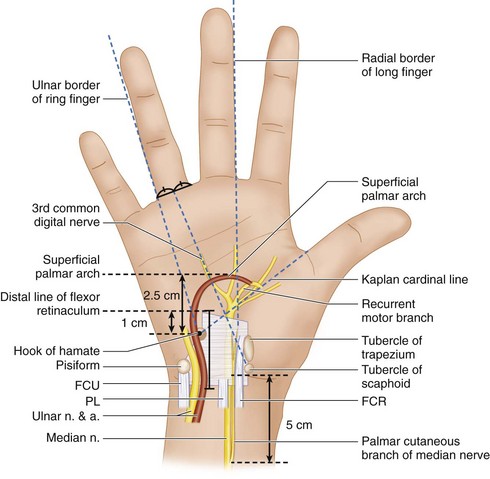
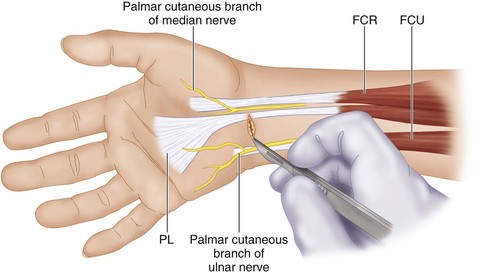
 The important surface landmarks and surrounding neurovascular structures related to the carpal tunnel are as follows (Fig. 11-2):
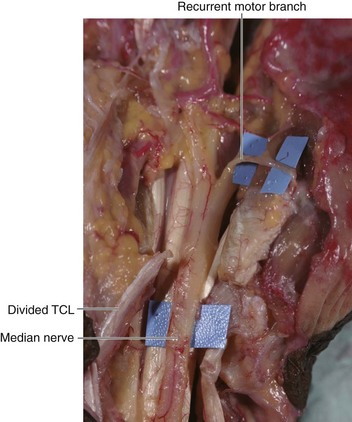
 The ulnar nerve and artery overlie the ulnar border of the flexor retinaculum and may be at risk during ECTR. The nerve is generally anterior or ulnar to the hook of the hamate, but the artery is often immediately superficial to the flexor retinaculum lying within a fat-filled space (Fig. 11-5).
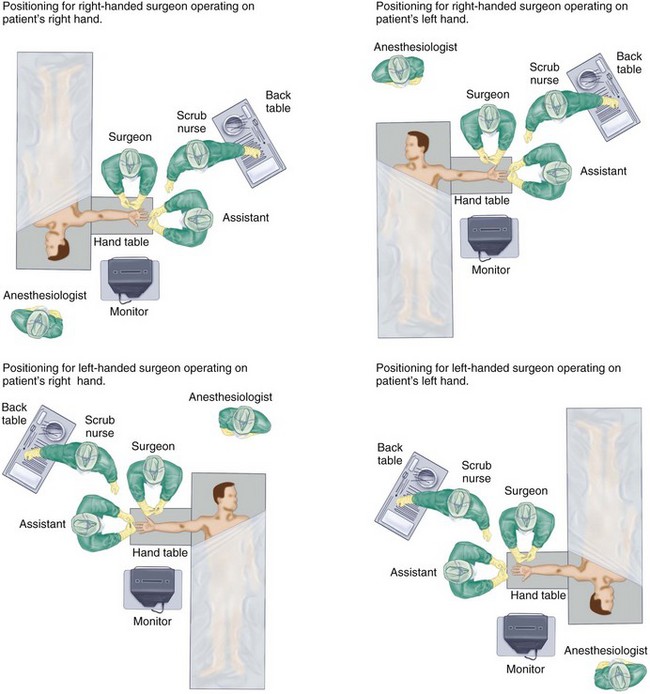
Positioning


Exposures
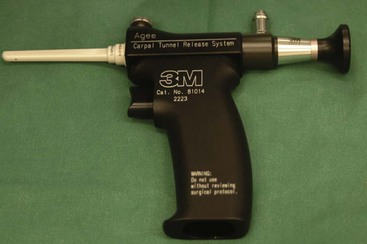
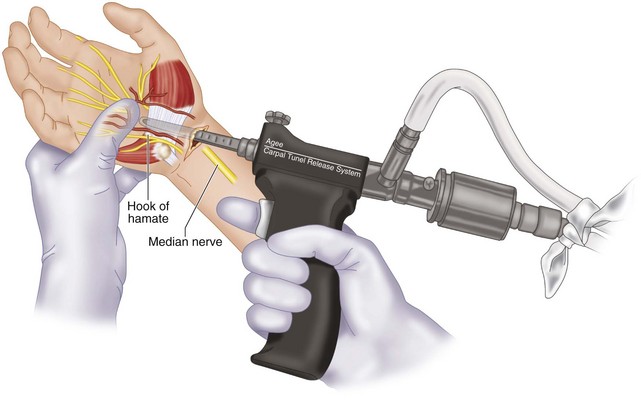
 We use the 3M Agee Carpal Tunnel Release System for ECTR (Fig. 11-7).
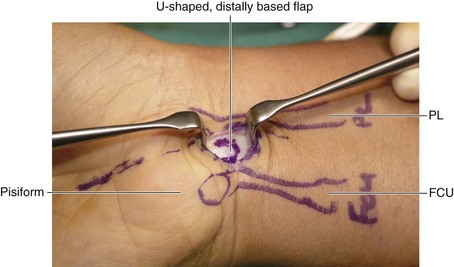
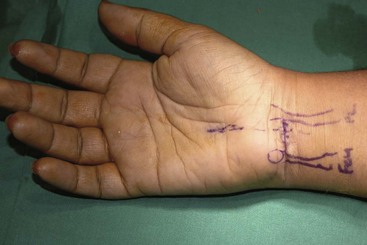
 A 1- to 1.5-cm transverse skin incision is made over the proximal wrist crease, ulnar to the PL tendon and radial to the flexor carpi ulnaris (FCU) tendon (Figs. 11-8 and 11-9).

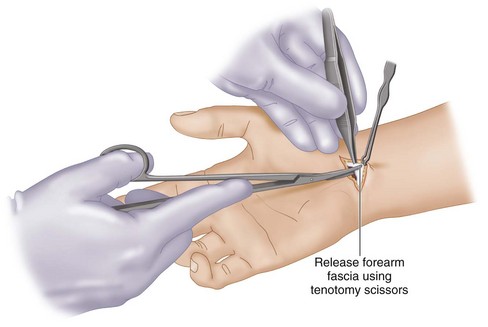
 The antebrachial fascia is exposed, and a U-shaped, distally based fascial flap is raised (Fig. 11-10). Elevation of the flap ensures that the endoscope enters the right plane deep to the fascia and not superficial to it.
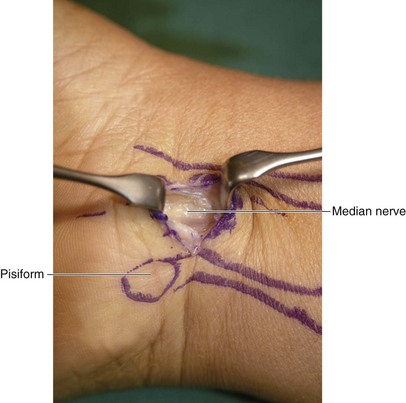
 The fascial flap is held up using a hemostat to expose the underlying median nerve (Fig. 11-11).

Pitfalls
Care should be taken not to injure the palmar cutaneous branch of the median nerve and the palmar cutaneous branch of the ulnar nerve.
The median nerve is directly below this flap, so care must be taken during the initial flap incision and elevation, especially in patients who do not have a PL tendon.
Procedure

Step 2: Dilate the Carpal Tunnel
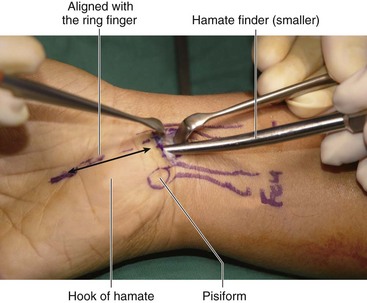
 The smallest probe (hamate finder) is inserted under the previously elevated fascial flap. The wrist is held in slight extension, and the probe is gradually advanced in line with the ring finger. The tip of the probe is automatically directed radially by the hamate and should be palpable subcutaneously as it exits the distal free edge of the TCL. The probe is then removed.
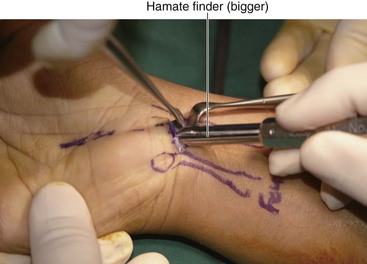
 The next-sized probe is inserted (Fig. 11-13), and finally the largest probe is inserted (Fig. 11-14). These probes function both as dilator and to confirm that the probe is within the carpal tunnel and not the Guyon canal.
Step 3: Clear the Synovium
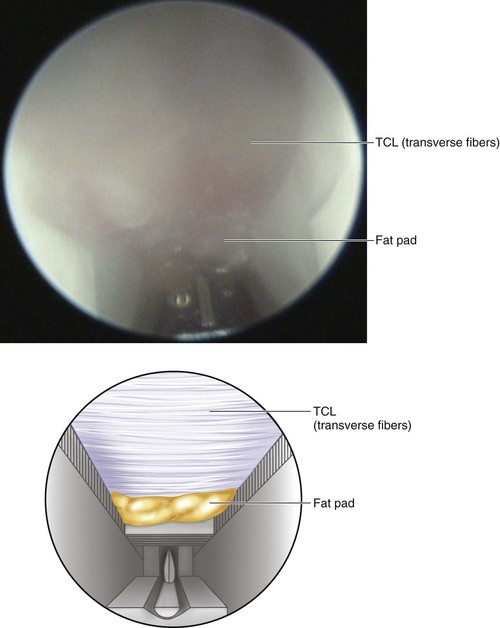
 The synovial separator is then passed into the dilated carpal tunnel. The synovial separator is used to sweep any adherent synovial membranes off the undersurface of the TCL. Adequate clearing of the synovial membrane is indicated by the roughness (“washboard effect”) of the transverse fibers of the TCL.
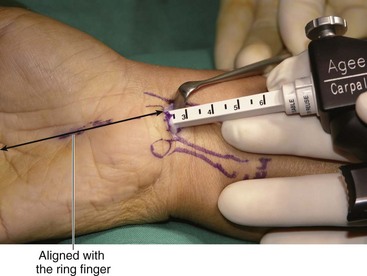
Step 4: Introducing the Blade Assembly into the Carpal Tunnel
 The wrist is placed in slight extension, and the blade assembly is inserted (Figs. 11-15 and 11-16) with the viewing window and blade facing anteriorly (toward the inner aspect of the TCL) (Fig. 11-17).
Step 4 Pearls
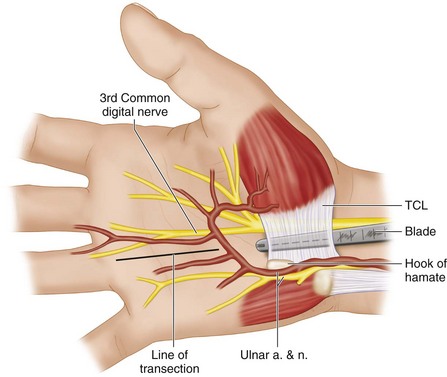
The device is inserted to a depth of less than 3 cm to avoid injury to the superficial palmar arch or the common digital nerve.
In patients with a narrow carpal tunnel, it may be difficult to insert the blade assembly even after adequate dilation. It is safer in such cases to convert to an open procedure.
Step 5: Identifying the Distal End of the TCL


Step 6: Incise the TCL
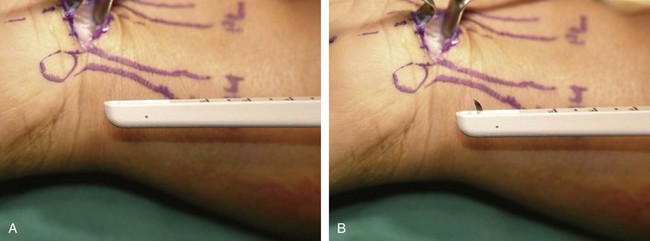
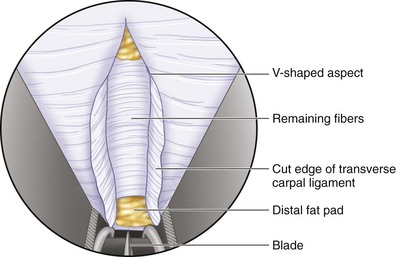
 Once the distal end of the TCL has been identified, the blade is elevated (Fig. 11-18), and slight pressure is applied on the palmar aspect of the carpal tunnel. The blade is then gradually withdrawn under visual guidance on the monitor to divide the TCL (Fig. 11-19).

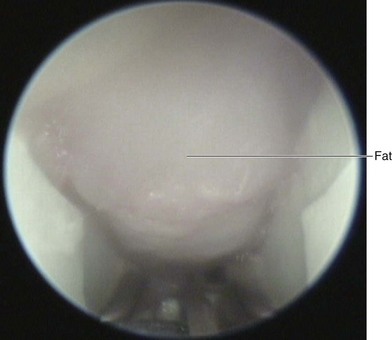
 After division of the ligament, fat will be seen herniating down into the field of vision (Fig. 11-20).
Step 6 Pearls
Step 6 Pitfalls
The blade assembly must not be inserted beyond the distal edge of the TCL to prevent inadvertent injury to the superficial palmar arterial arch and/or the common digital nerve.
Once the blade is elevated, the assembly must always be withdrawn in a distal to proximal direction. The assembly should never be passed in a proximal to distal direction with the blade elevated. This is especially important when inspecting the TCL for completeness of the division and when additional passes are made to divide an incomplete TCL.
The blade assembly should be withdrawn gently and the blade retracted when nearing the entrance incision to avoid cutting skin.


Postoperative Care and Expected Outcomes


Beck JD, Deegan JH, Rhoades D, Klena JC. Results of endoscopic carpal tunnel release relative to surgeon experience with the Agee technique. J Hand Surg [Am]. 2011;36:61-64.
Schmelzer RE, Della Rocca GJ, Caplin DA. Endoscopic carpal tunnel release: a review of 753 cases in 486 patients. Plast Reconstr Surg. 2006;117:177-185.